Integration Management
Managing Integrations
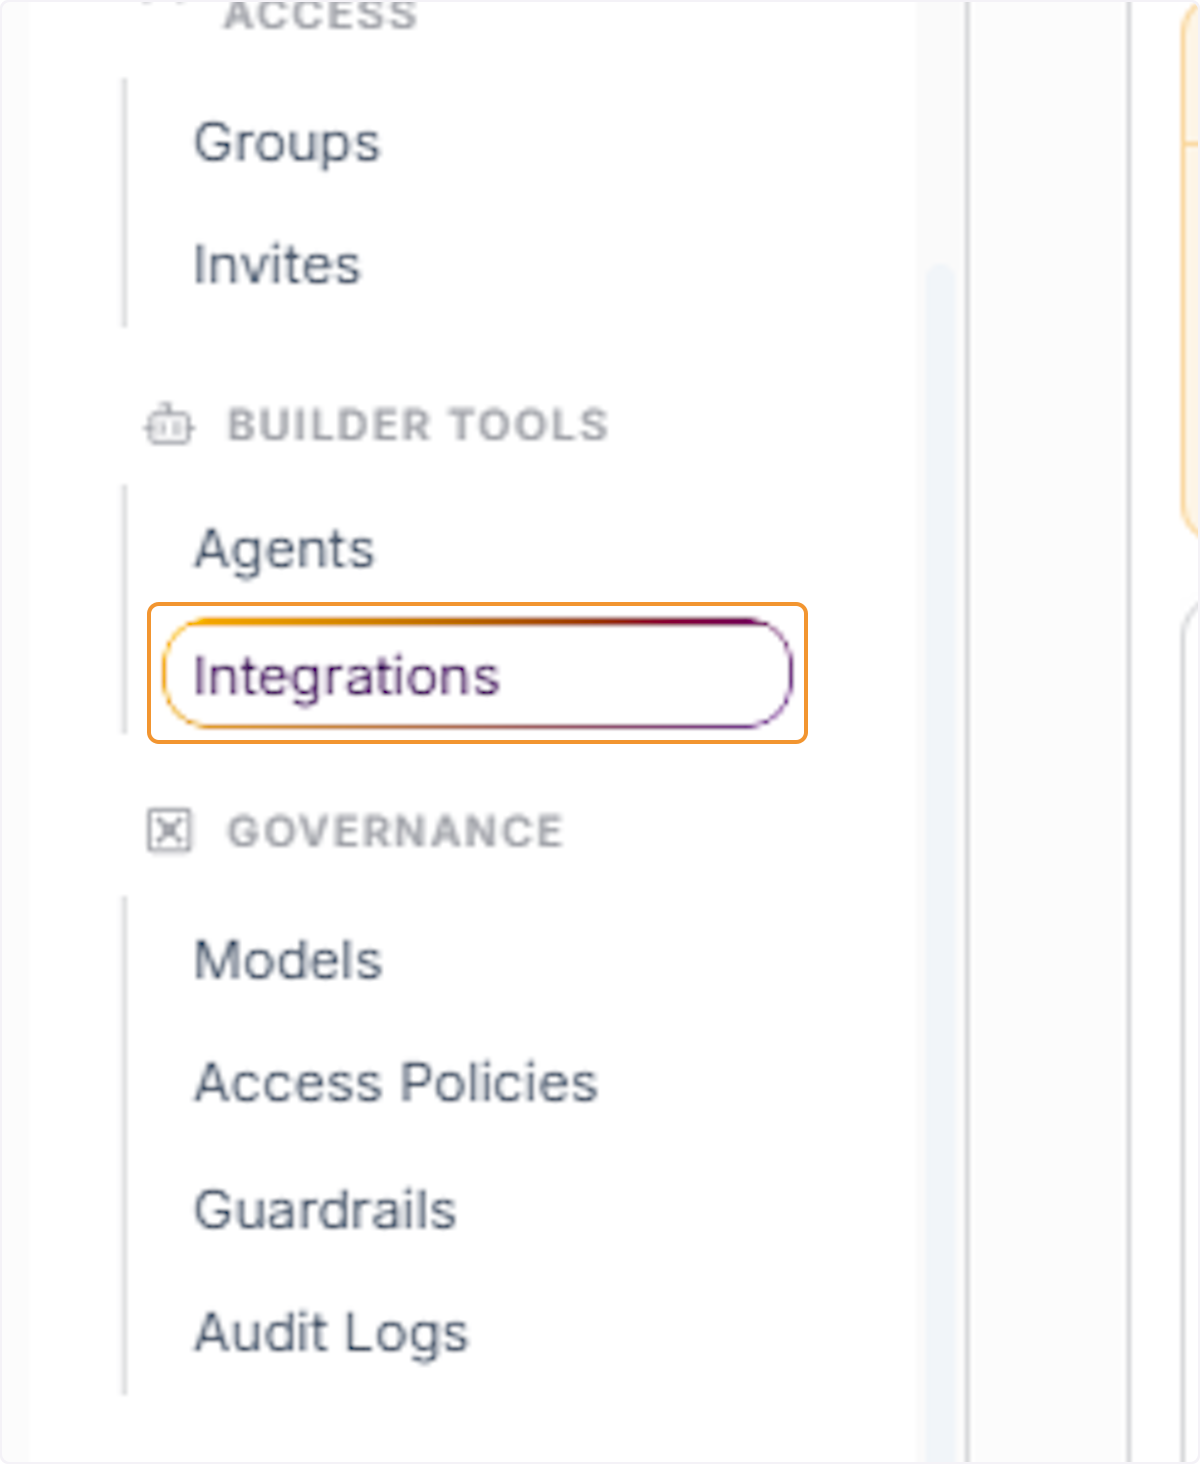
From the left-hand navigation menu, scroll down to the Builder Tools section and click on ‘Integrations’. This will open the Integrations management area where you can configure MCP, OpenAPI, and app-based connections.
Open the Integrations Dashboard
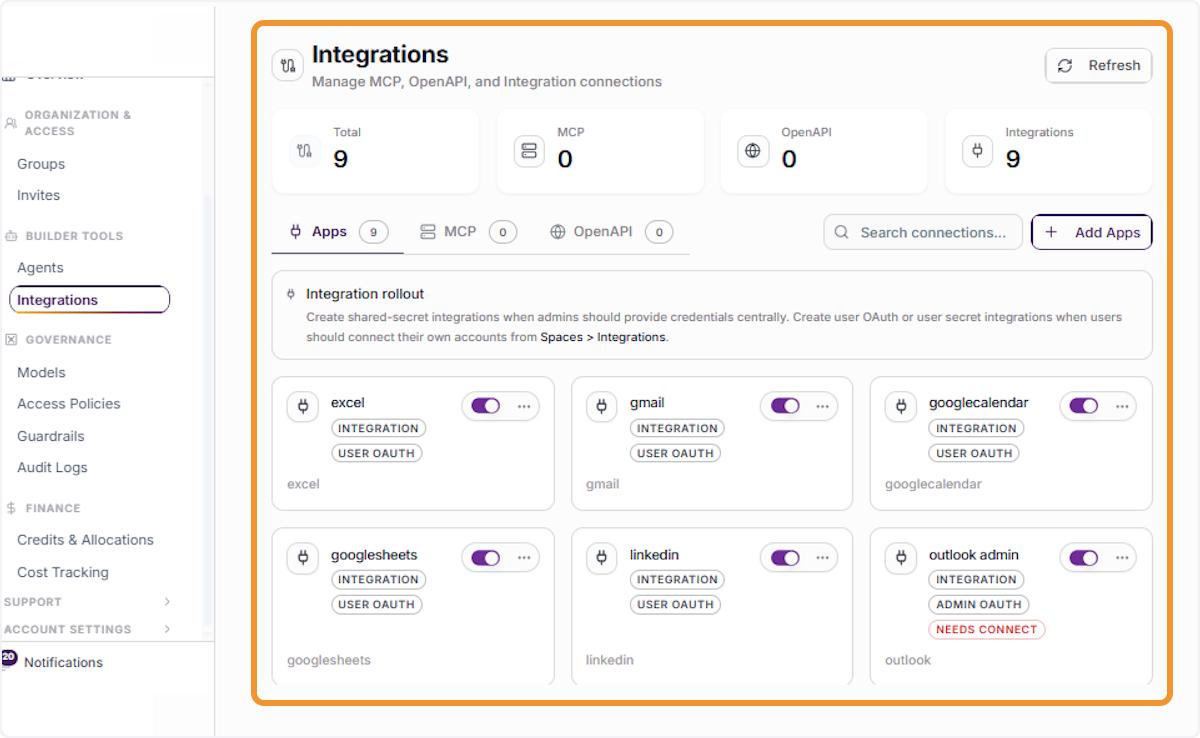
The Integrations dashboard will load, displaying a summary of all current connections including total integrations, MCP count, and OpenAPI connections. This is your central hub for managing all third-party integrations.
Click on the Apps Tab
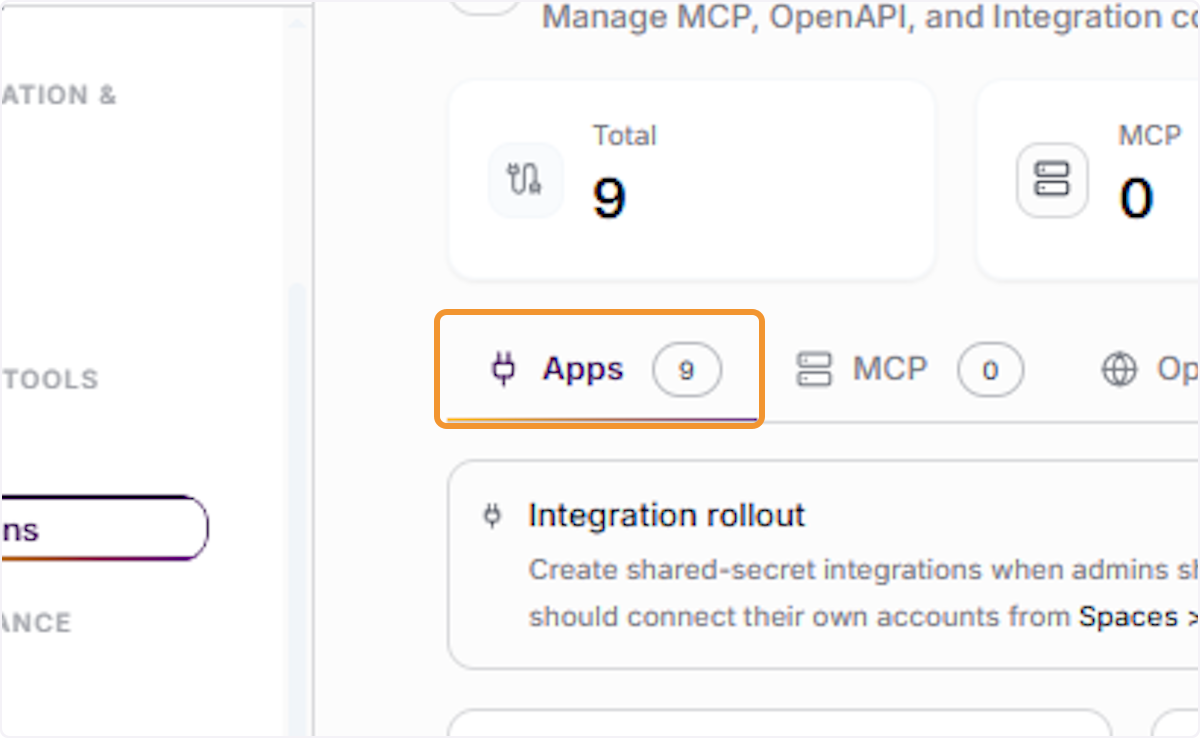
On the Integrations dashboard, click the ‘Apps’ tab to view all currently configured application integrations. This tab lists every connected app along with its integration type and authentication method.
Review Existing App Integrations
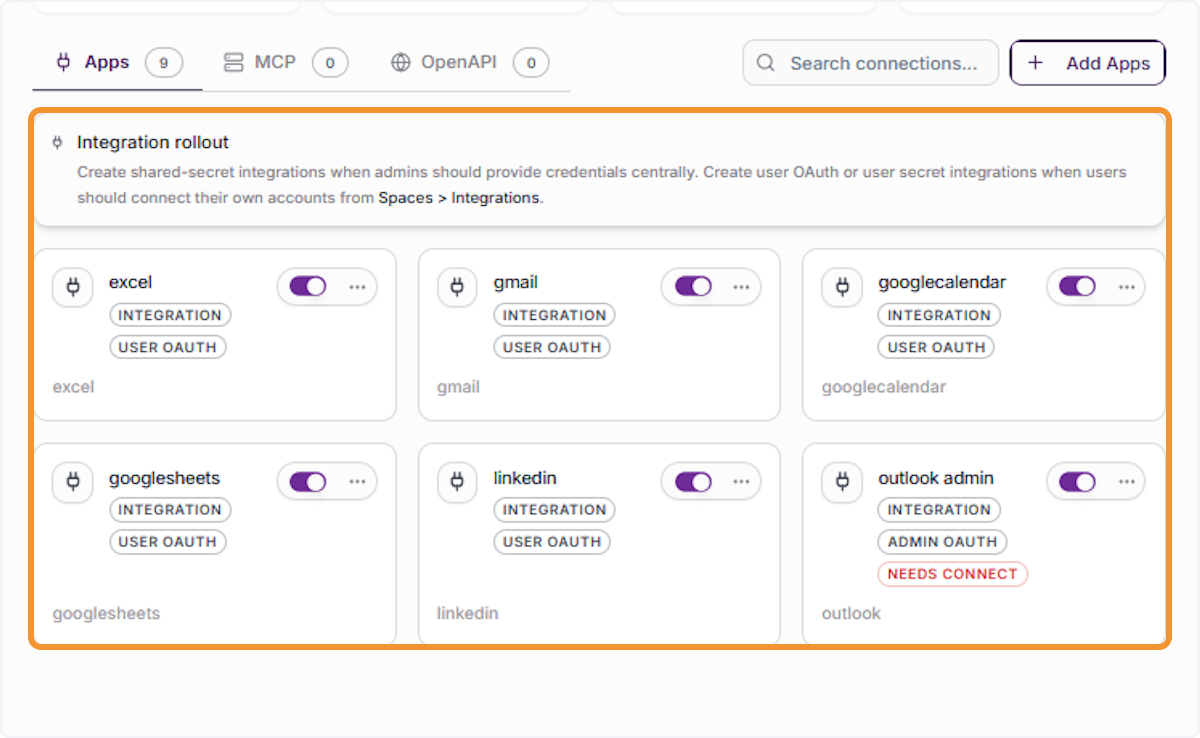
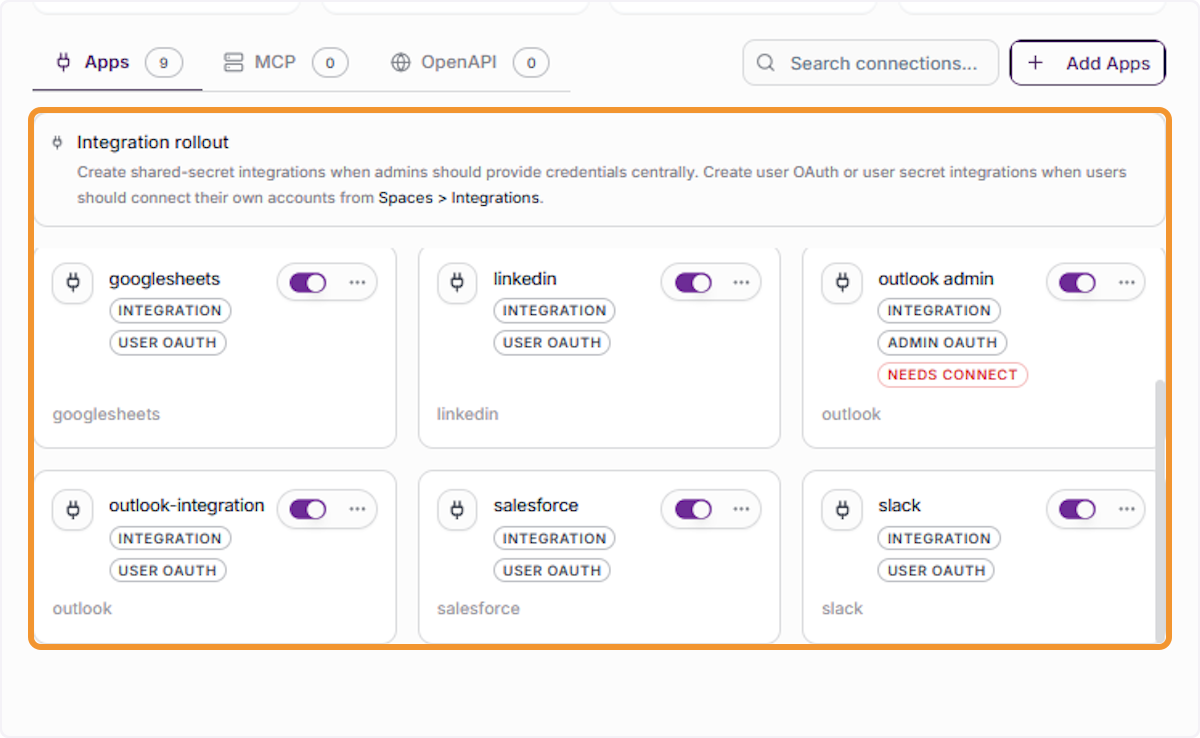
The Apps tab displays all active integrations such as Excel, Gmail, Google Calendar, Google Sheets, LinkedIn, and Outlook Admin. Review the list to understand what is already connected before adding or modifying any integration.
Search for a Specific Integration
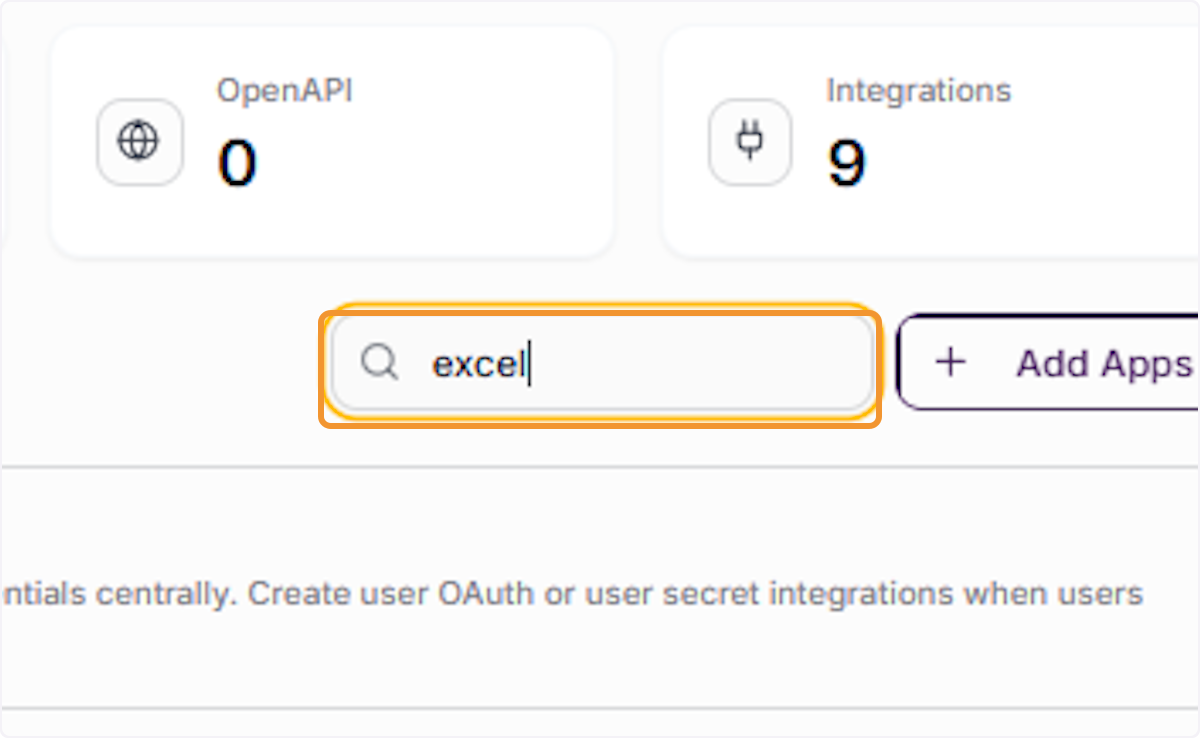
Use the search bar at the top of the integrations panel to quickly locate a specific app. Type the name of the app (e.g., ‘excel’) to filter the results and reduce the list to matching integrations only.
View Filtered Search Results
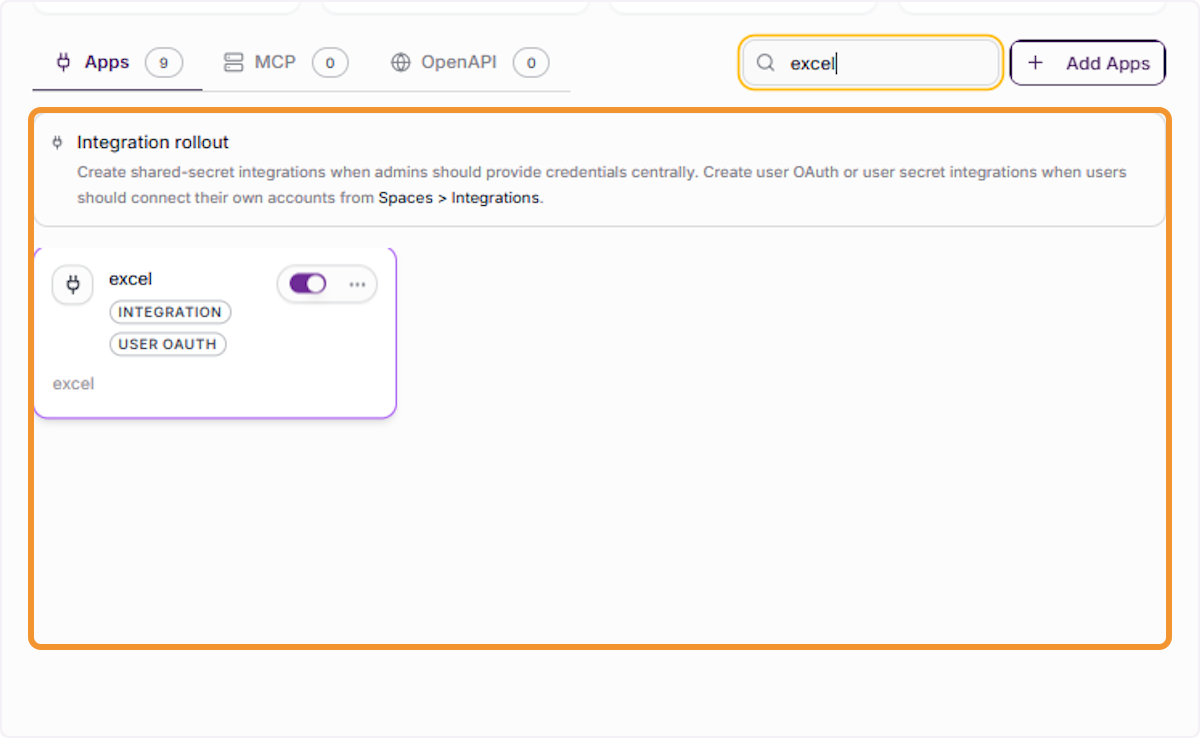
Once you have typed in the search term, the dashboard will automatically filter and display only the matching integration(s). Confirm the correct app appears before proceeding with any configuration actions.
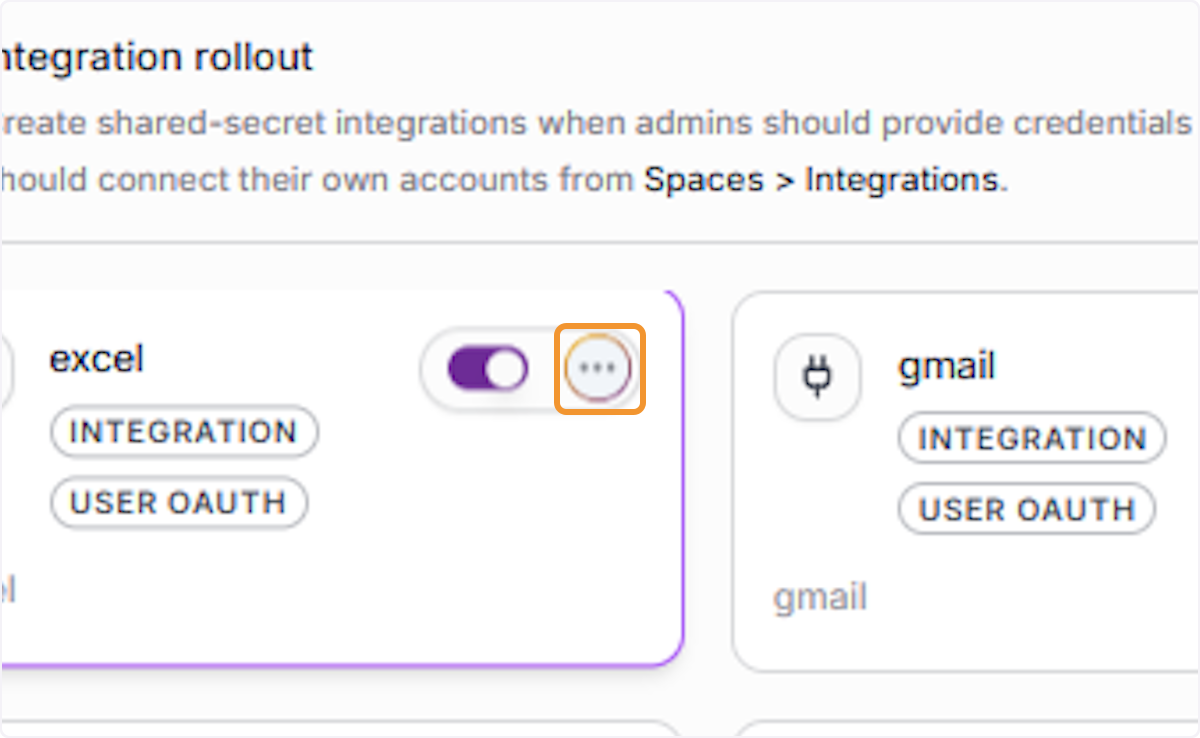
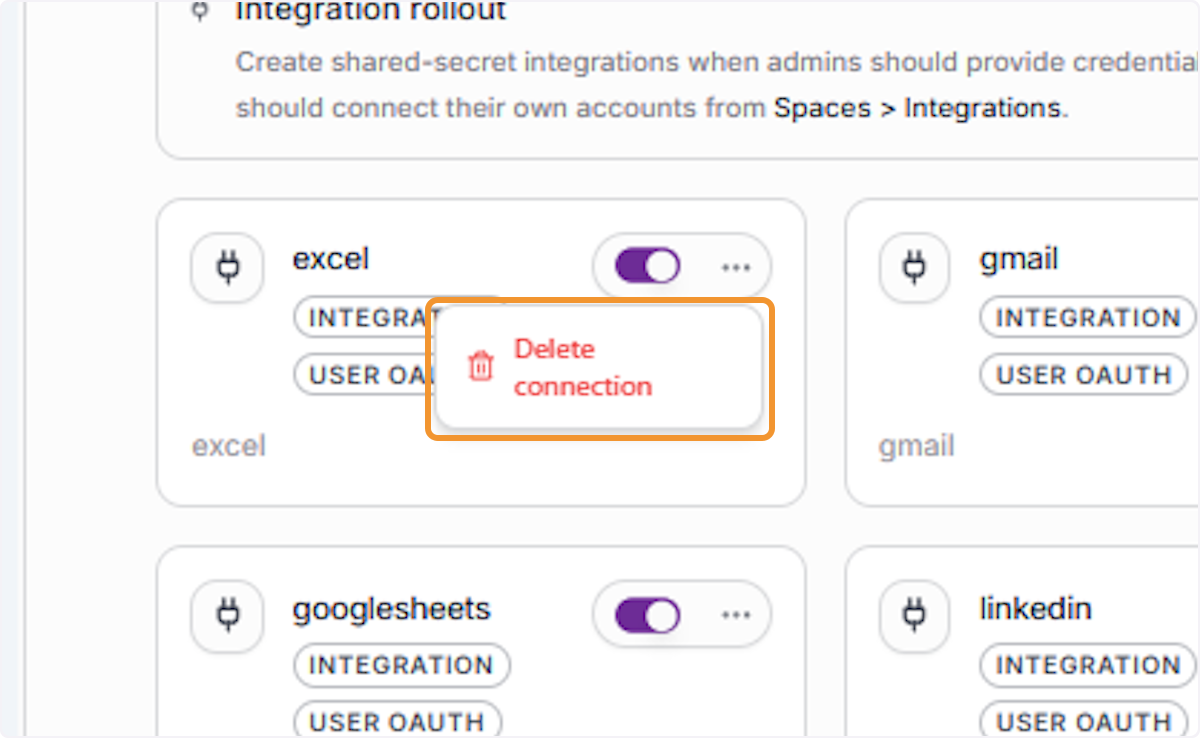
Click the three-dot dropdown trigger (⋯) on the right side of the desired integration card to reveal additional action options. This menu allows you to manage or delete the selected integration connection.
Access the Delete Connection Option
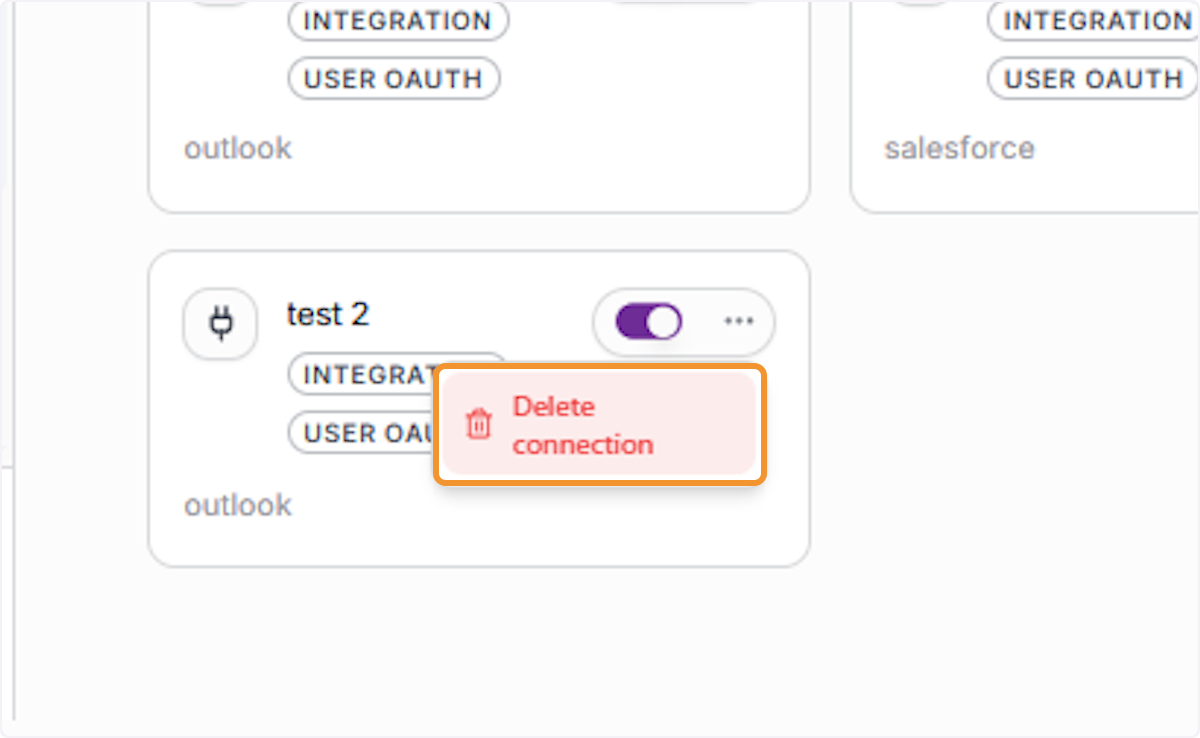
After clicking the dropdown trigger, a small action menu will appear displaying the ‘Delete connection’ option with a red trash icon. This step is used when you need to remove an existing integration before setting up a new one.
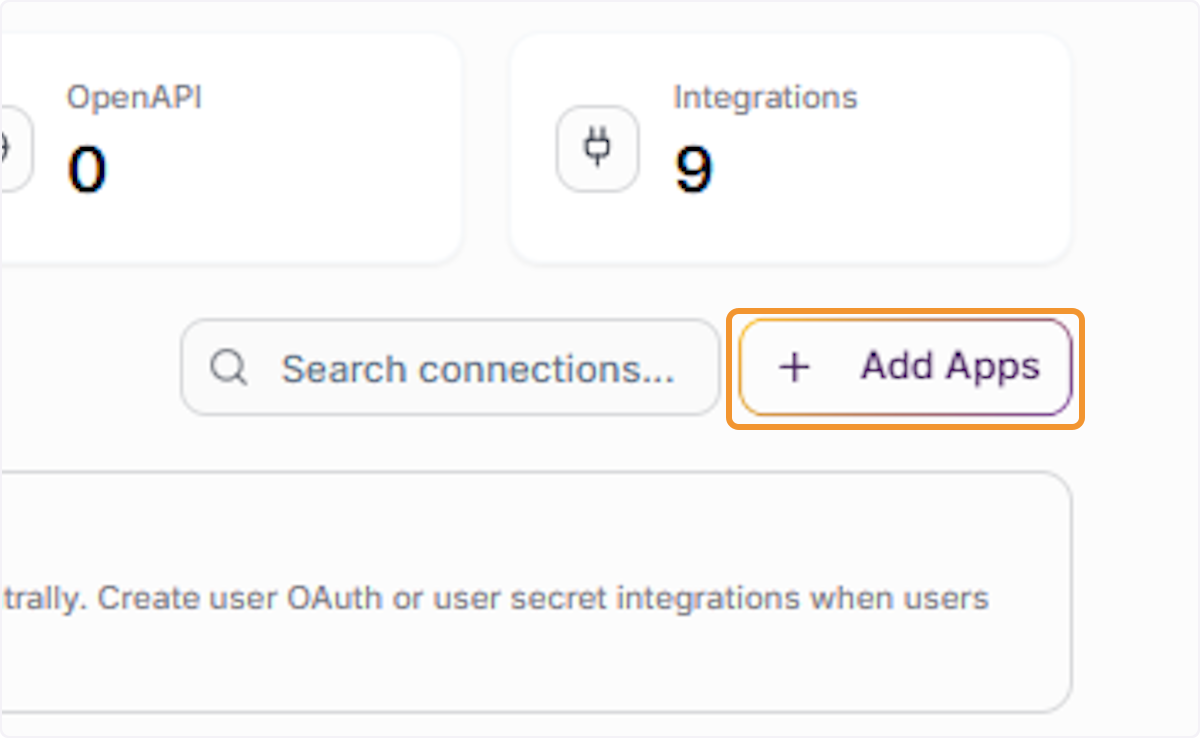
Click Add Apps to Create a New Integration
To add a new app integration, click the ’+ Add Apps’ button in the top-right corner of the Integrations panel. This opens the Add Integration form where you can configure a new app connection from scratch.
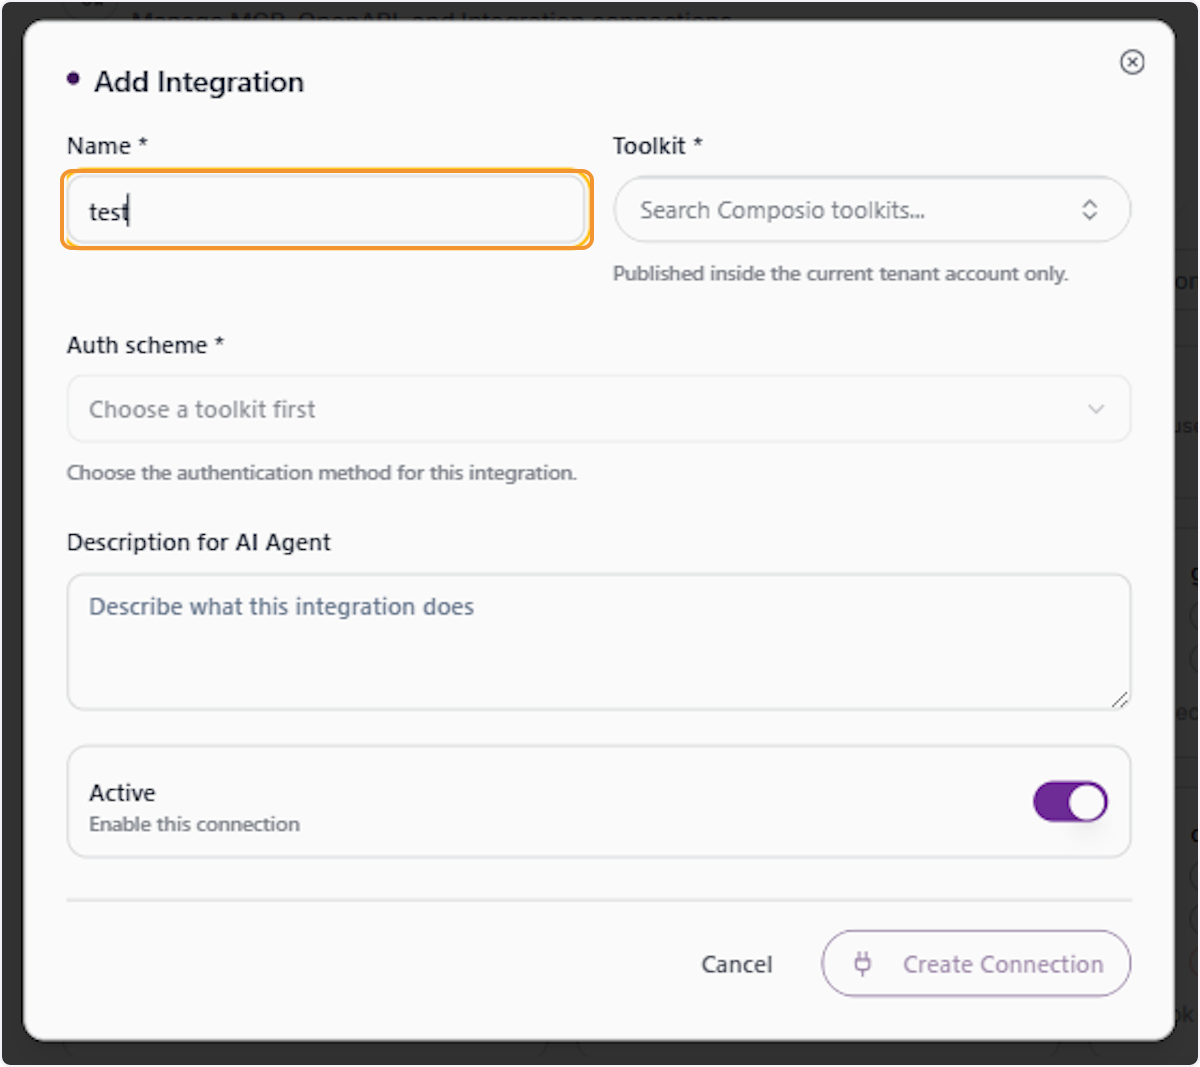
Enter a Name for the Integration
In the ‘Add Integration’ form, type a descriptive name for your new integration in the ‘Name’ field (e.g., ‘test’). This name will be used to identify the integration across the platform and should be clear and meaningful.
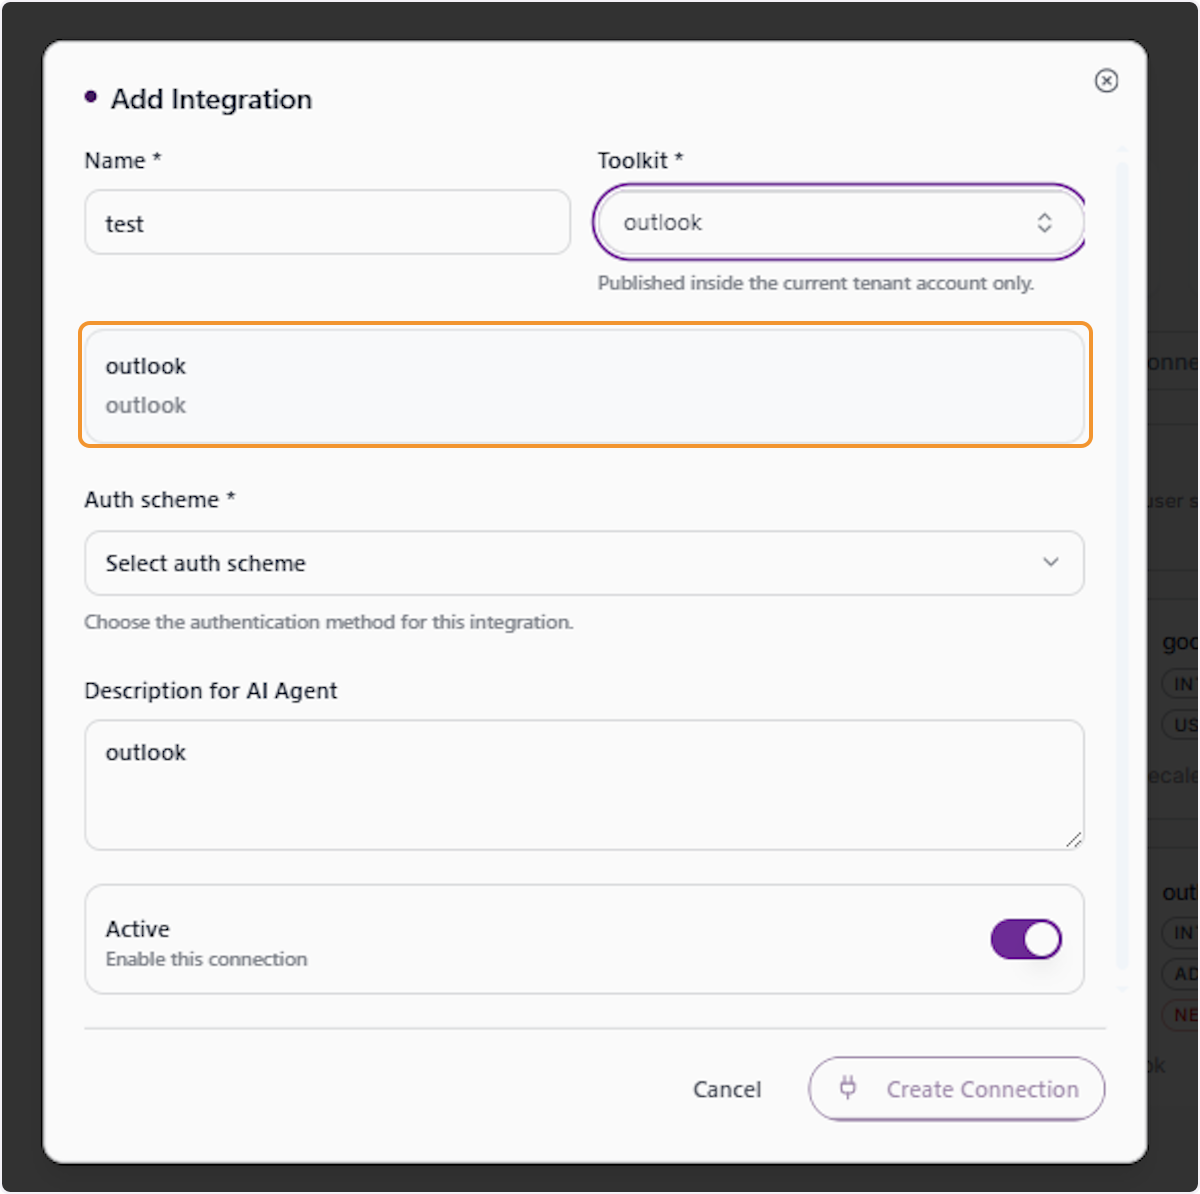
Select the Outlook Toolkit
Click on the ‘Toolkit’ search field and type ‘outlook’ to locate the Outlook toolkit. Select ‘outlook’ from the dropdown results. The system will display a note indicating that this toolkit is published inside the current tenant account only.
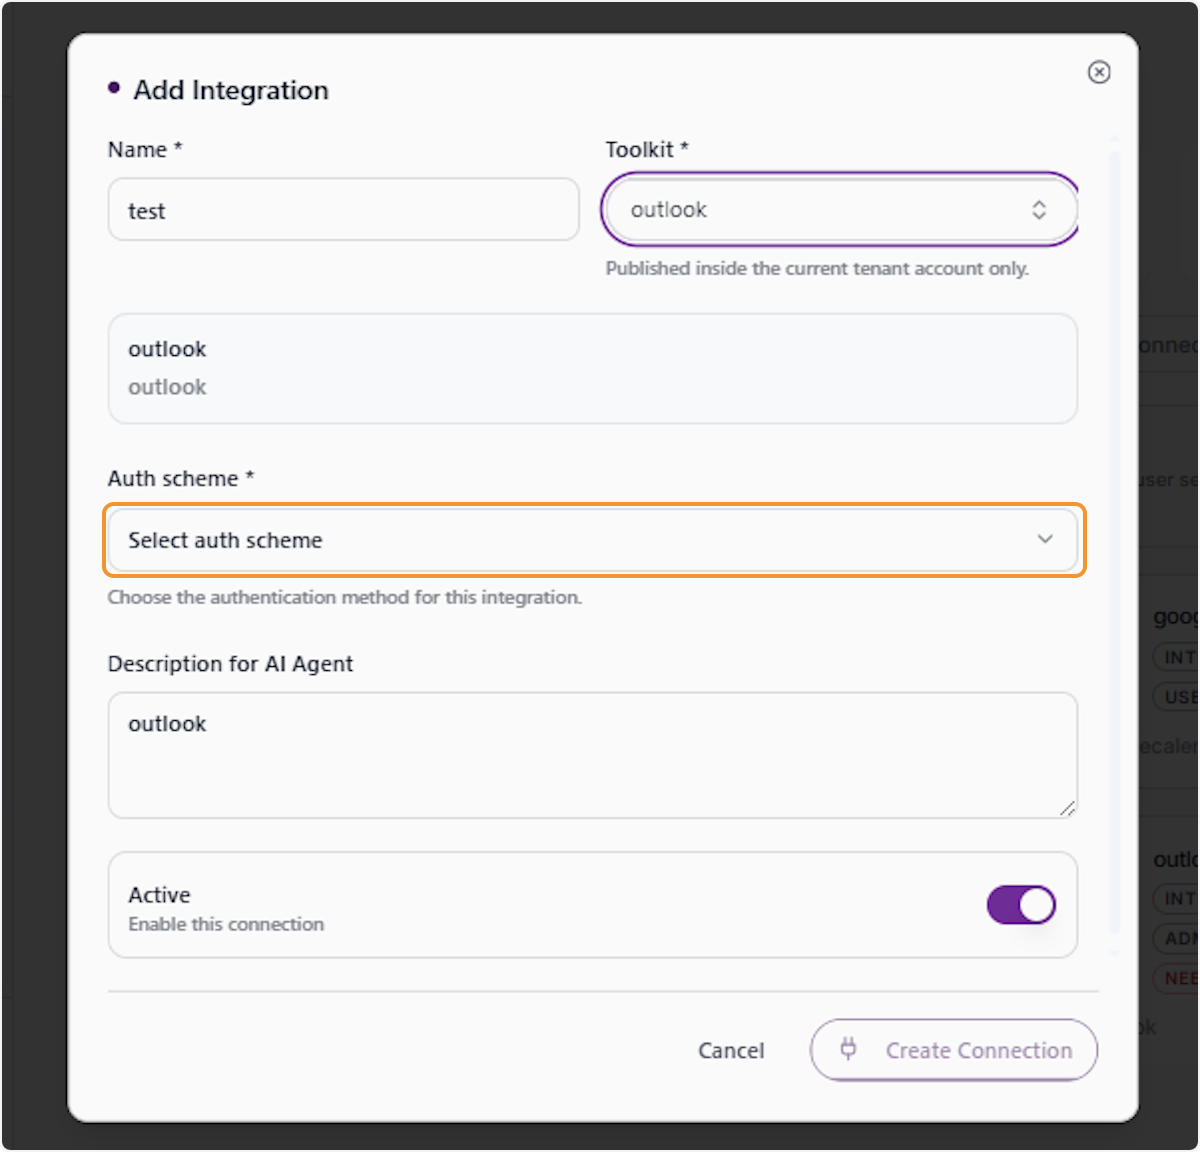
Open the Auth Scheme Selector
Click on the ‘Auth scheme’ dropdown to begin selecting the authentication method for this integration. The available options will depend on the toolkit selected. You must choose an auth scheme before the integration can be created.
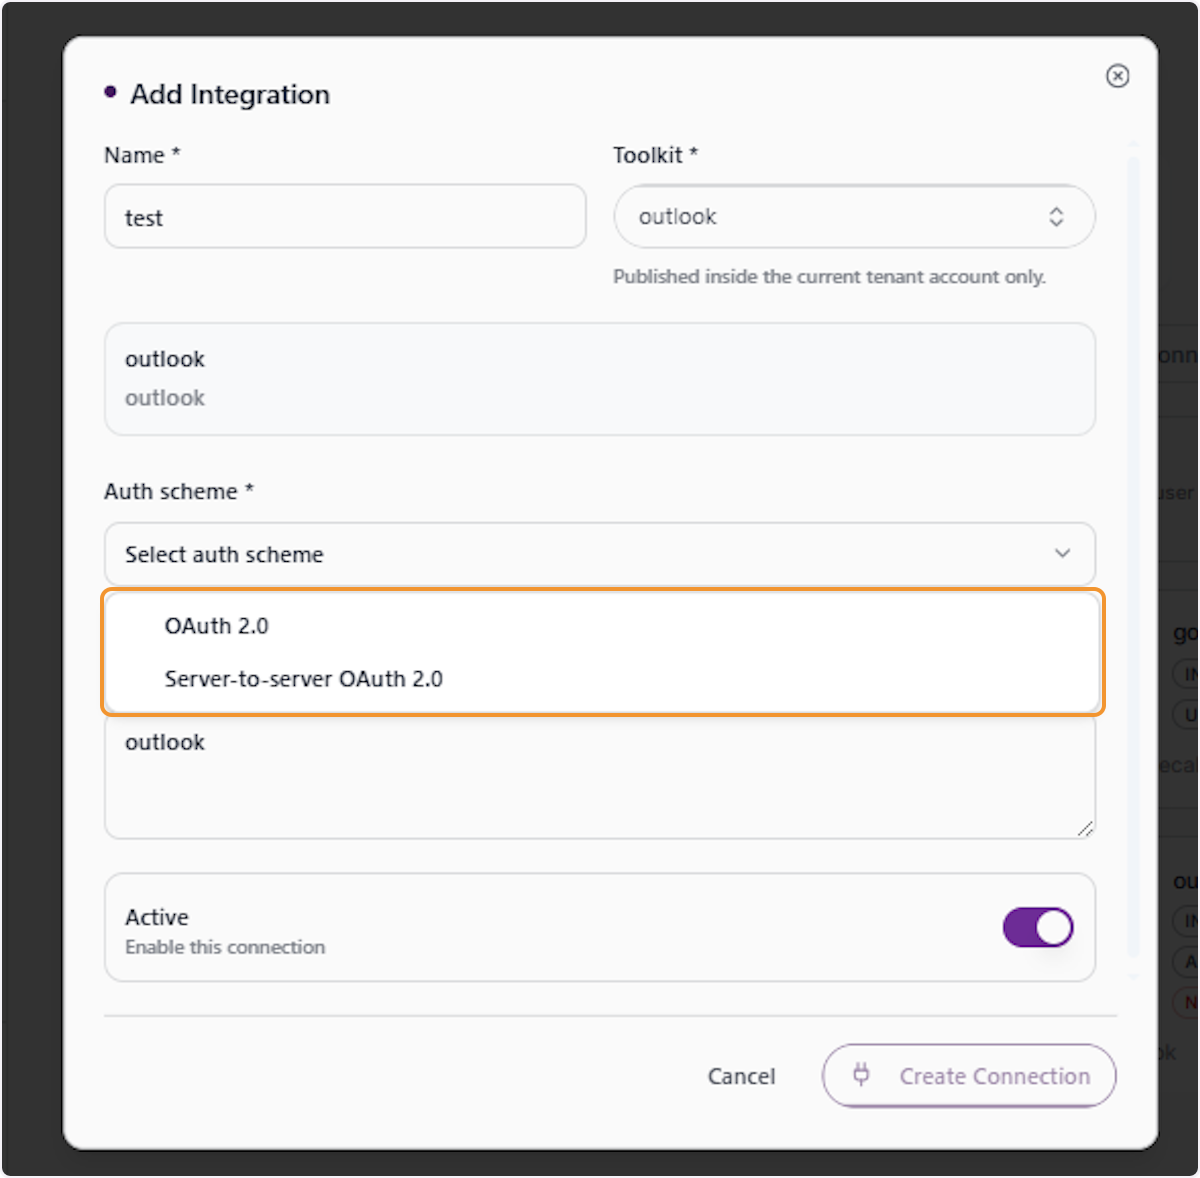
View Available Auth Schemes
The Auth scheme dropdown will expand to show available options for the Outlook toolkit, including ‘OAuth 2.0’ and ‘Server-to-server OAuth 2.0’. Review each option to determine which authentication method suits your integration requirements.
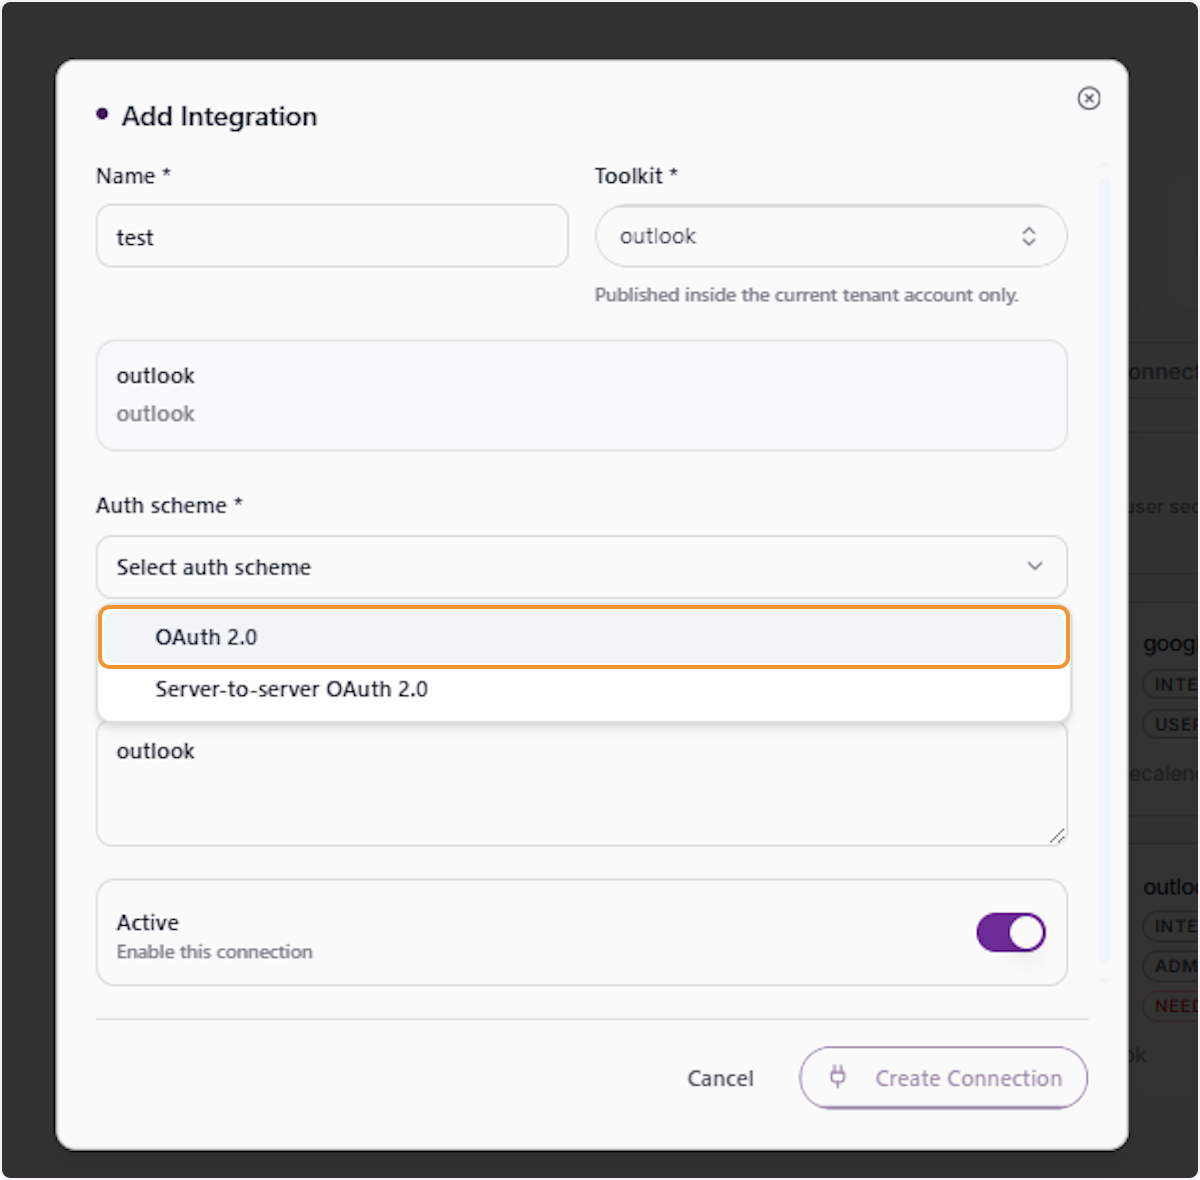
Select OAuth 2.0 as the Auth Scheme
From the expanded dropdown, select ‘OAuth 2.0’ as the authentication method. This option uses the provider’s OAuth flow for delegated access and can be configured either once by an admin or separately by each user.
Review the Auth Ownership Setting
After selecting OAuth 2.0, the form will display an ‘Auth ownership’ field. Click on this field to review or change how authentication is managed — either by the admin centrally or by individual users through their own Spaces accounts.
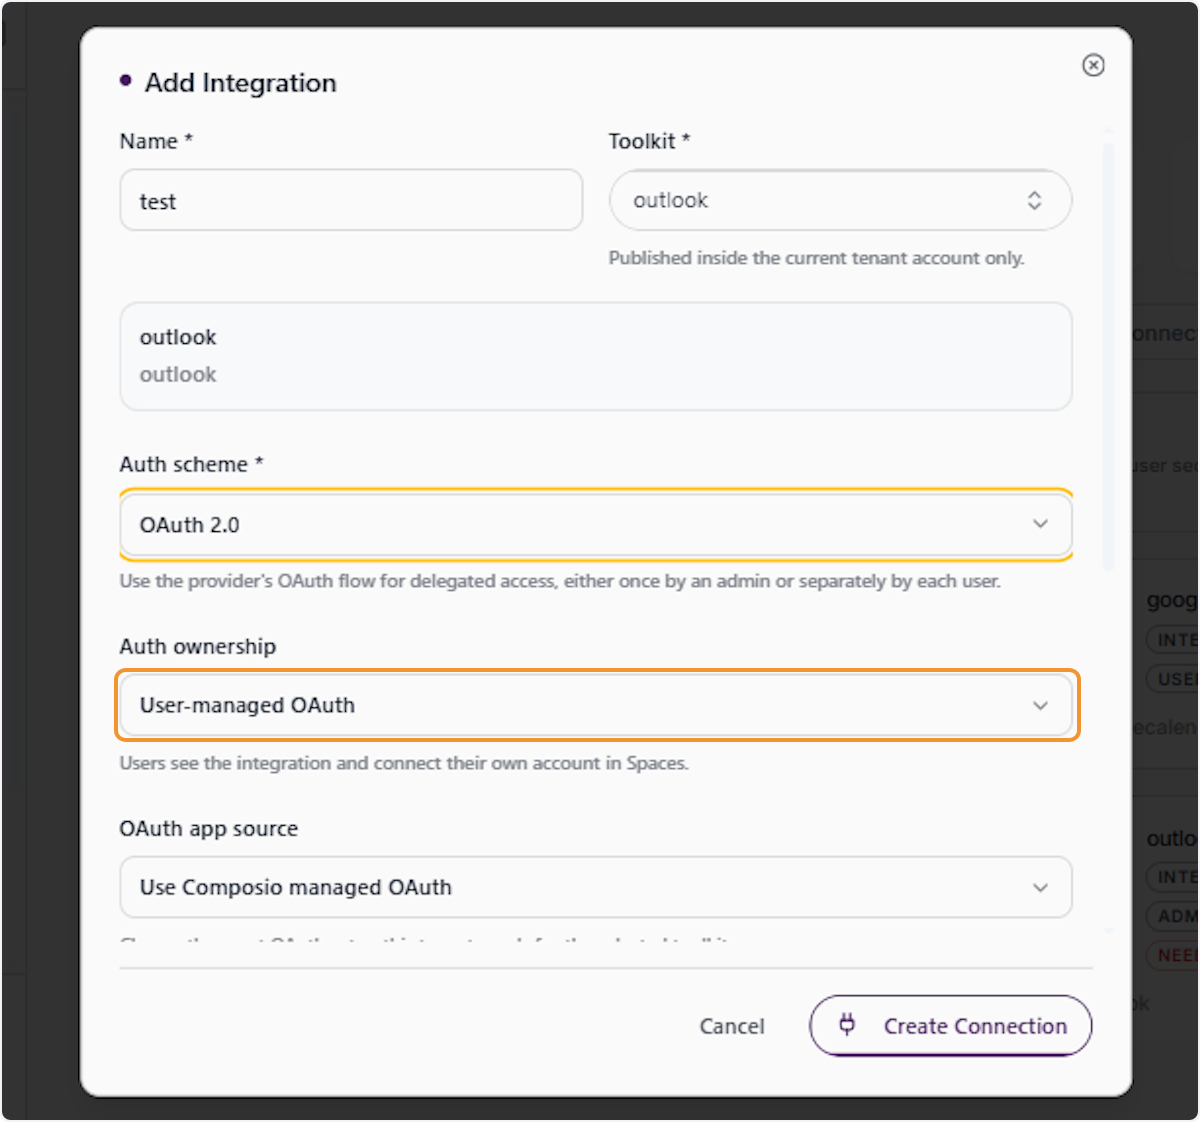
Open the Auth Ownership Dropdown
Click the Auth ownership dropdown to view the available ownership options. The dropdown will display choices including ‘User-managed OAuth’ and ‘Admin-connected OAuth’, each with a different level of access control and user responsibility.
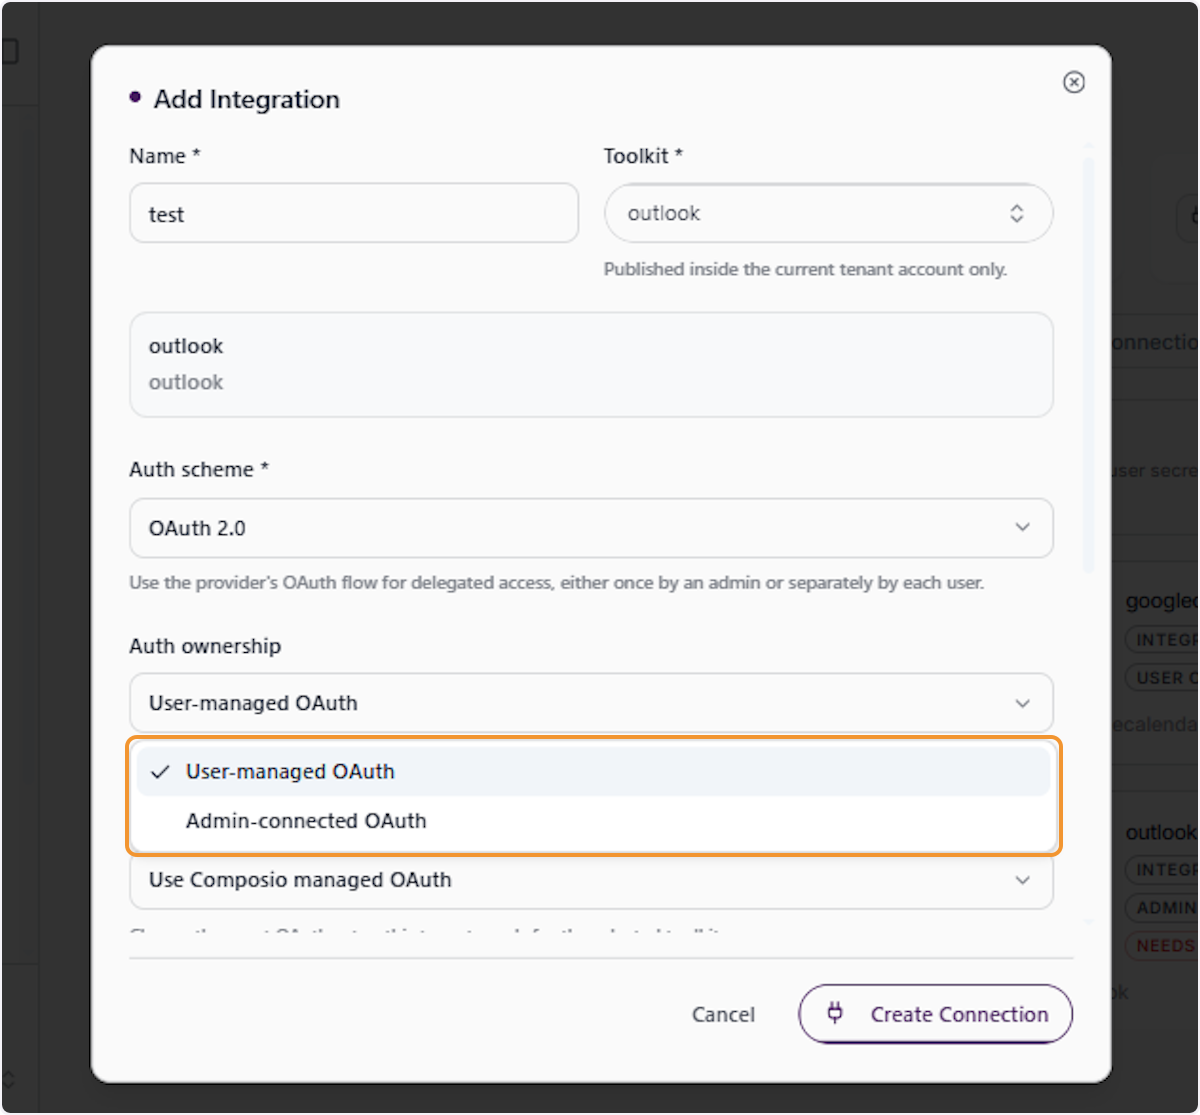
Select User-Managed OAuth
From the ownership dropdown, select ‘User-managed OAuth’. This setting means that end users will manage their own OAuth connection through Spaces, connecting and disconnecting their own accounts independently.
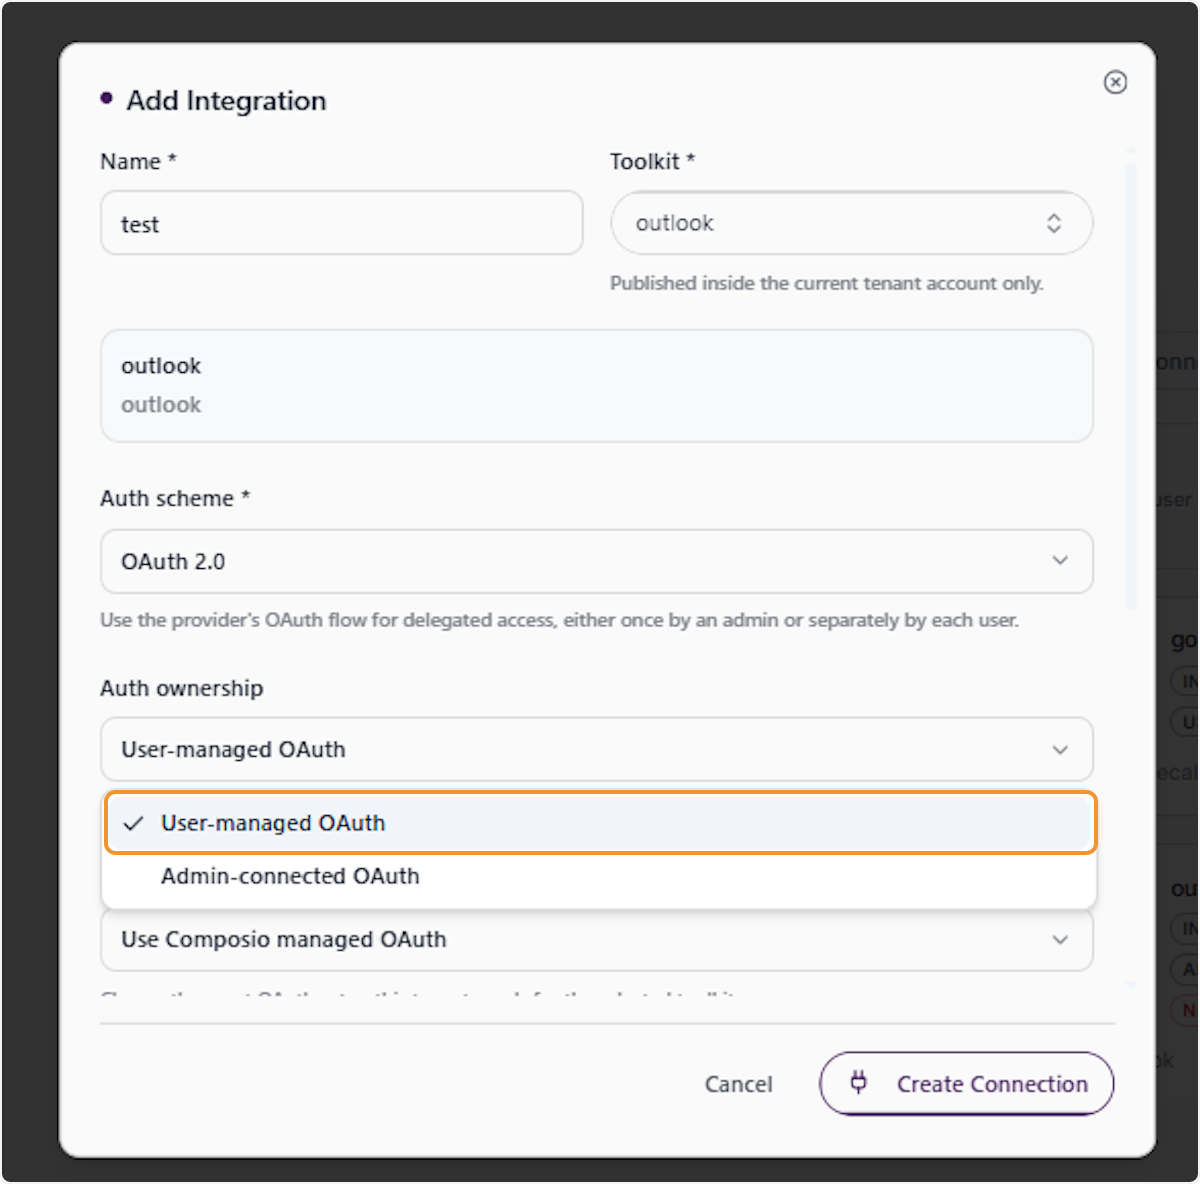
Review the OAuth App Source Field
After setting the ownership, the ‘OAuth app source’ field will appear. Click on this field to choose how the OAuth application credentials are sourced — either using Composio’s managed OAuth or providing your own custom OAuth app credentials.
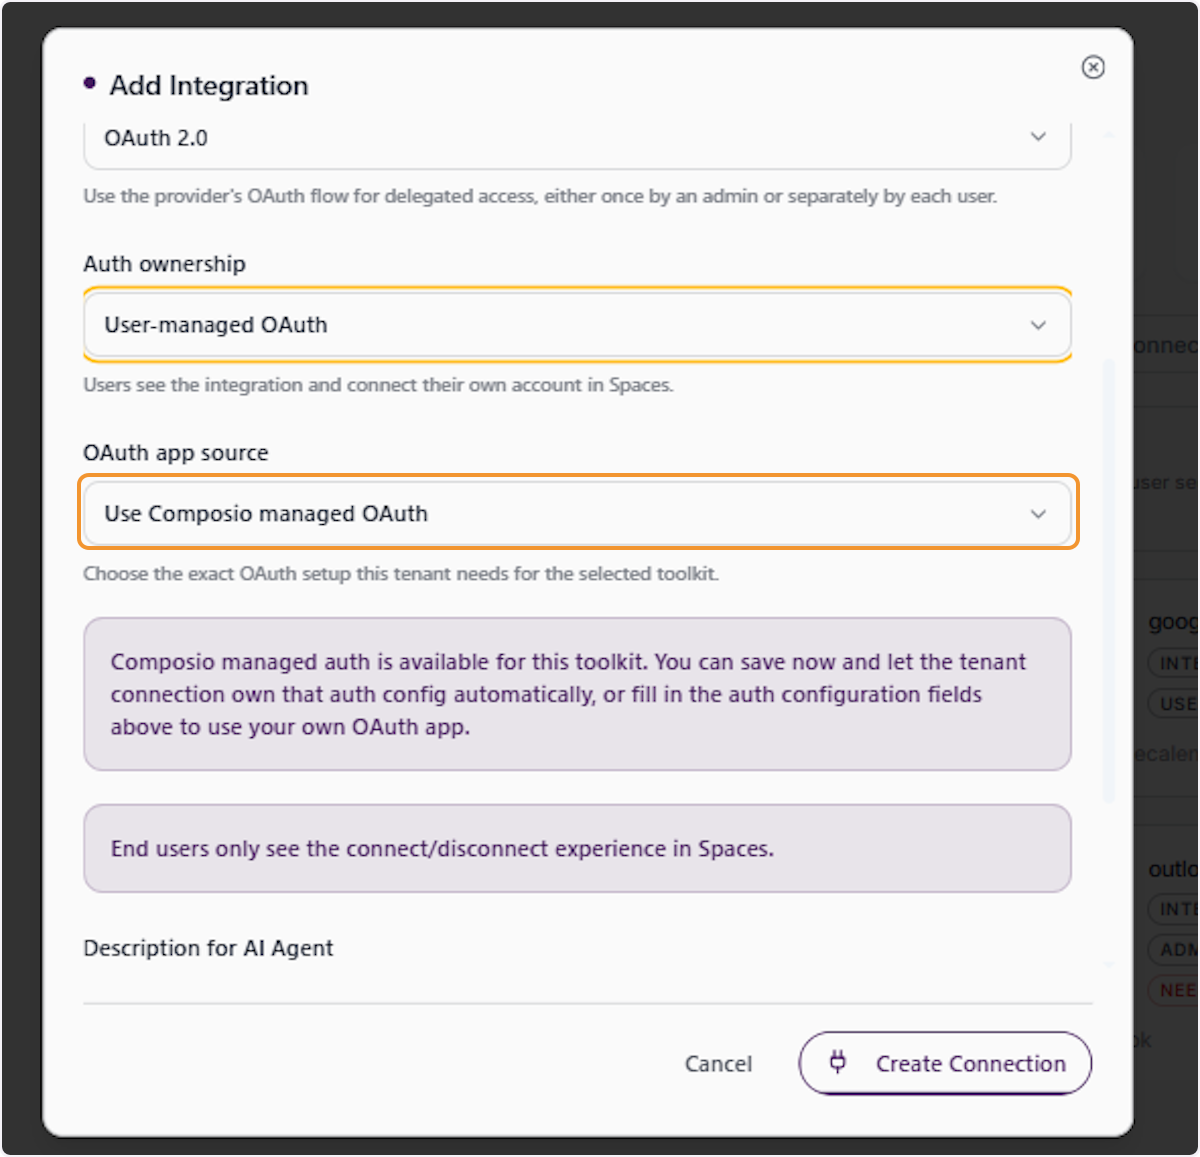
Open the OAuth App Source Dropdown
Click the OAuth app source dropdown to see the available options. The dropdown will display ‘Use Composio managed OAuth’ and ‘Use our own OAuth app’, allowing you to choose between a pre-configured managed option and a custom credential setup.
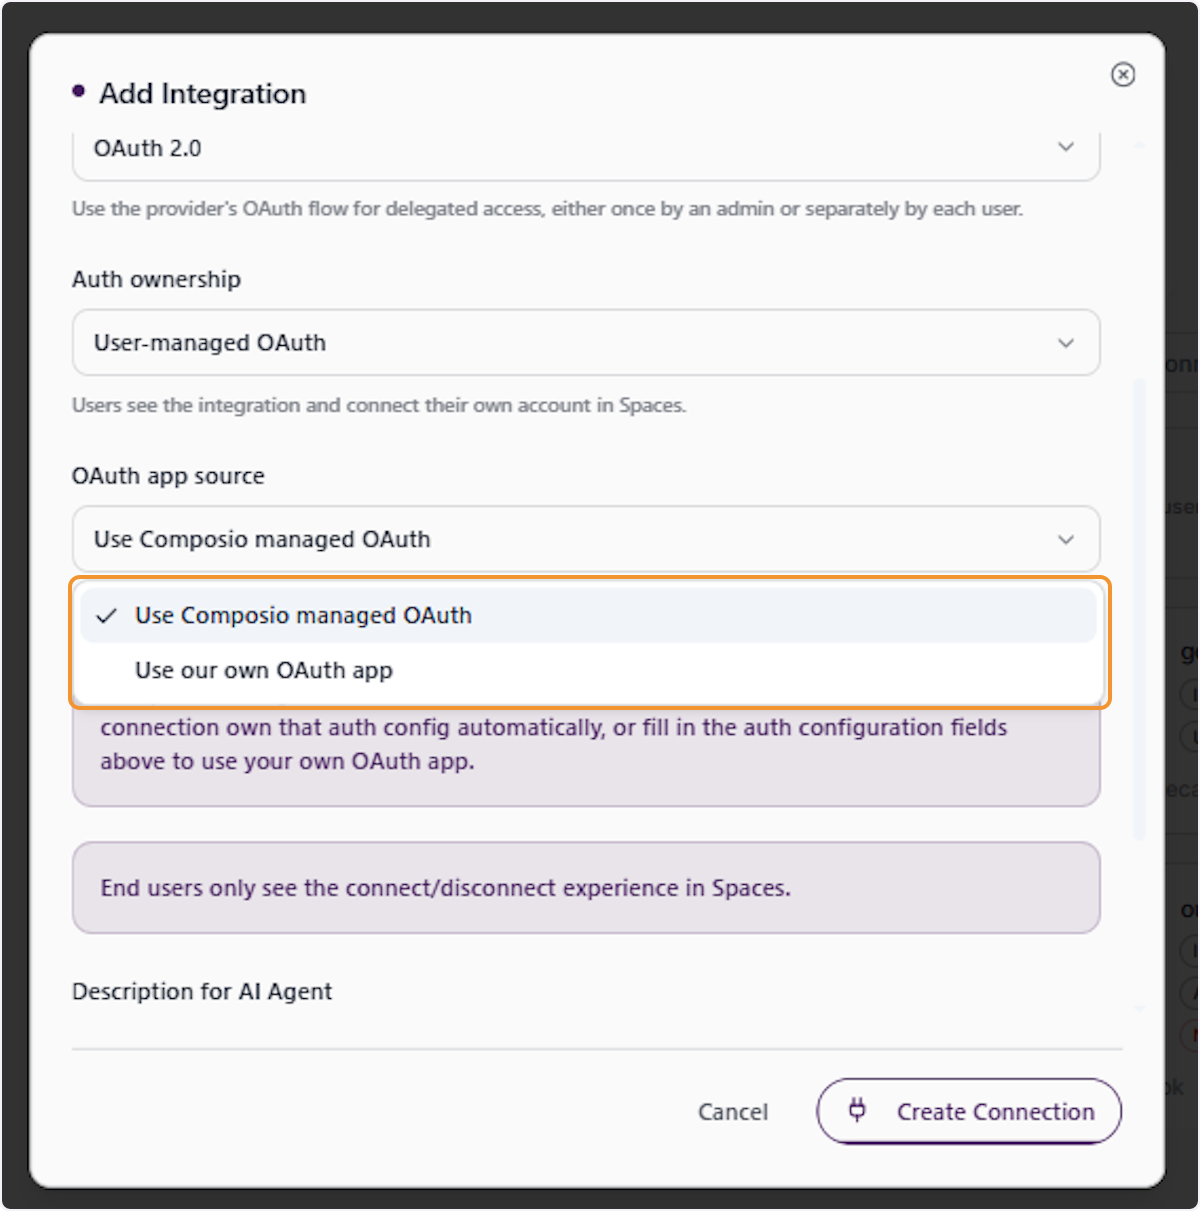
Review the Composio Managed OAuth Notice
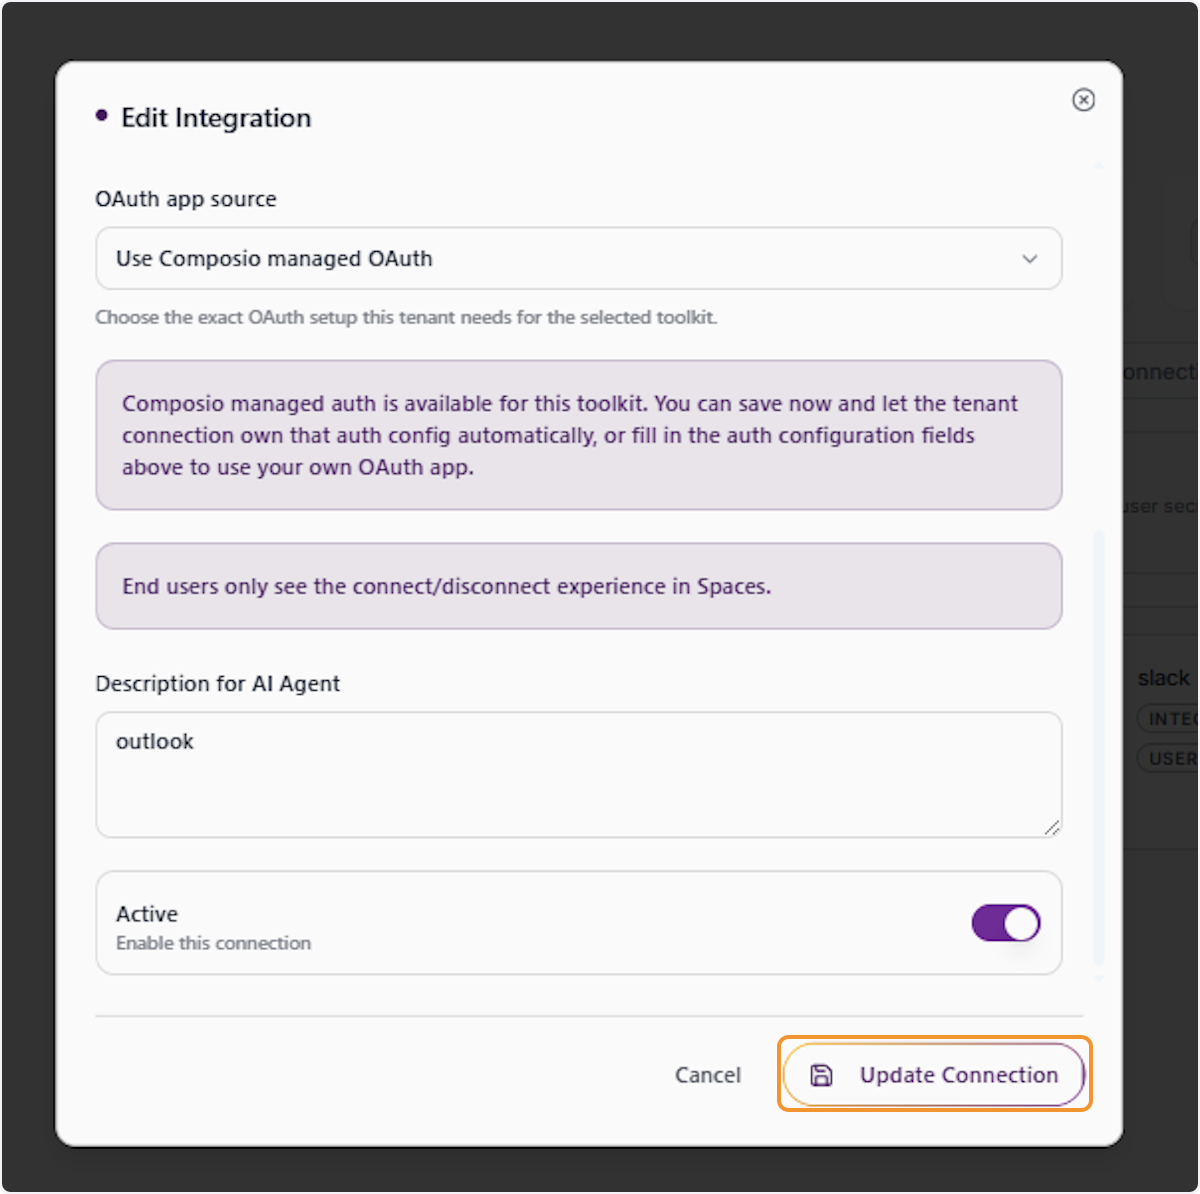
After selecting ‘Use Composio managed OAuth’, an informational notice will appear confirming that managed auth is available for this toolkit. Read this notice carefully — it explains that you can save the connection now and let the tenant handle auth configuration automatically, or fill in custom OAuth credentials manually.
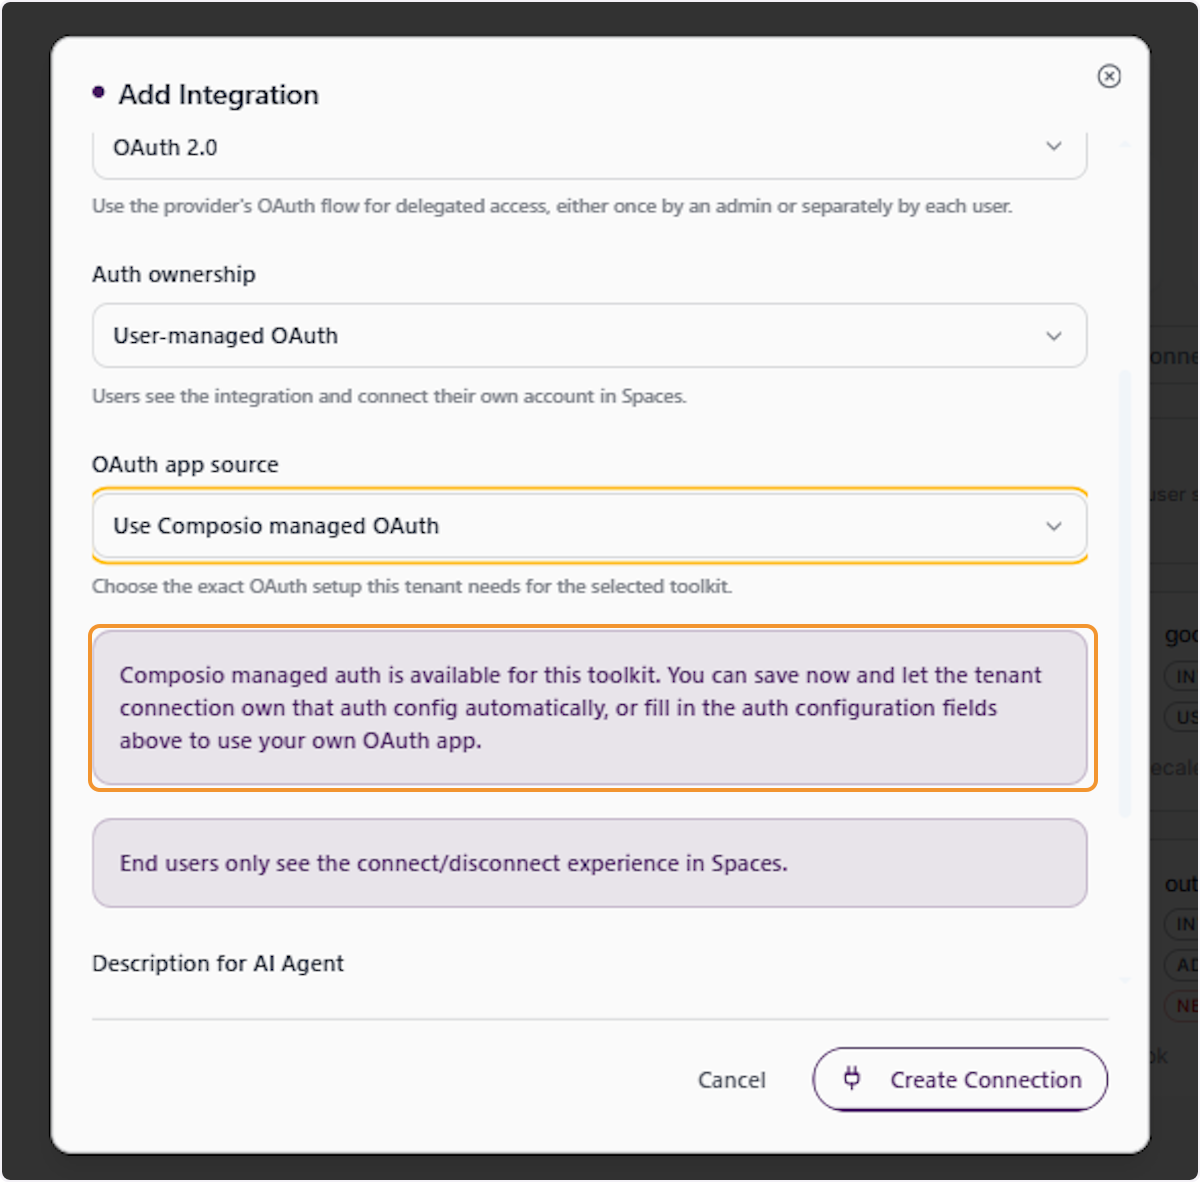
Add a Description for the AI Agent
Scroll down to the ‘Description for AI Agent’ text field and enter a brief description of what this integration does (e.g., ‘outlook’). This description helps the AI agent understand the purpose and context of the integration when deciding when and how to use it.
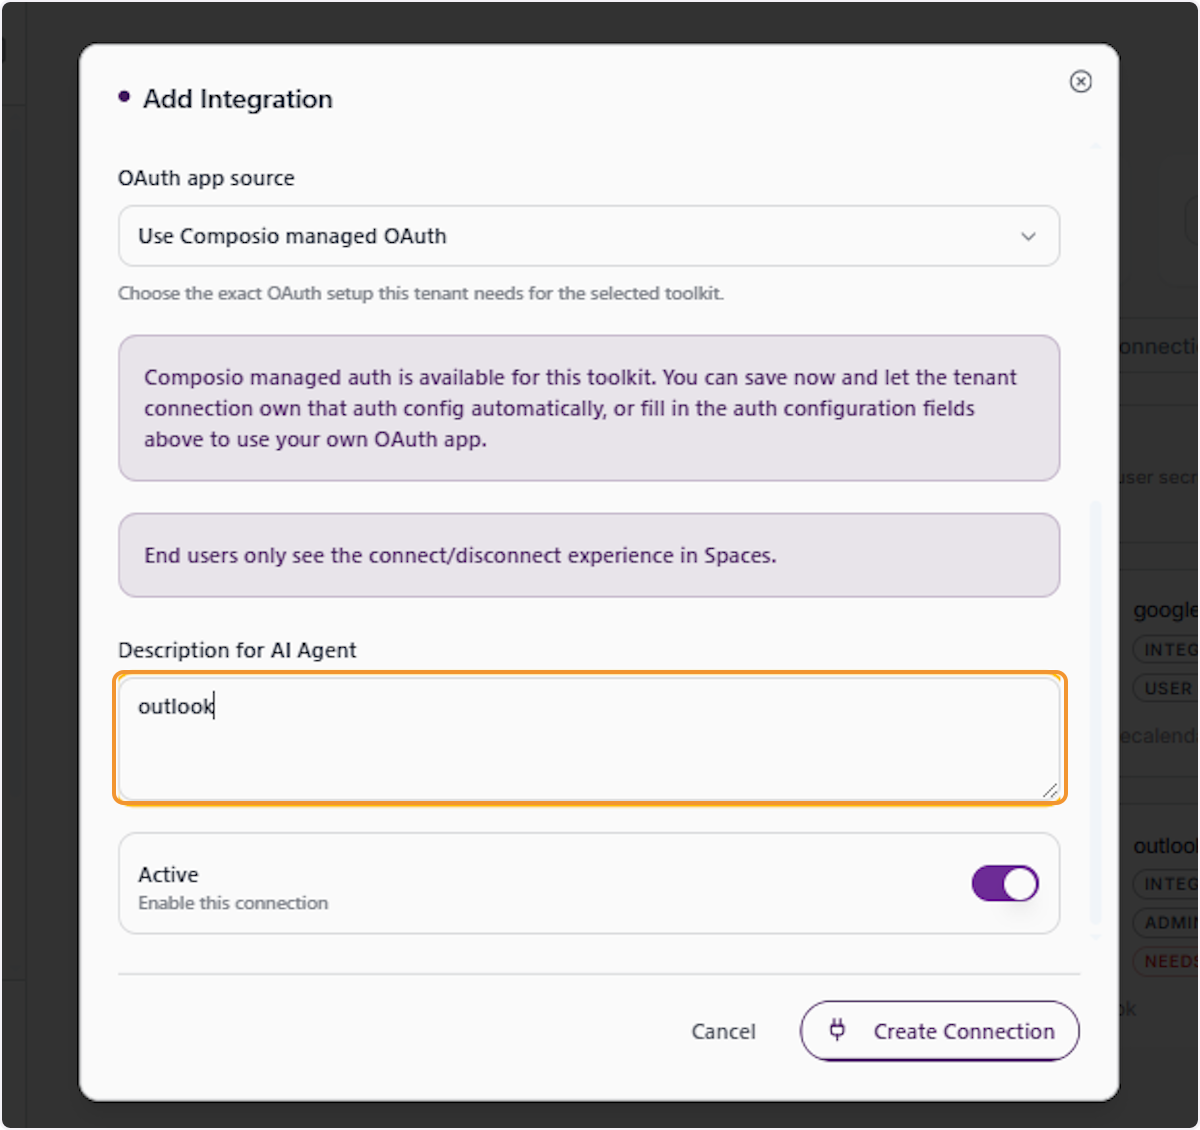
Click Create Connection to Save
Once all required fields are completed, click the ‘Create Connection’ button at the bottom of the form. This will save the integration configuration and establish the connection using the settings you have defined.
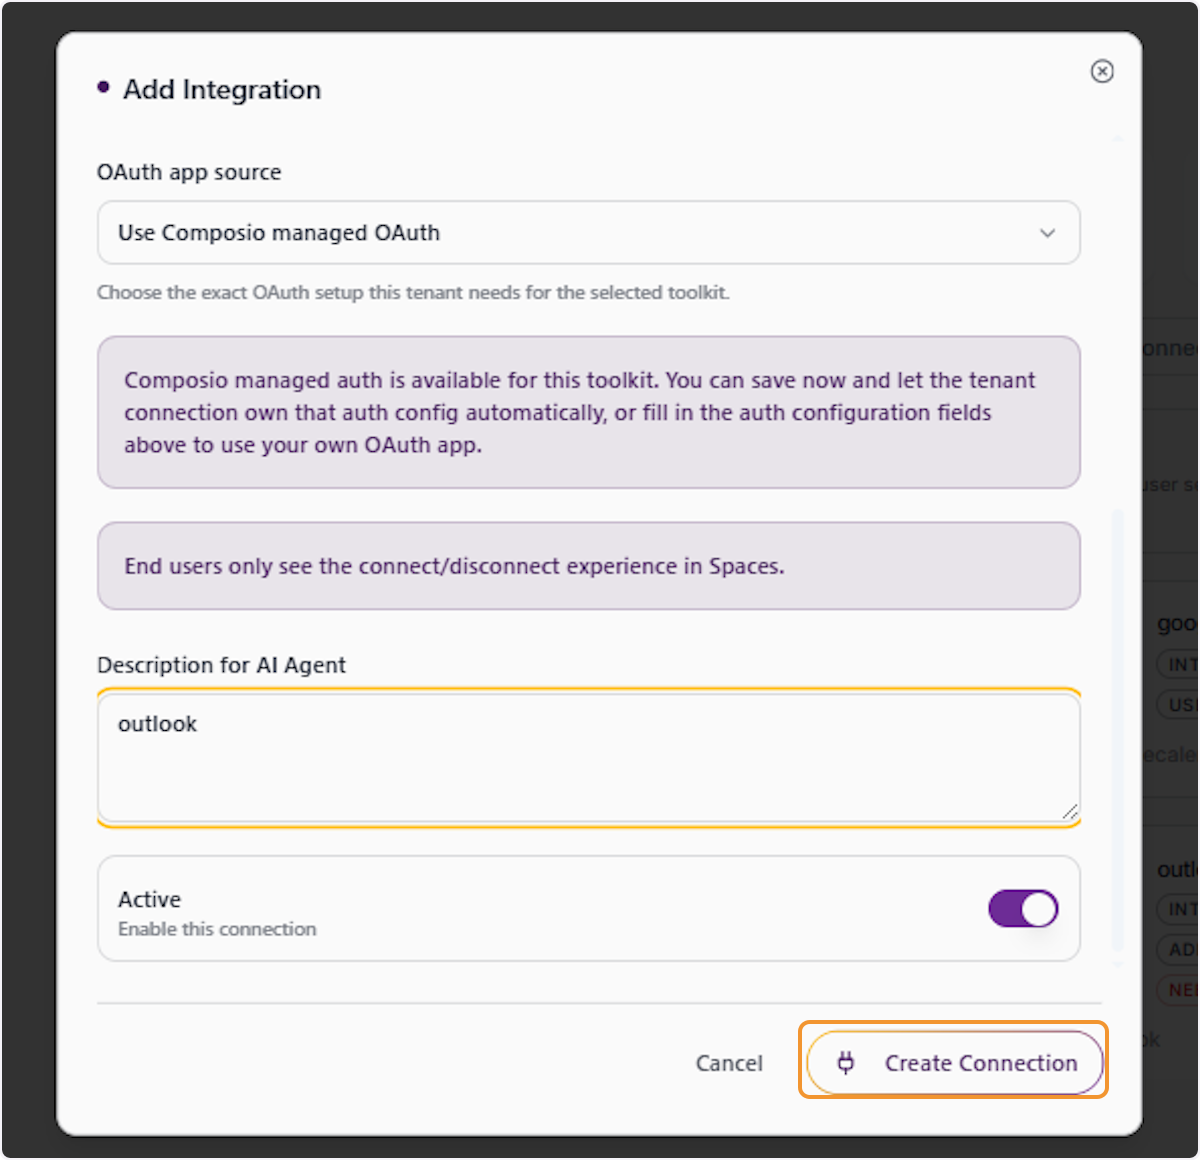
Enter a Name for the Second Integration
The Edit Integration form will reopen for creating an additional connection. Enter a name in the ‘Name’ field (e.g., ‘test 2’). This allows you to configure a second, separate Outlook integration with different settings or ownership.
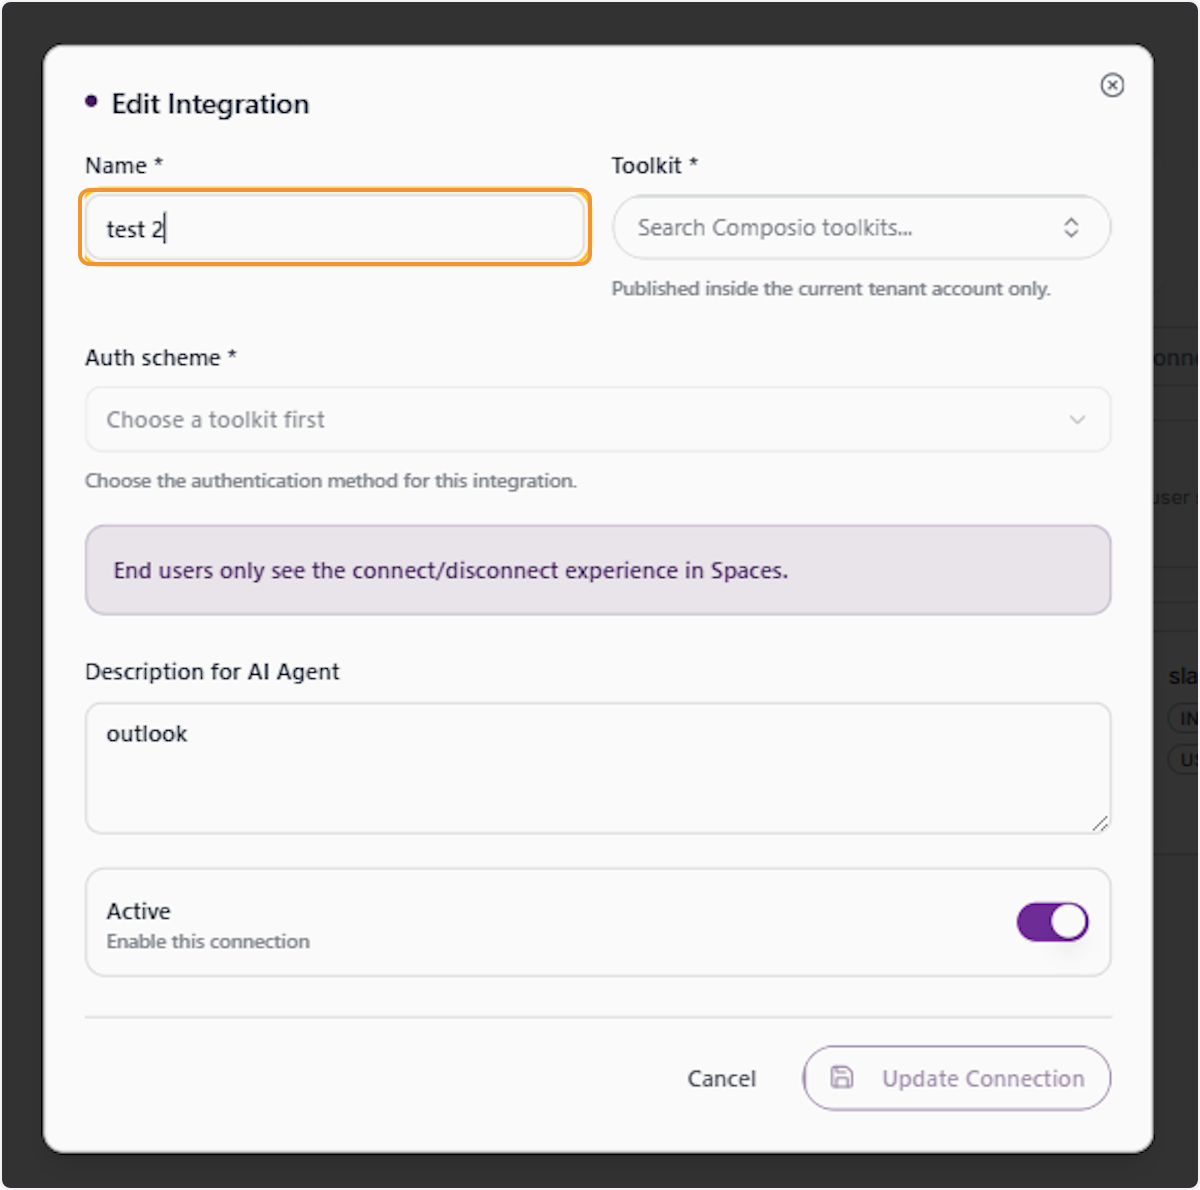
Open the Toolkit Search Field
Click on the ‘Toolkit’ field to open the toolkit search input. This will display a search box where you can look up available Composio toolkits to associate with this integration.
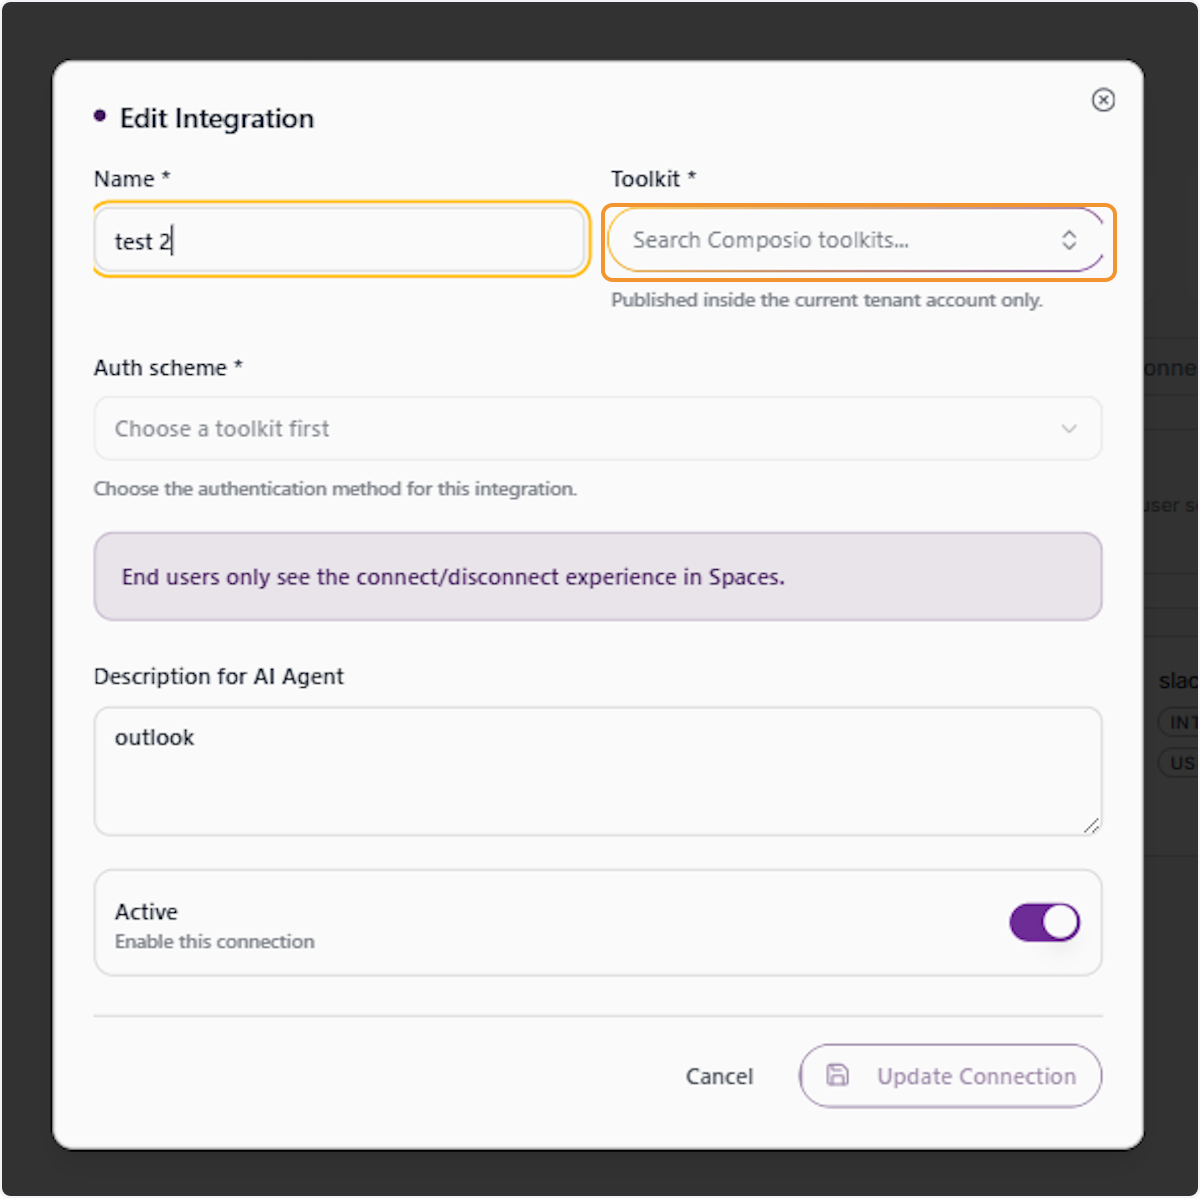
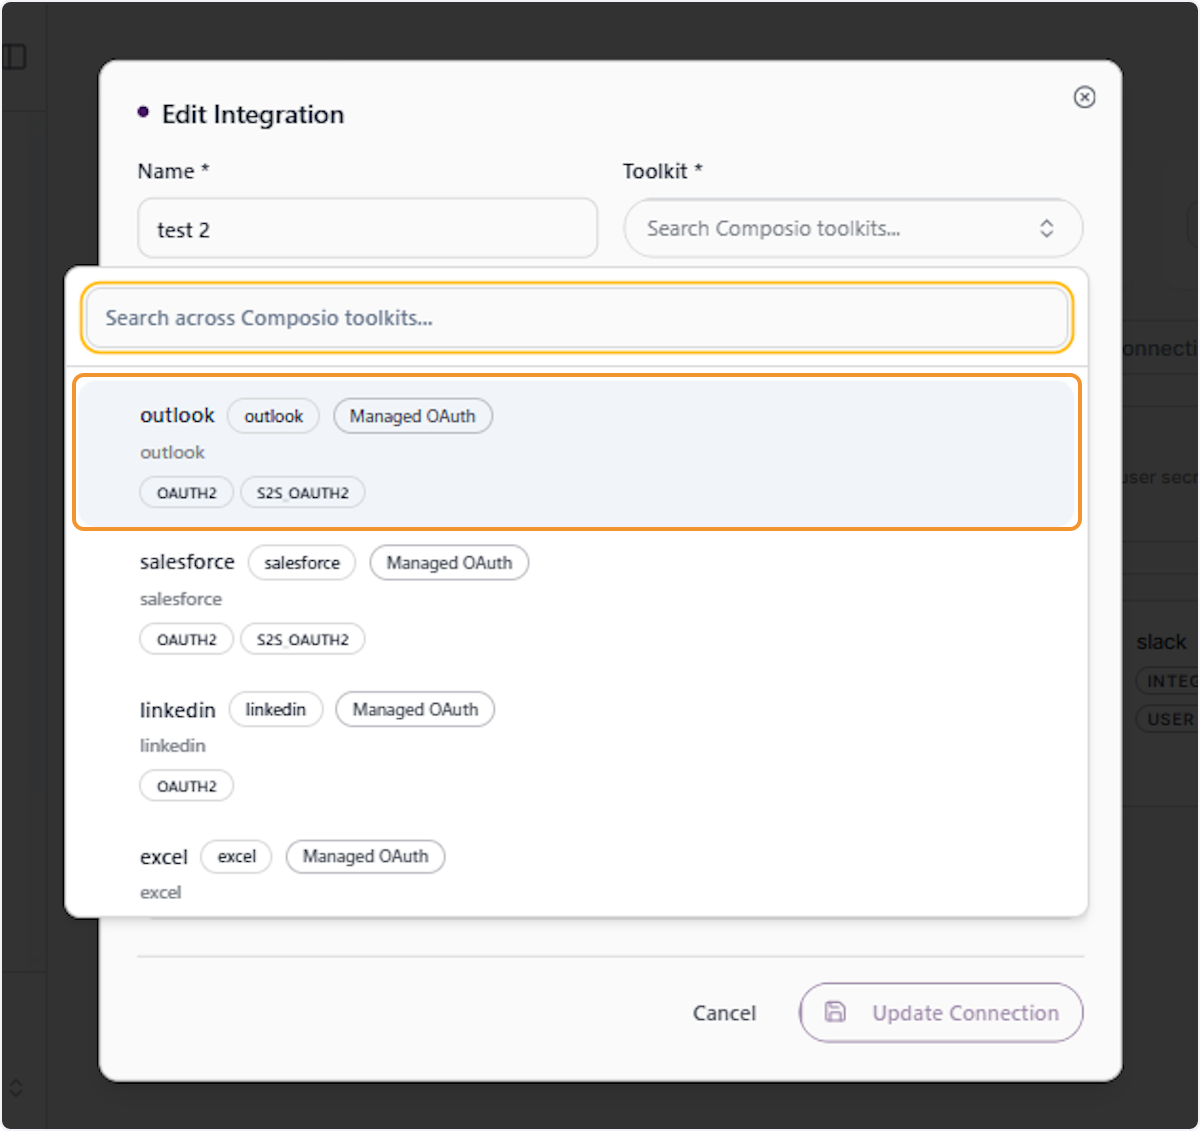
Search for and Select the Outlook Toolkit
In the toolkit search box, type ‘outlook’ to filter the available toolkits. The results will show the Outlook toolkit along with its supported authentication schemes such as OAuth2 and S2S OAuth2. Click on ‘outlook’ to select it for this integration.
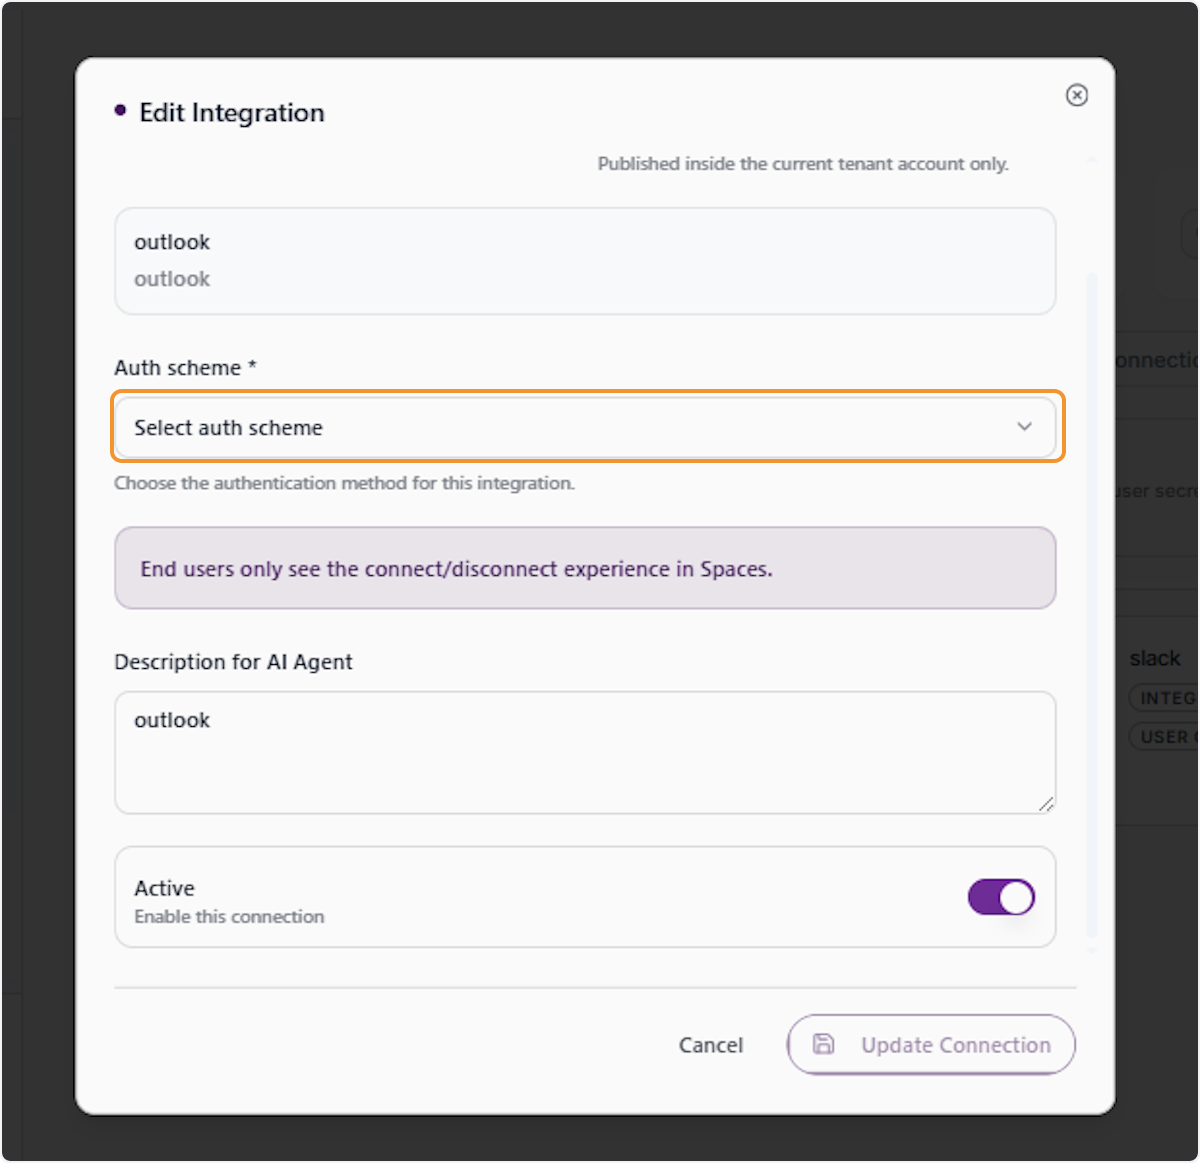
Click on the Auth Scheme Field
With the Outlook toolkit selected, click on the ‘Auth scheme’ field to choose the authentication method. The dropdown will become active and display the available authentication options for the Outlook toolkit.
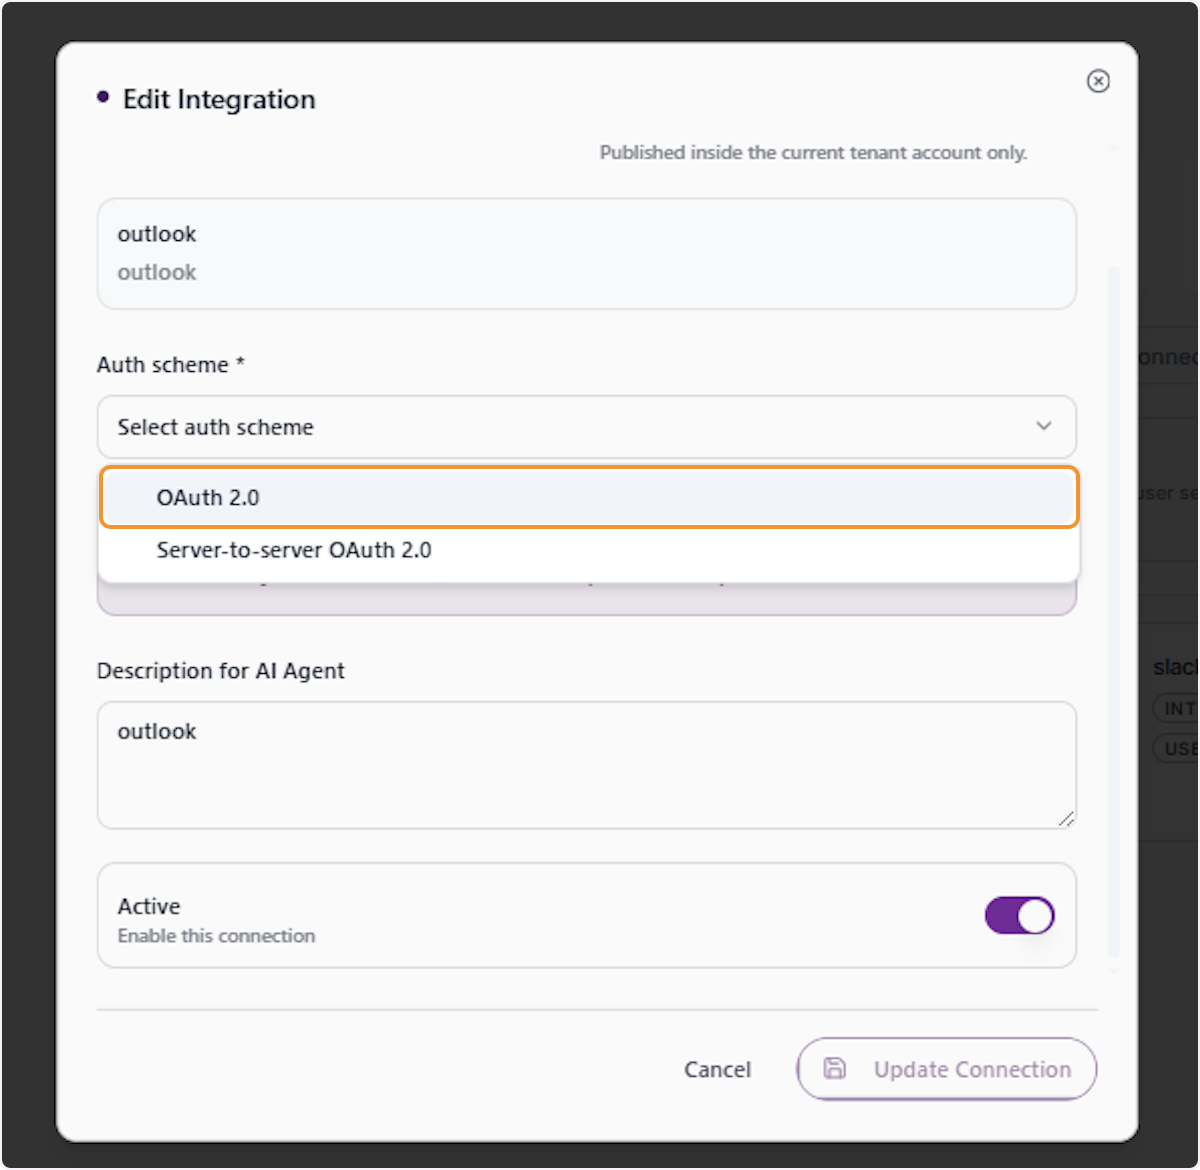
Select the Auth Scheme from the Dropdown
The Auth scheme dropdown will expand showing ‘OAuth 2.0’ and ‘Server-to-server OAuth 2.0’. Select the appropriate scheme based on your access requirements. OAuth 2.0 is recommended for user-delegated access scenarios.
Click Update Connection to Save Changes
After completing all required fields for the second integration, click the ‘Update Connection’ button to save the changes. This will update the integration record with the new configuration and authentication settings.
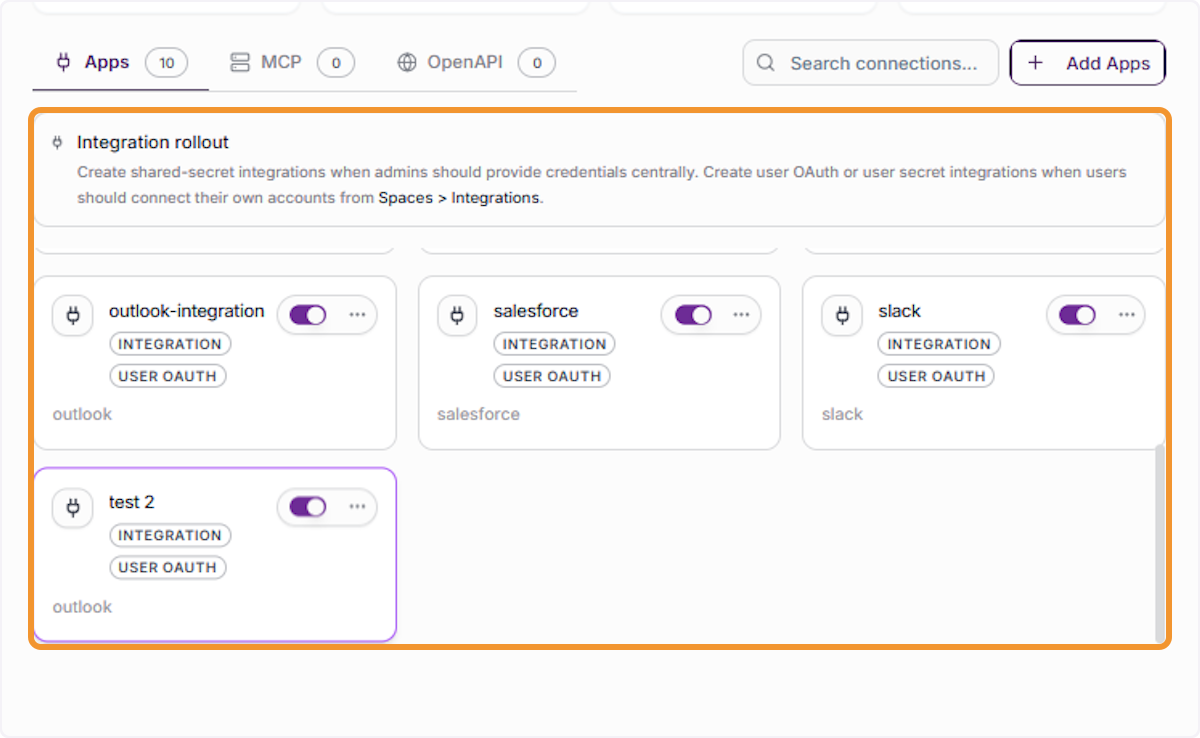
Return to the Apps Tab to Verify
Navigate back to the ‘Apps’ tab to verify that the new integration has been successfully created. You should now see the updated list including the newly added integration entries such as ‘outlook-integration’ and ‘test 2’.
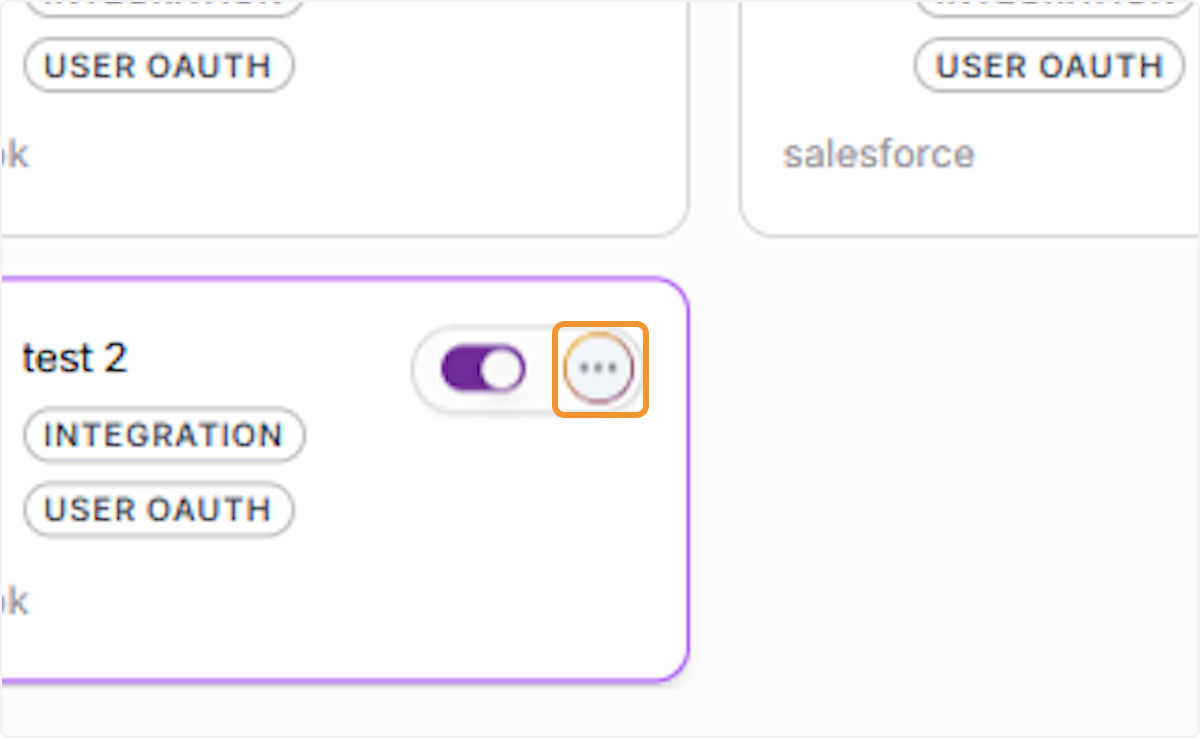
Open the Dropdown for an Integration Card
On the Apps tab, locate the integration you wish to manage and click the three-dot dropdown trigger (⋯) on its card. This reveals the action menu for that specific integration, allowing you to edit or delete the connection.
From the dropdown action menu, click ‘Delete connection’ (shown in red with a trash icon) to initiate the removal of the selected integration. This is a permanent action, so ensure you are targeting the correct integration before proceeding.
Review the Delete Confirmation Dialog
A confirmation dialog titled ‘Delete Connection’ will appear, warning that the action cannot be undone. Review the message carefully to confirm you are deleting the correct connection before proceeding.
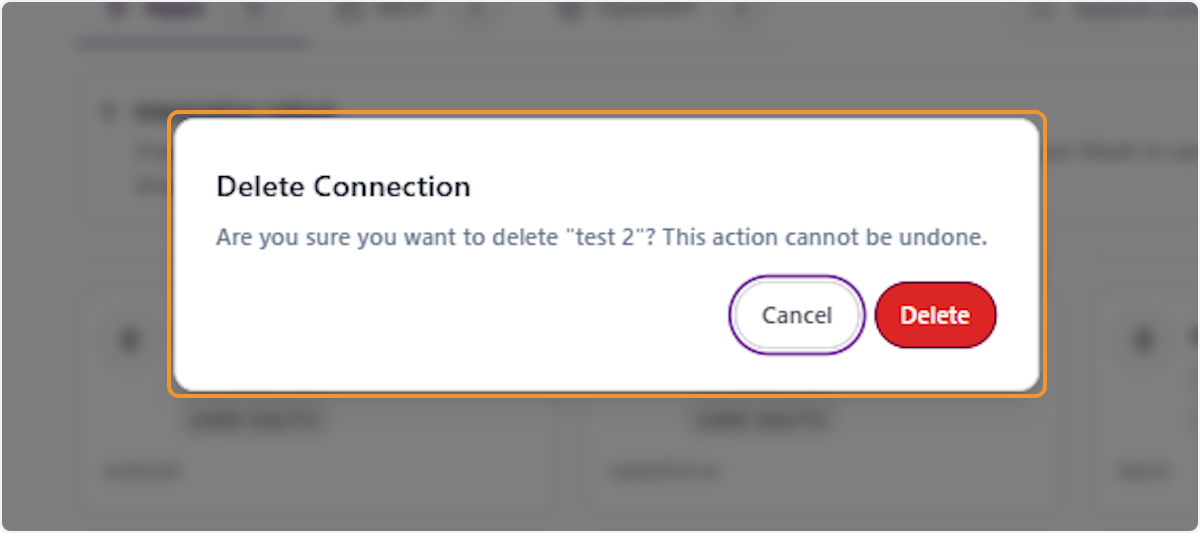
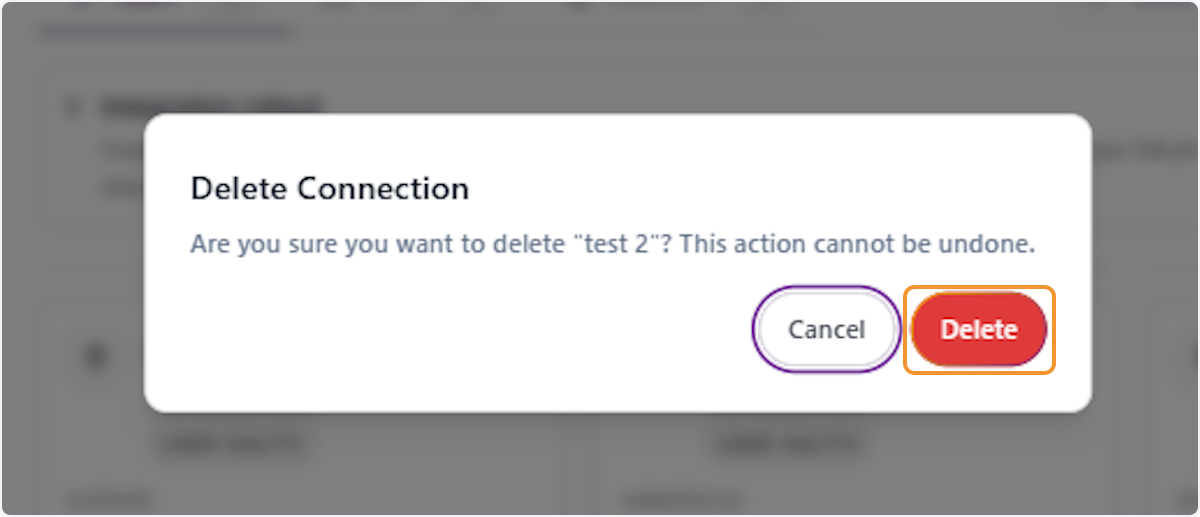
Confirm Deletion by Clicking Delete
In the confirmation dialog, click the red ‘Delete’ button to permanently remove the integration. If you wish to abort, click ‘Cancel’ instead. Once deleted, the connection will no longer appear in the integrations list.
After the deletion is confirmed, return to the ‘Apps’ tab to review the updated list of integrations. Verify that the deleted connection no longer appears and that all remaining integrations are intact.
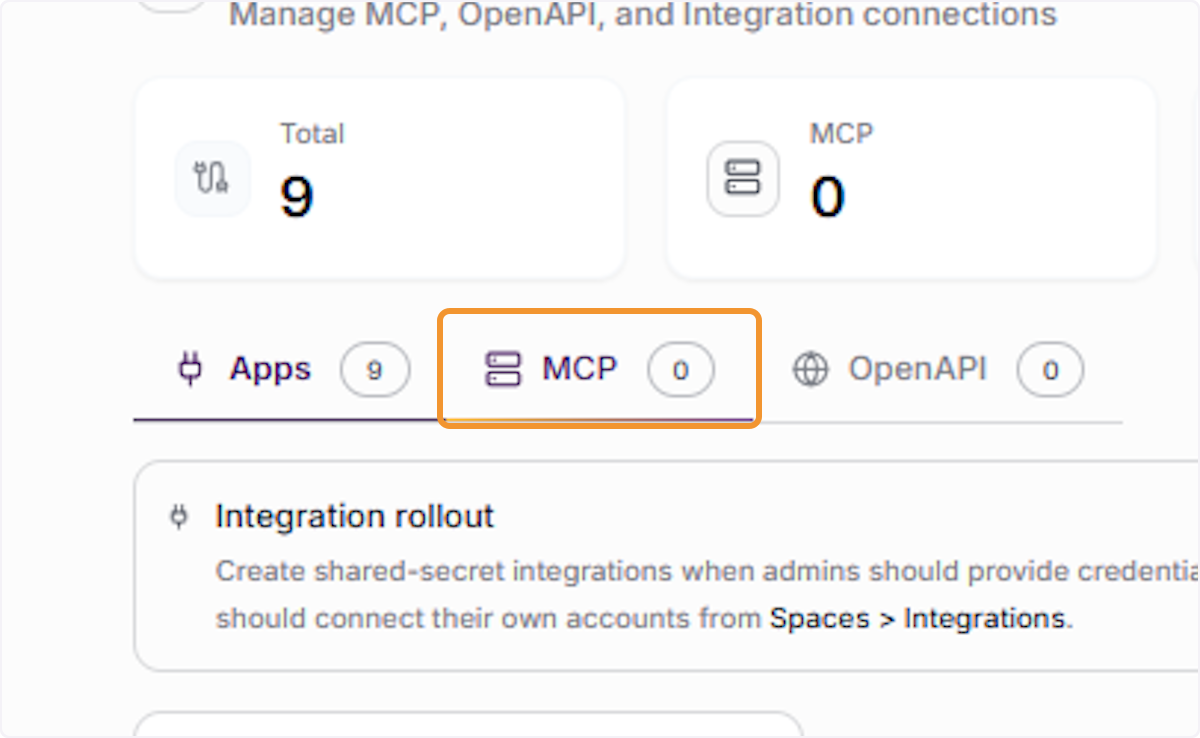
Switch to the MCP Tab
Click the ‘MCP’ tab at the top of the Integrations dashboard. This section is dedicated to Model Context Protocol (MCP) server connections, which allow AI agents to interact with external tools and services in real time.
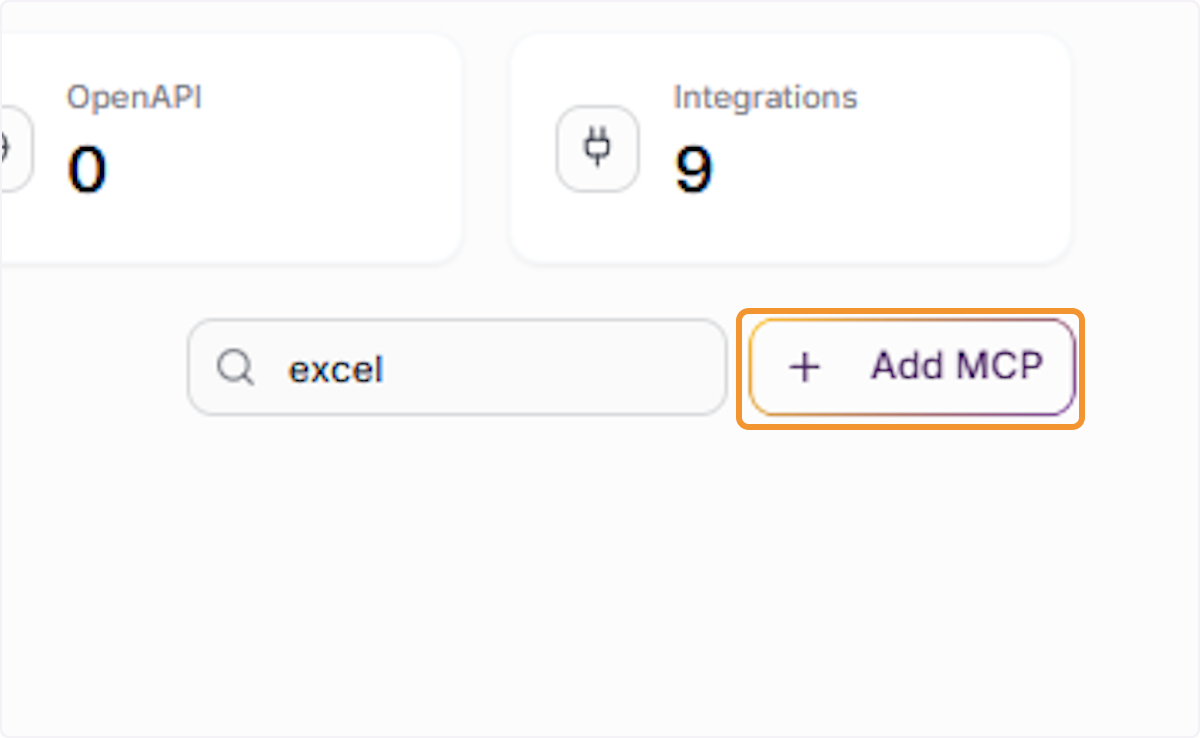
Click Add MCP to Create a New MCP Tool
Click the ’+ Add MCP’ button in the top-right corner of the MCP tab. This opens the form for adding a new MCP tool connection, where you will define the tool name, connection type, and configuration details.
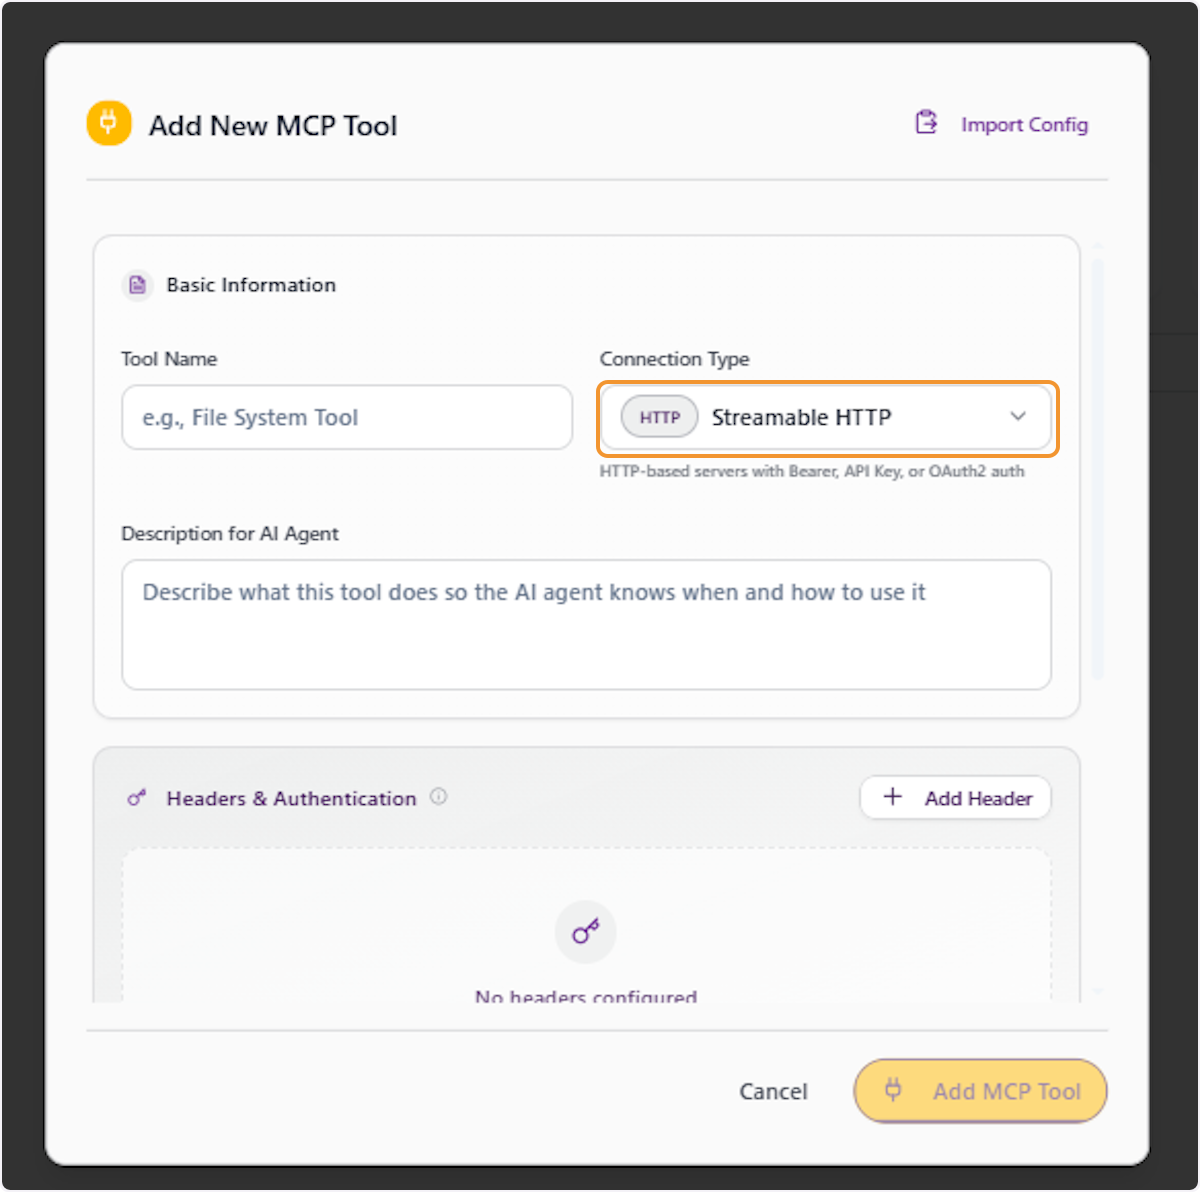
Review the Connection Type Field
In the Add MCP Tool form, locate the ‘Connection Type’ dropdown. This field determines how the MCP tool communicates — either via HTTP Streamable HTTP (for live HTTP-based servers) or STDIO (for sandboxed local execution). Click the field to open the selector.
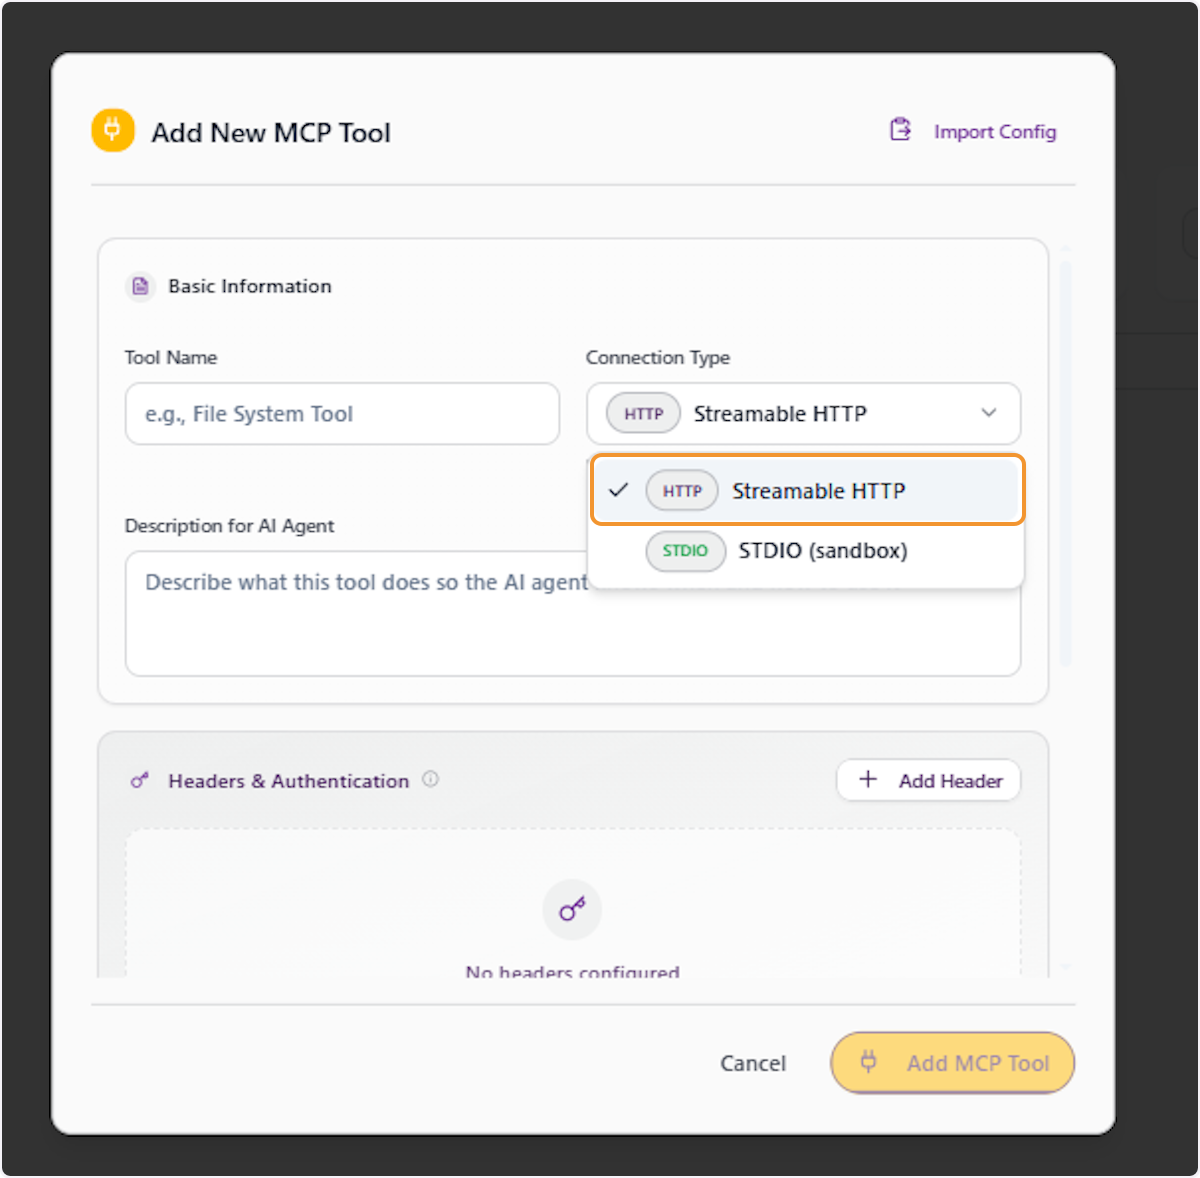
View Available Connection Type Options
The Connection Type dropdown will expand to show two options: ‘Streamable HTTP’ (HTTP-based servers supporting Bearer, API Key, or OAuth2 auth) and ‘STDIO (sandbox)’ (for local sandboxed tools). Review both options before making your selection.
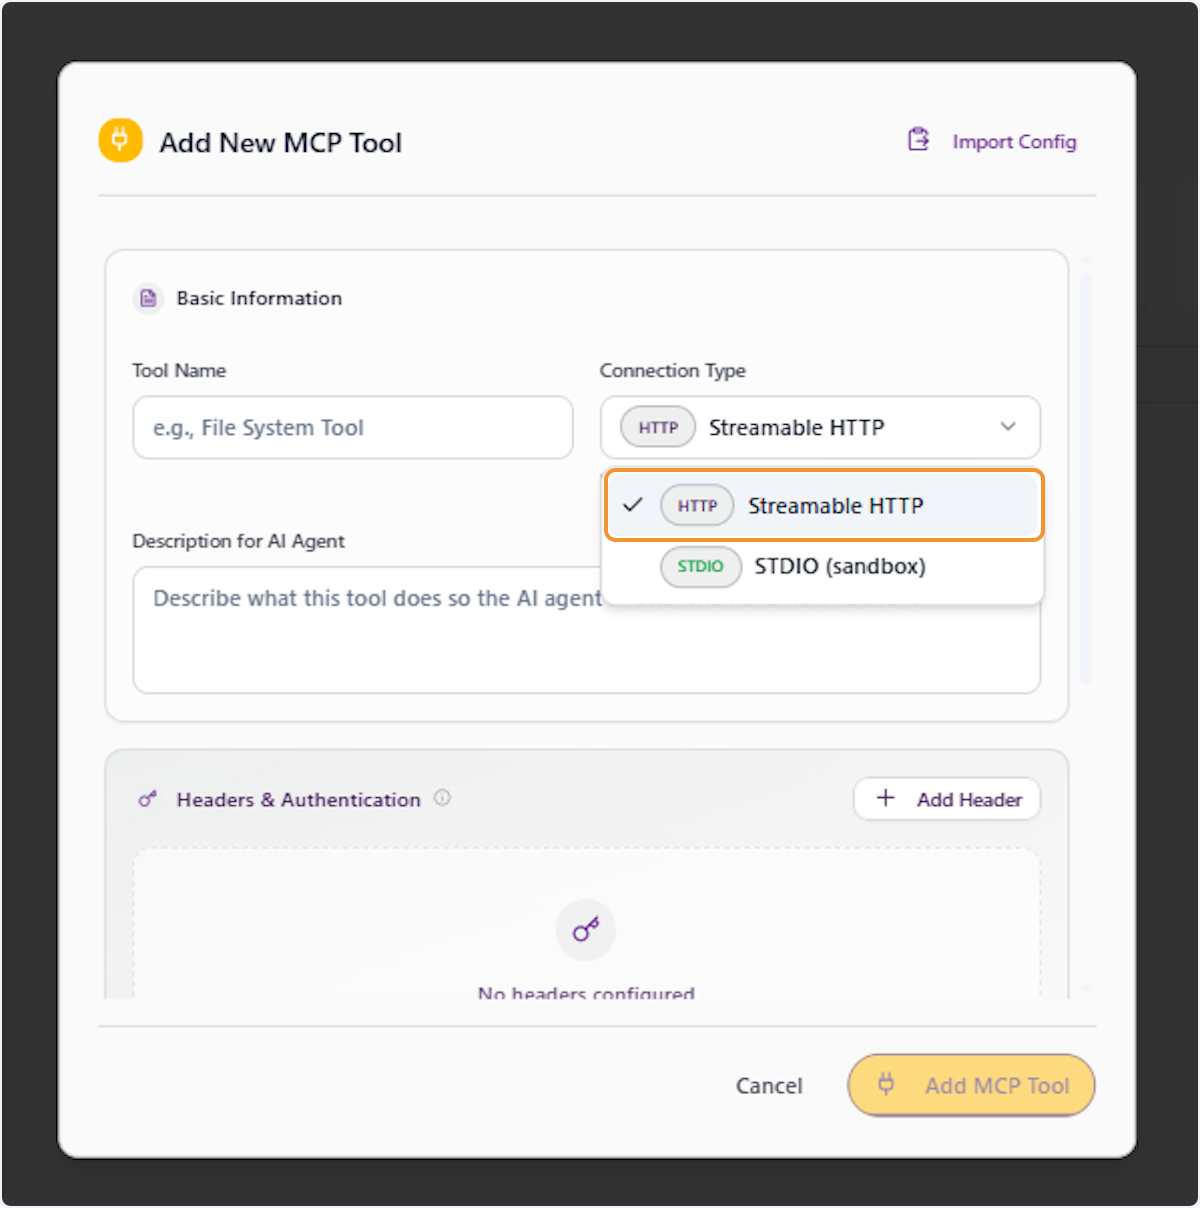
Select Streamable HTTP as the Connection Type
Select ‘Streamable HTTP’ from the dropdown. This option is suited for connecting to external MCP servers accessible over HTTP. It supports Bearer token, API Key, and OAuth2 authentication methods for secure communication.
Enter the JSON Configuration for the MCP Server
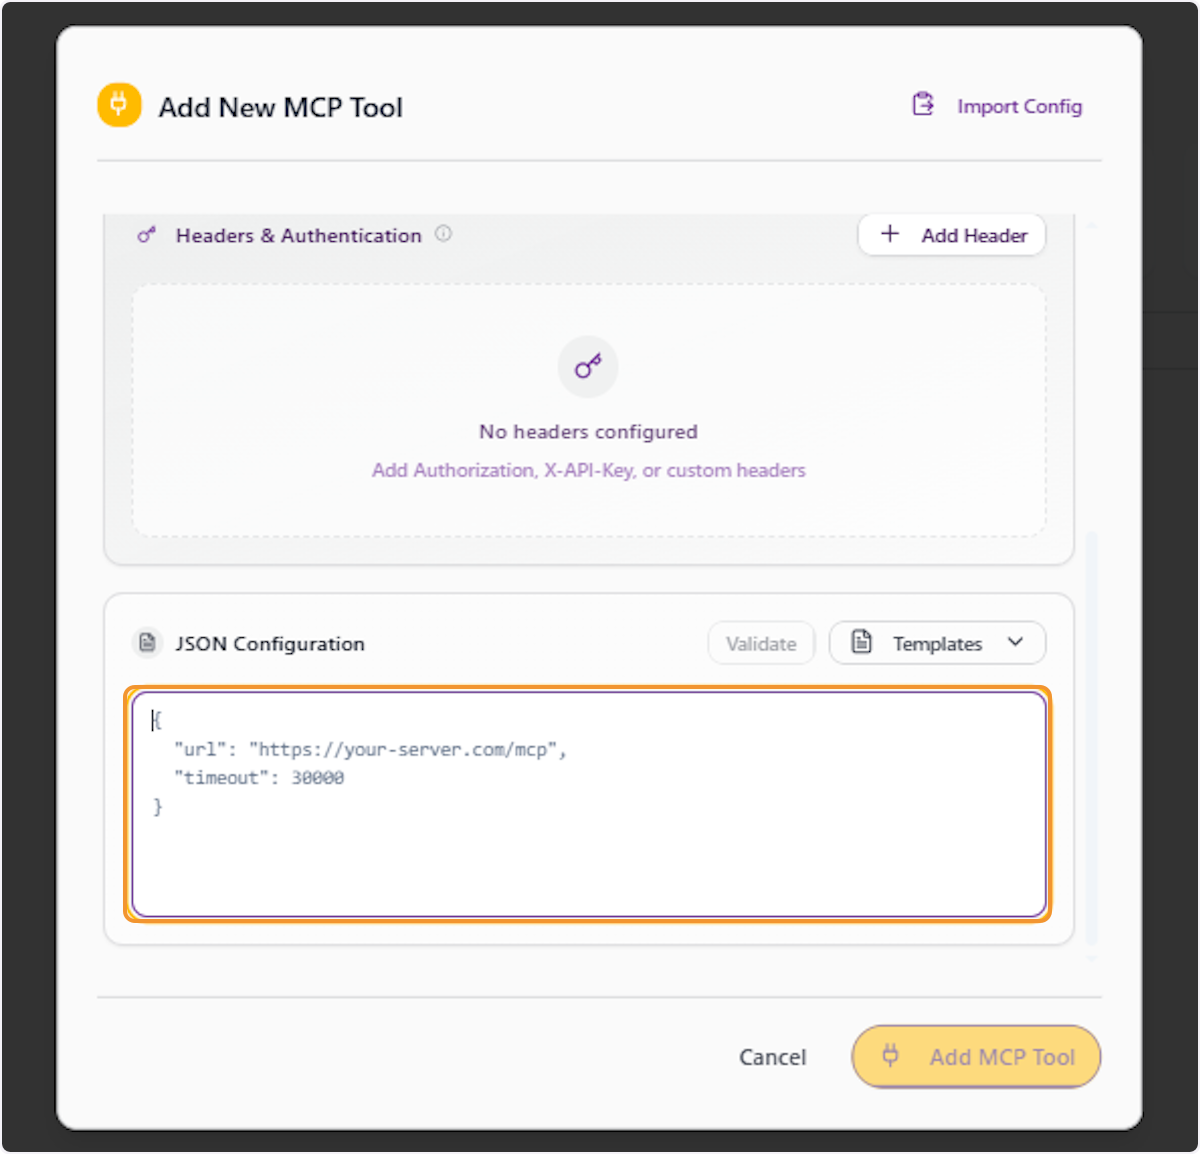
In the JSON Configuration editor, enter the required configuration details for your MCP server. At minimum, provide the server URL (e.g., https://your-server.com/mcp) and a timeout value in milliseconds (e.g., 30000). This configuration tells the system how to connect to your MCP endpoint.
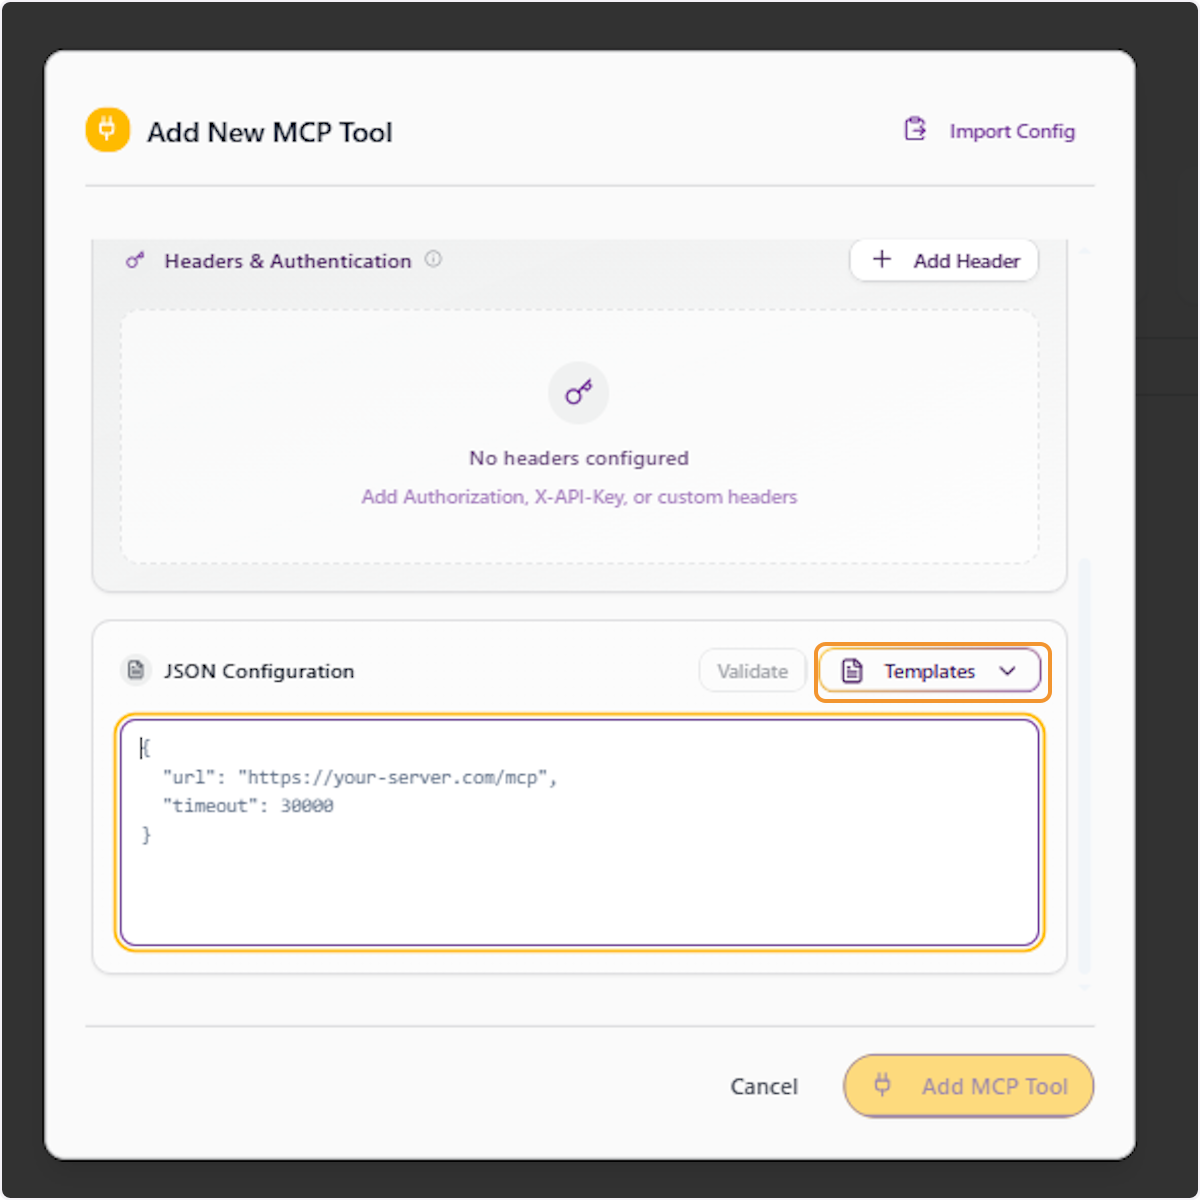
Click the ‘Templates’ button next to the JSON configuration editor to access pre-built configuration templates. These templates provide ready-made JSON structures for common authentication patterns, saving setup time.
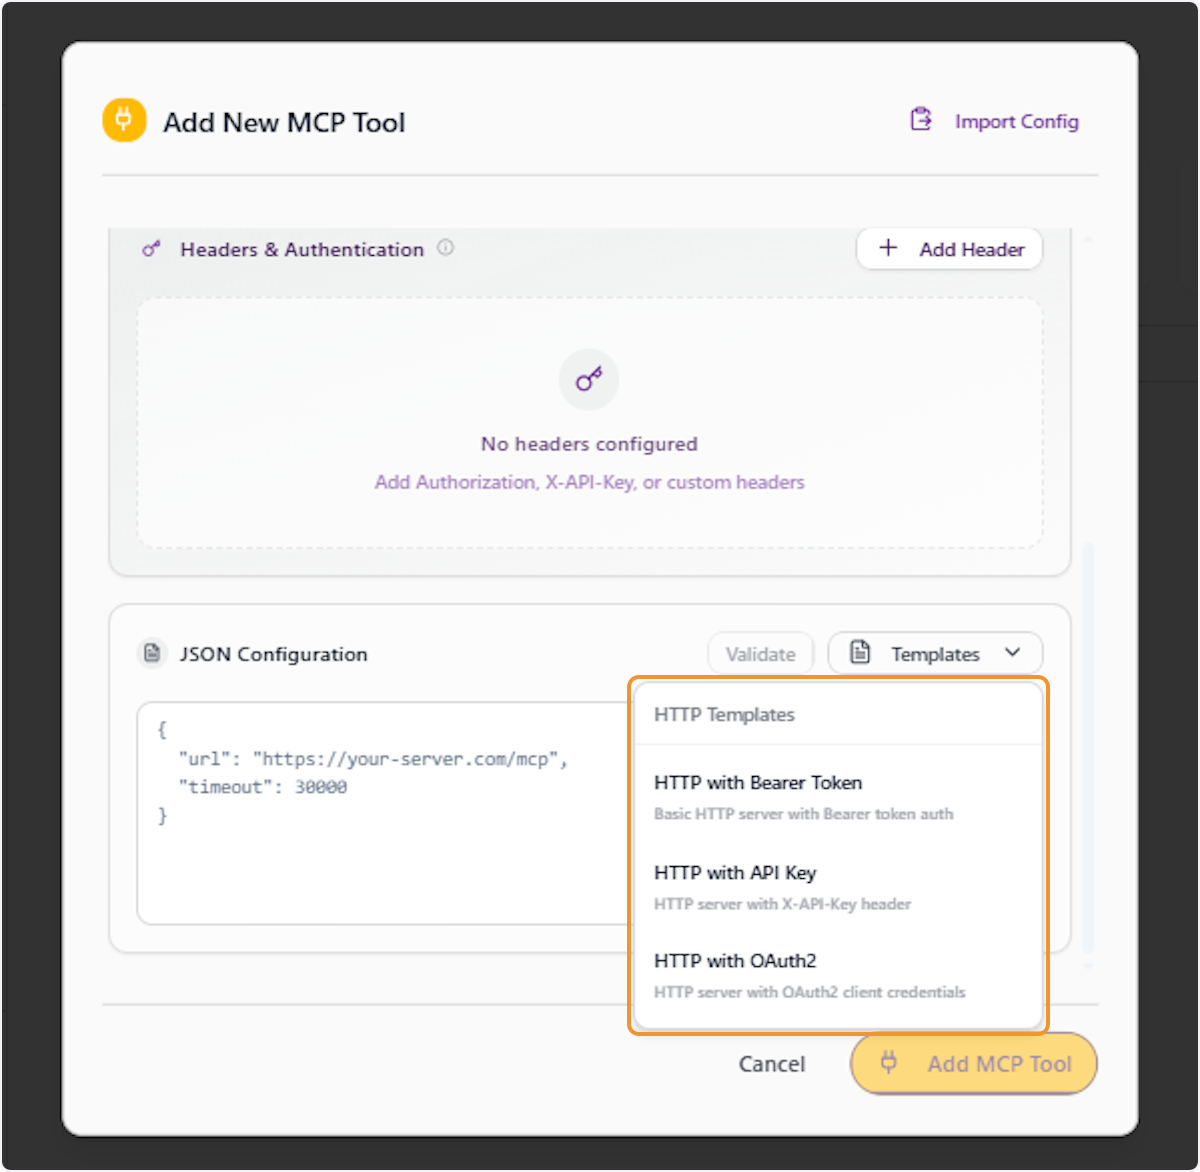
Review Available HTTP Templates
The Templates dropdown will display a list of HTTP Templates including ‘HTTP with Bearer Token’, ‘HTTP with API Key’, and ‘HTTP with OAuth2’. Select the template that matches your MCP server’s authentication method to auto-populate the configuration fields.
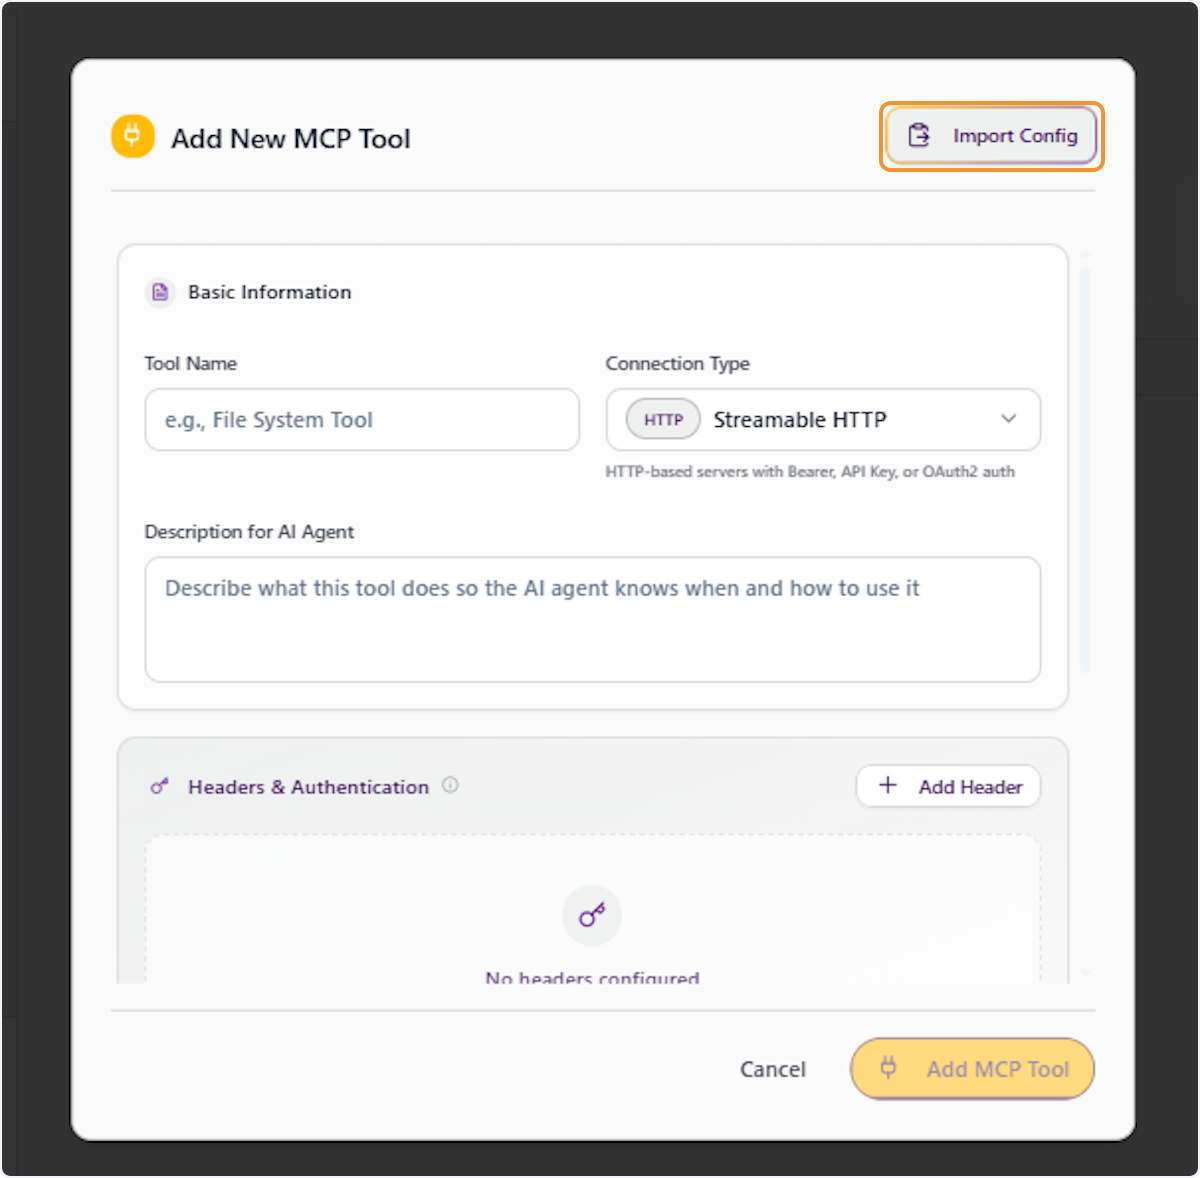
Use Import Config to Load an Existing Configuration
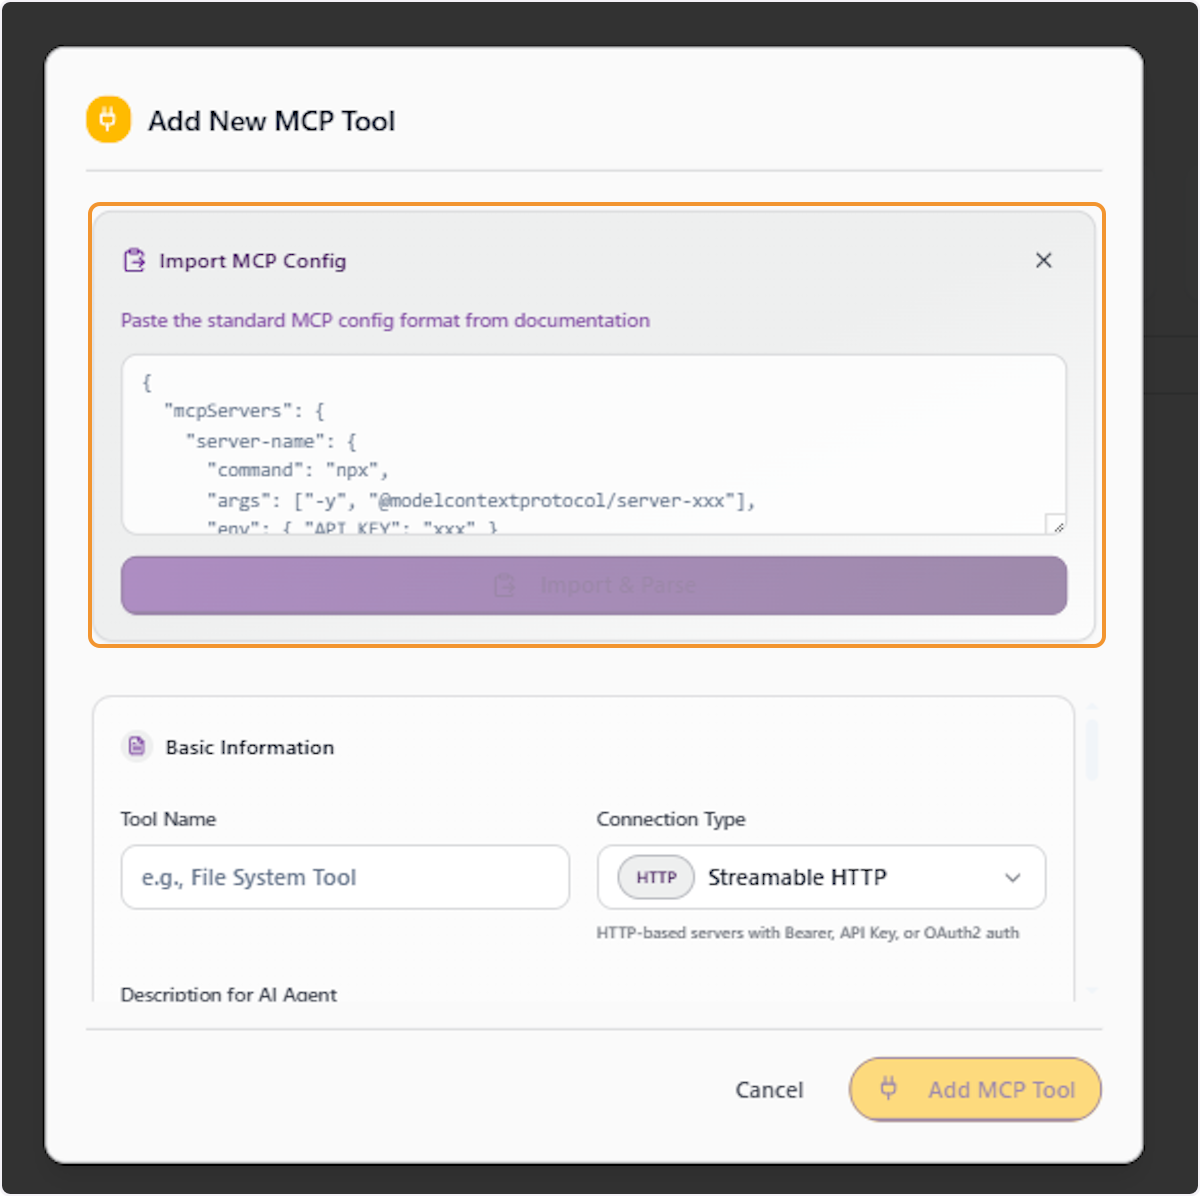
Click the ‘Import Config’ button at the top of the MCP Tool form to load an existing MCP configuration. This is useful when you have a previously exported configuration or a standard MCP config from documentation that you want to reuse.
Paste the MCP Configuration into the Import Panel
The ‘Import MCP Config’ panel will open with a text area. Paste the standard MCP config format from your documentation into this field. The system will parse the configuration and populate the relevant form fields automatically.
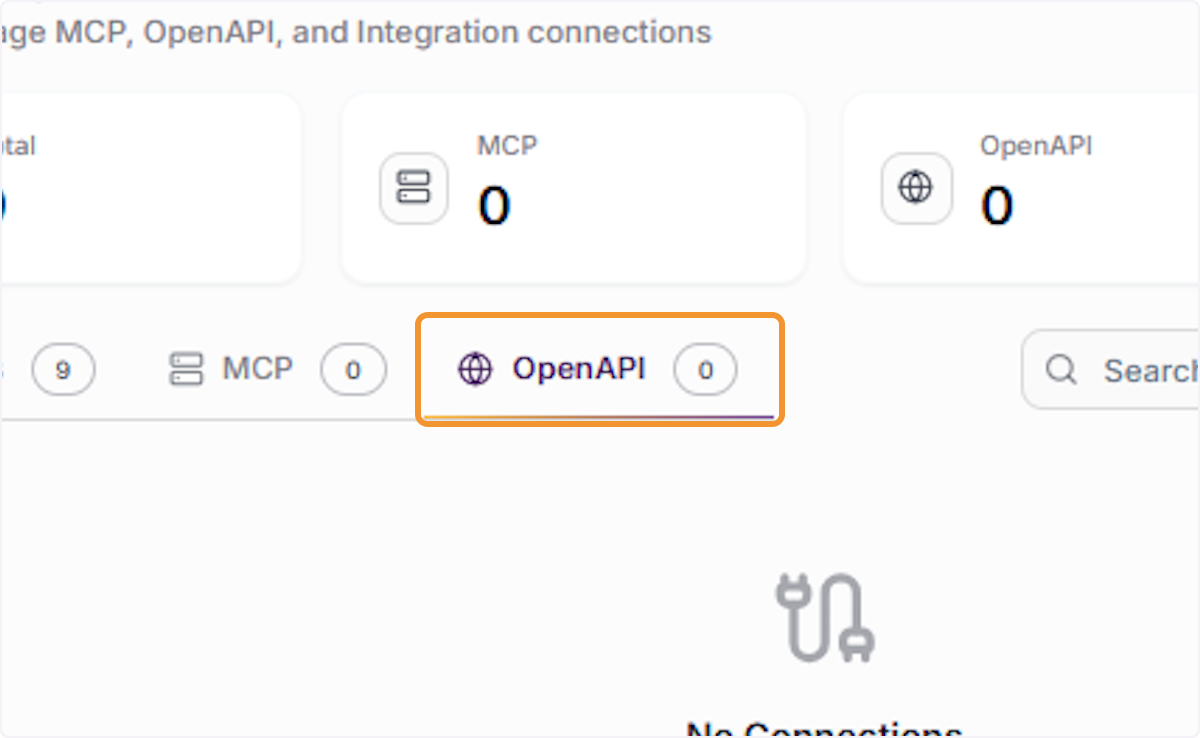
Click the ‘OpenAPI’ tab on the Integrations dashboard to access the OpenAPI connections section. This area is used to connect APIs that follow the OpenAPI specification, enabling AI agents to interact with REST APIs directly.
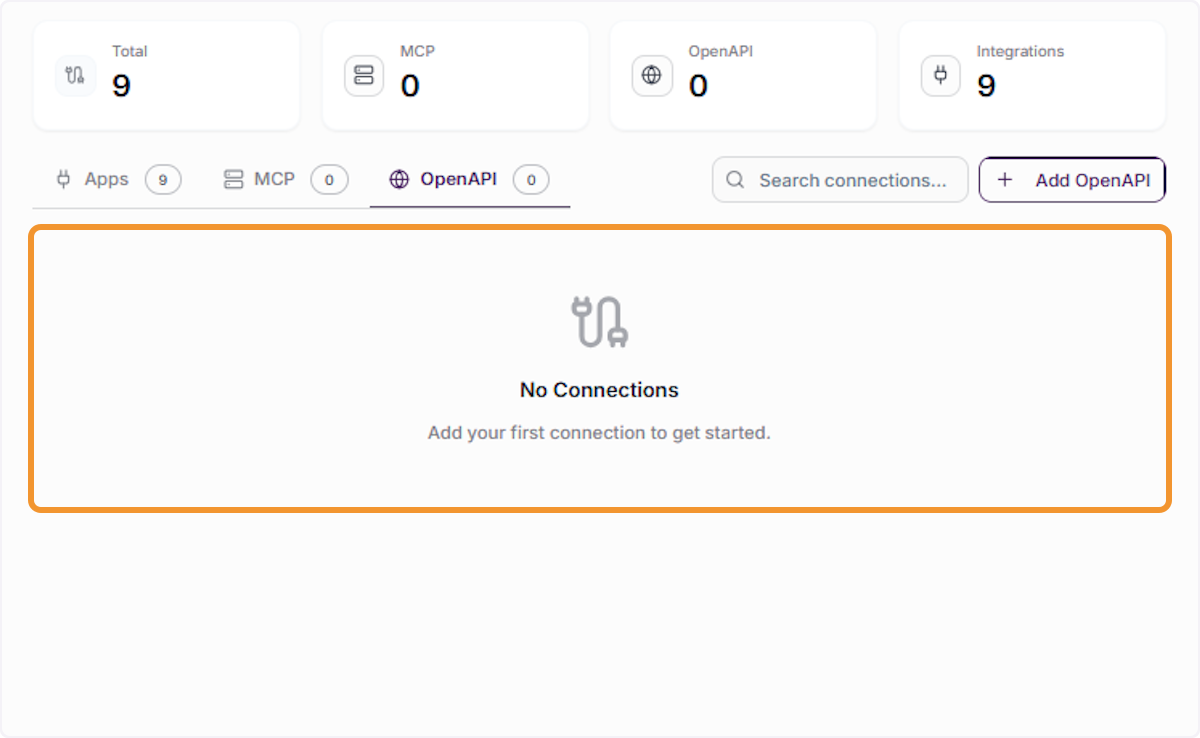
Review the OpenAPI Connections Panel
The OpenAPI tab will display a ‘No Connections’ state if no OpenAPI specs have been added yet. This confirms that the section is ready for a new connection. Click ’+ Add OpenAPI’ to begin adding your first OpenAPI specification.
Enter the OpenAPI Specification URL
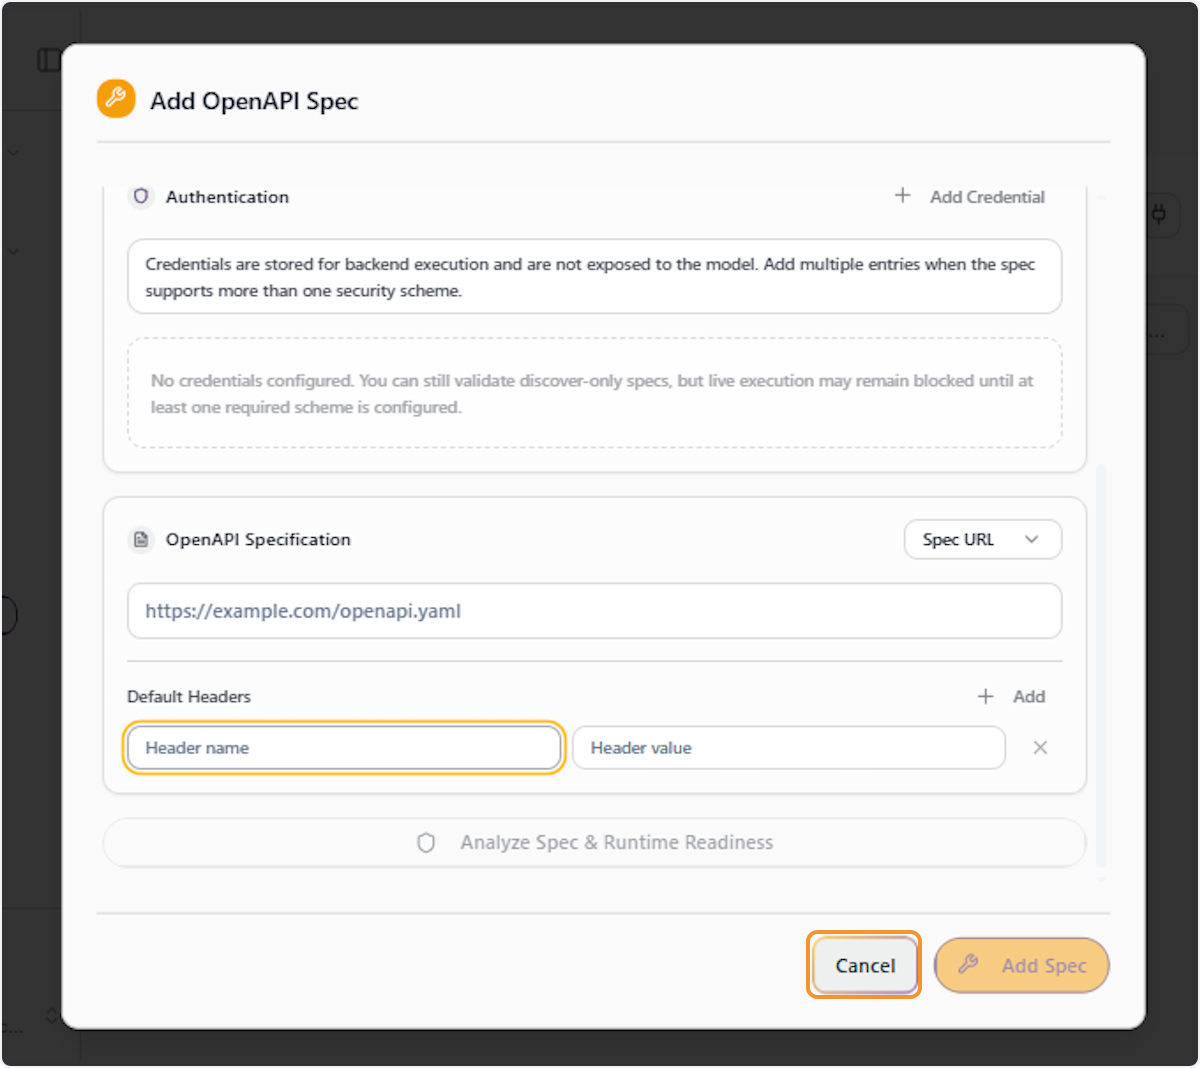
In the Add OpenAPI Spec form, locate the ‘Spec URL’ input field under the OpenAPI Specification section. Enter the URL pointing to your API’s OpenAPI specification file (e.g., https://example.com/openapi.yaml). This URL is used to discover and validate the API’s endpoints and schemas.
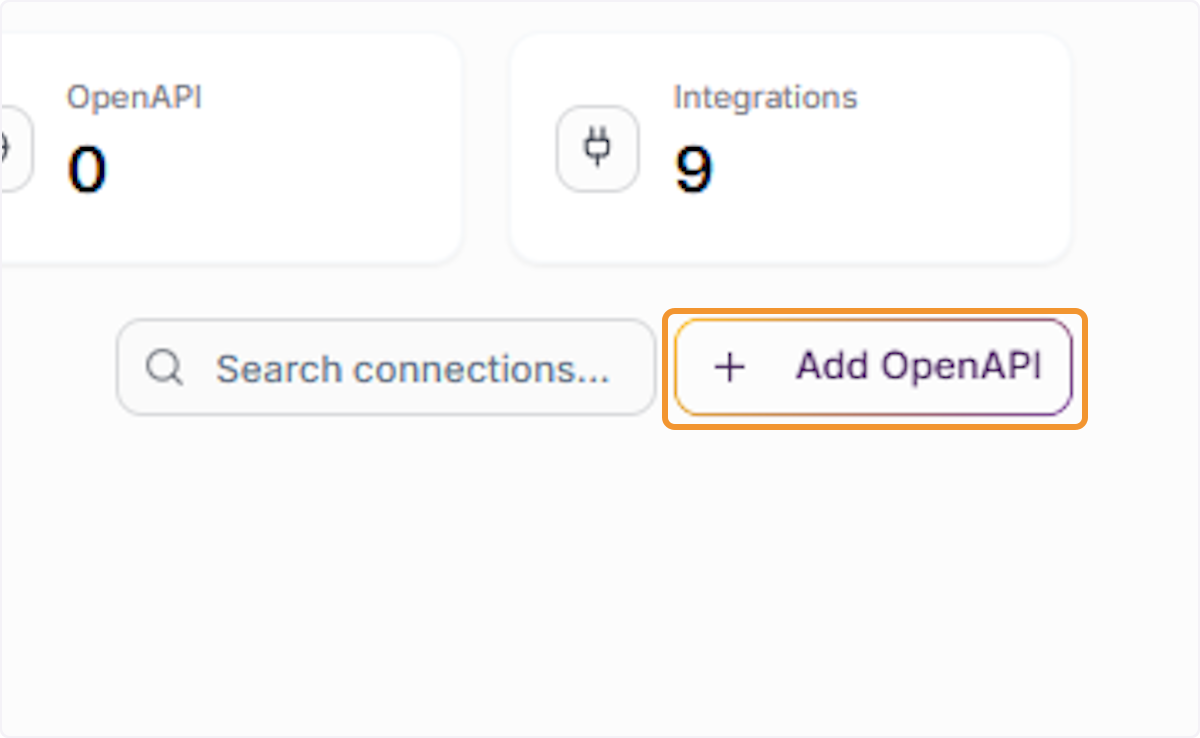
Click Add OpenAPI to Begin Configuration
Click the ’+ Add OpenAPI’ button in the top-right corner of the OpenAPI tab to open the Add OpenAPI Spec form. This initiates the process of registering a new API specification with the platform.
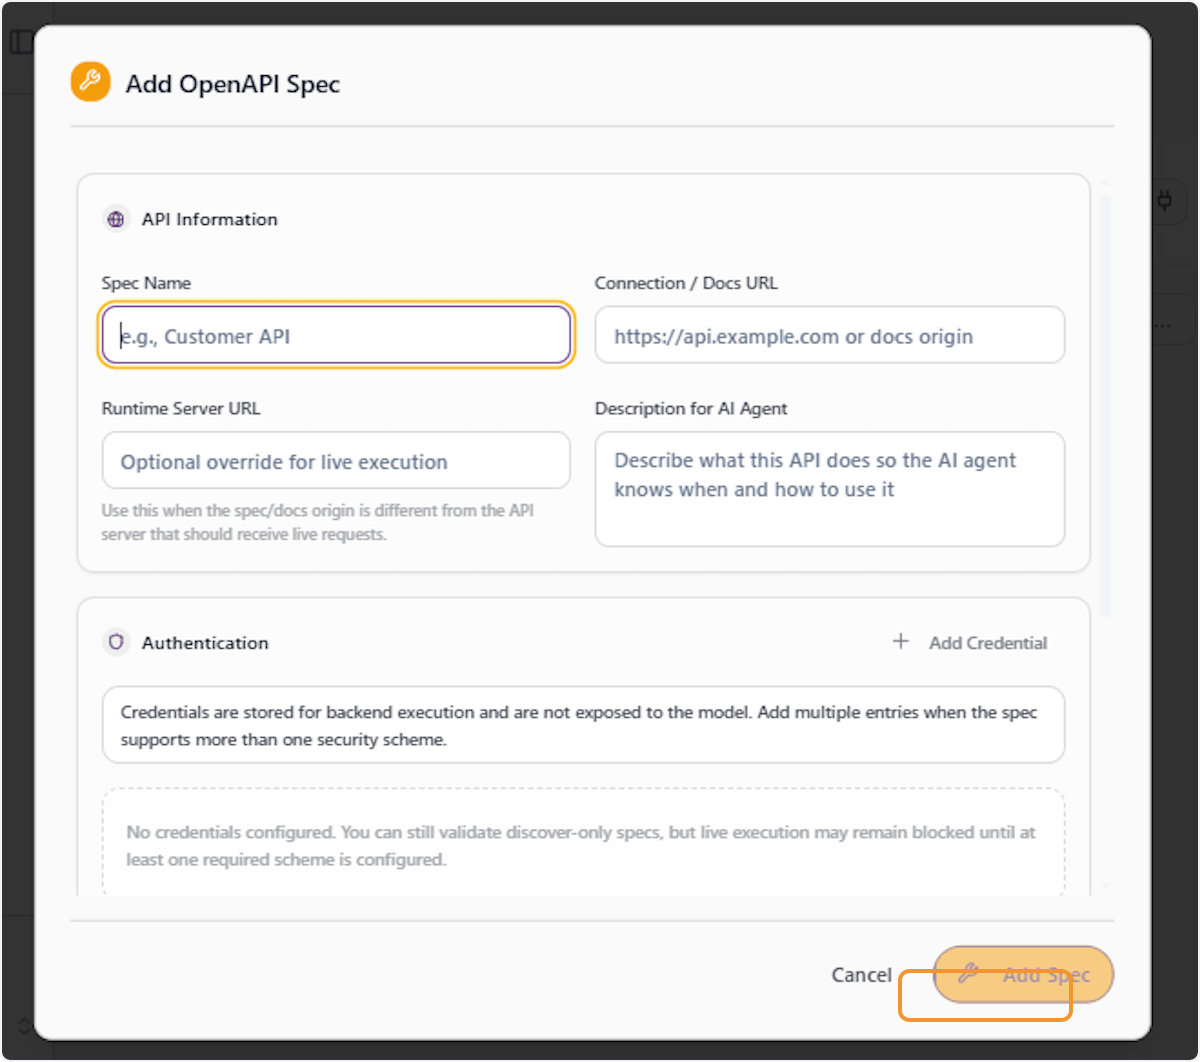
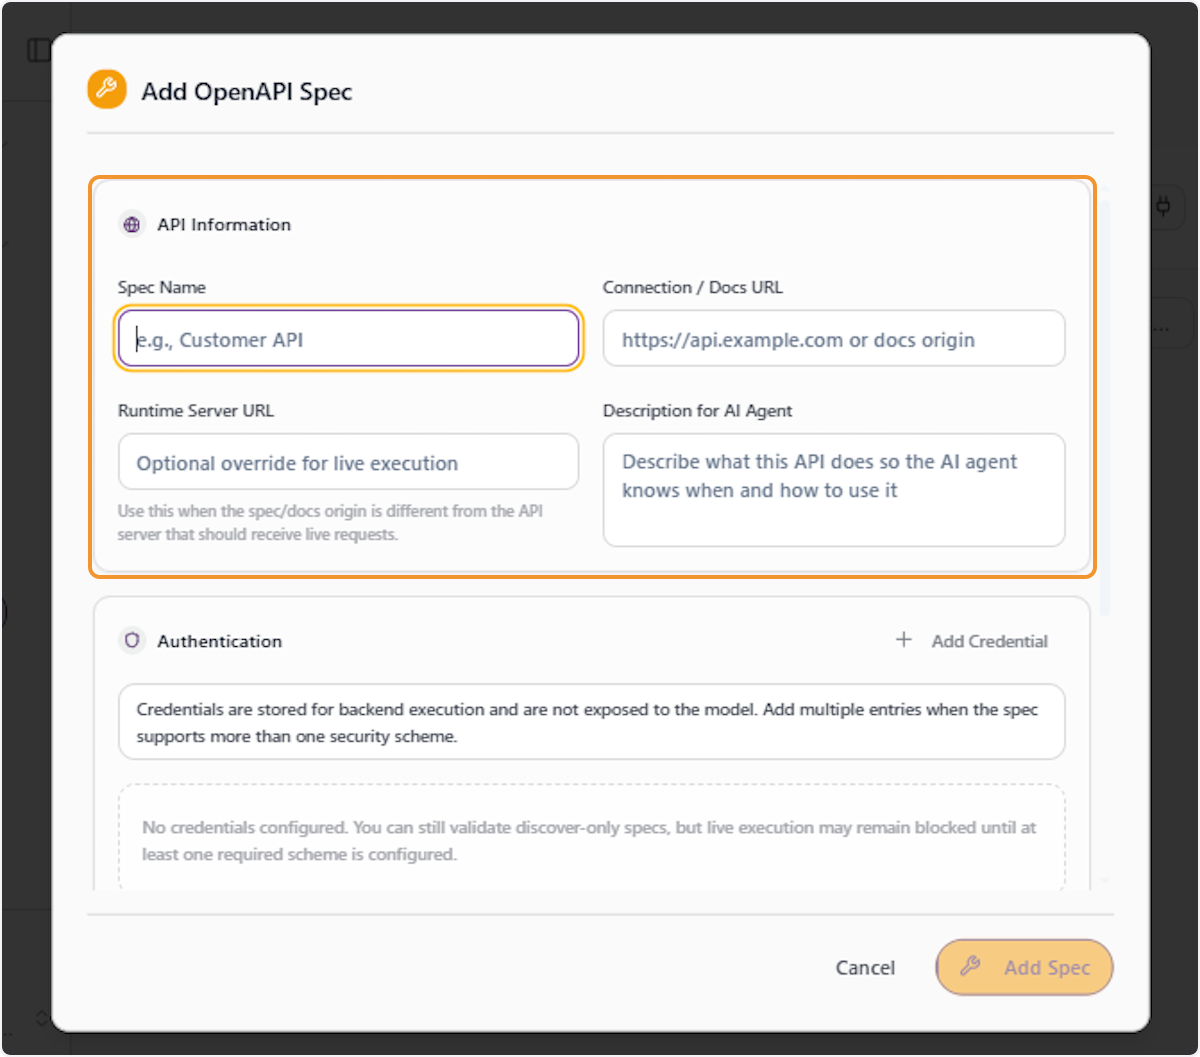
Fill in the API Information Section
In the ‘Add OpenAPI Spec’ form, complete the ‘API Information’ section by entering the Spec Name, Connection/Docs URL, Runtime Server URL (if different from the spec origin), and a description for the AI Agent explaining what this API does and when to use it.
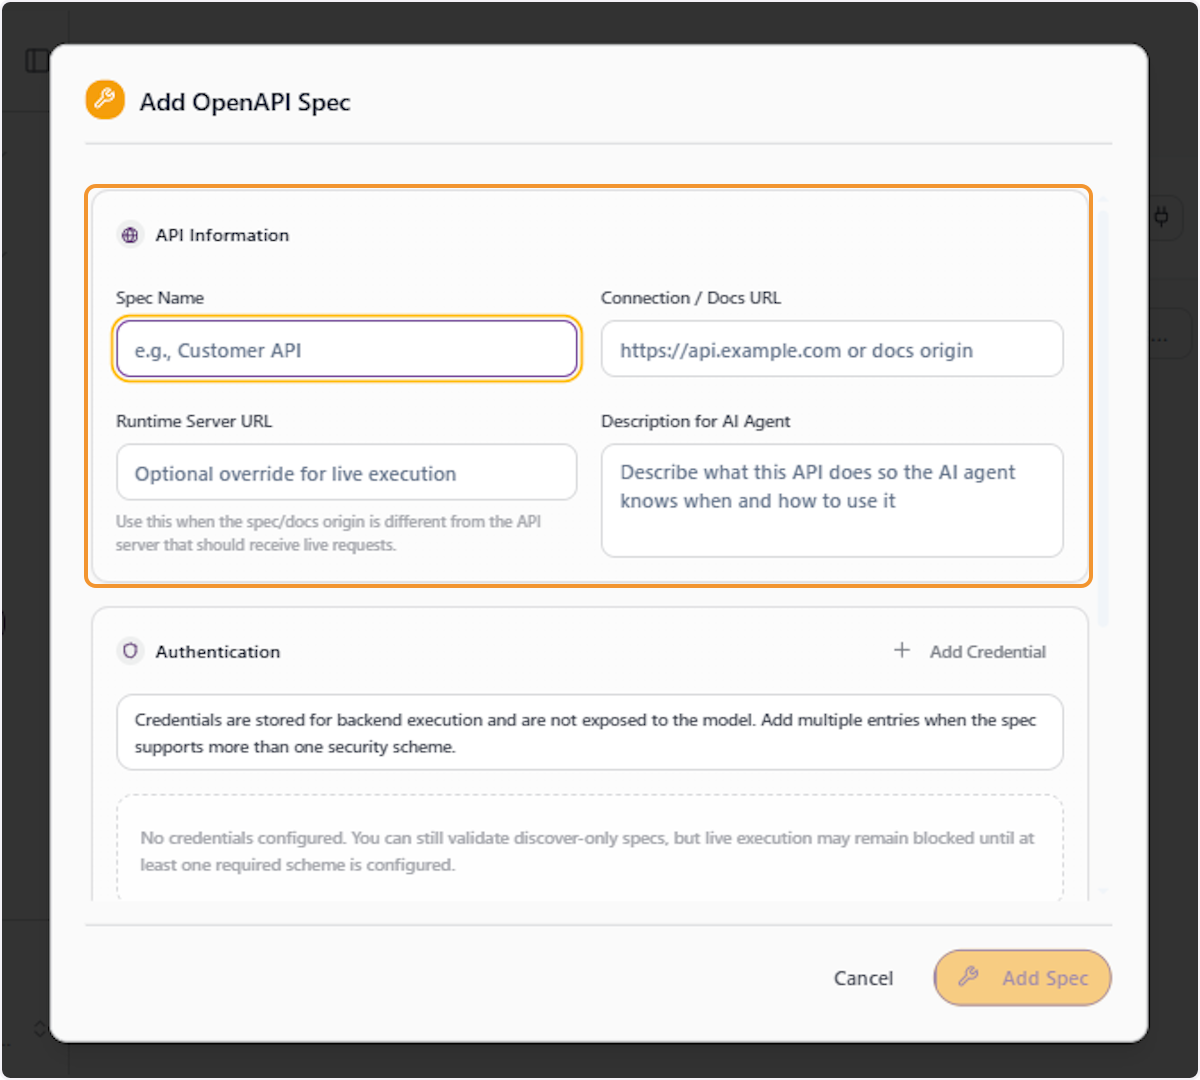
Review All API Information Fields
Review all the fields in the API Information section to ensure they are accurate. The Spec Name identifies the integration, the Connection URL points to the API documentation, and the AI Agent description ensures the agent understands the API’s purpose and appropriate use cases.
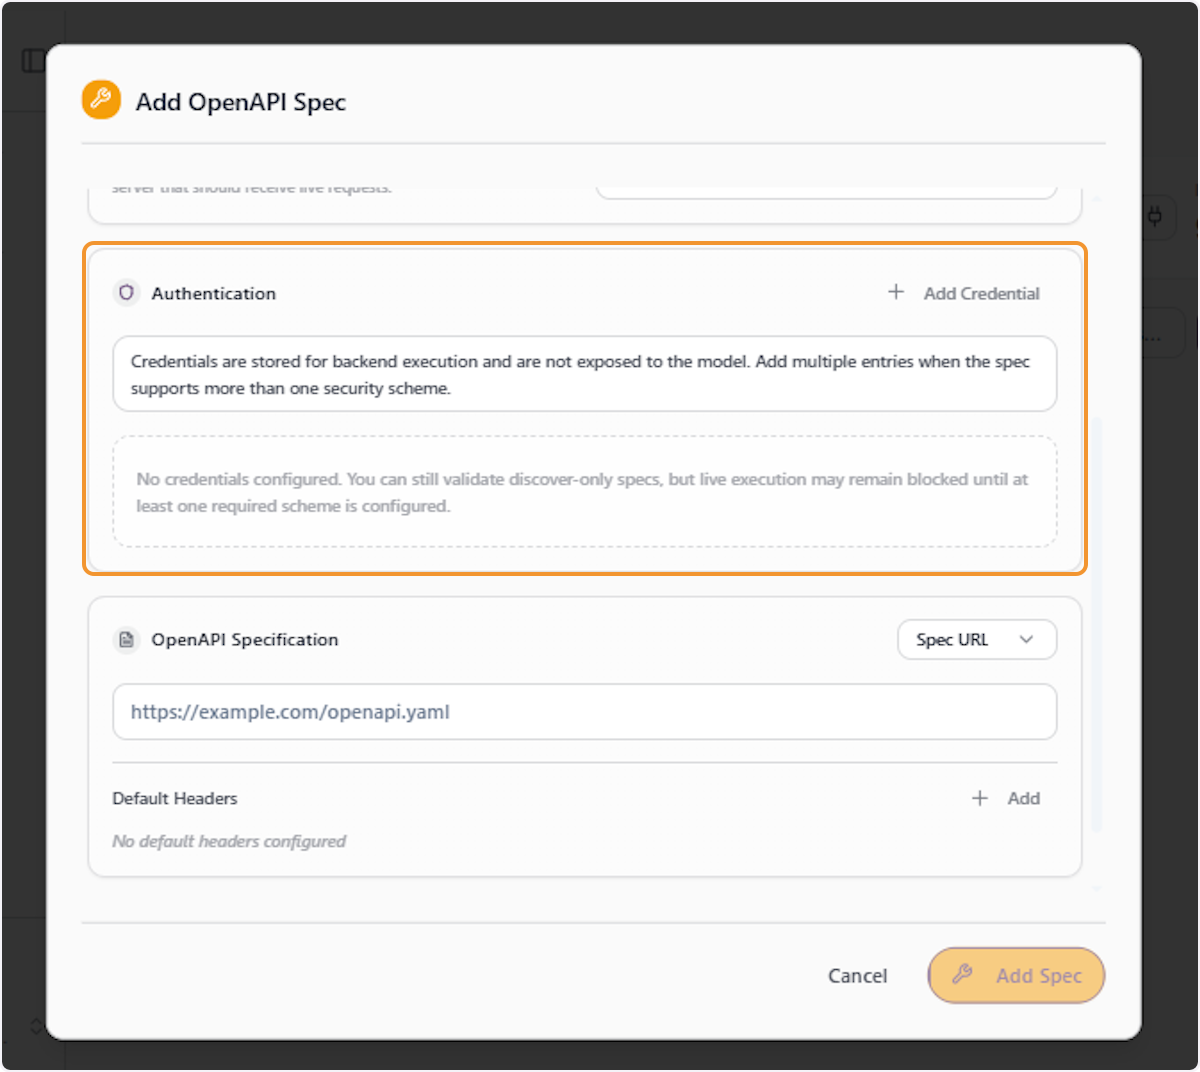
Review the Authentication Section
Scroll down to the ‘Authentication’ section of the form. This section stores credentials securely for backend execution without exposing them to the AI model. Click ’+ Add Credential’ if authentication is required for your API, or note the warning if no credentials have been configured yet.
Click on the Spec Source Type Dropdown
Locate the ‘OpenAPI Specification’ section and click on the source type dropdown (currently showing ‘Spec URL’). This allows you to choose how the OpenAPI specification will be provided — via a URL, raw JSON, or YAML content.
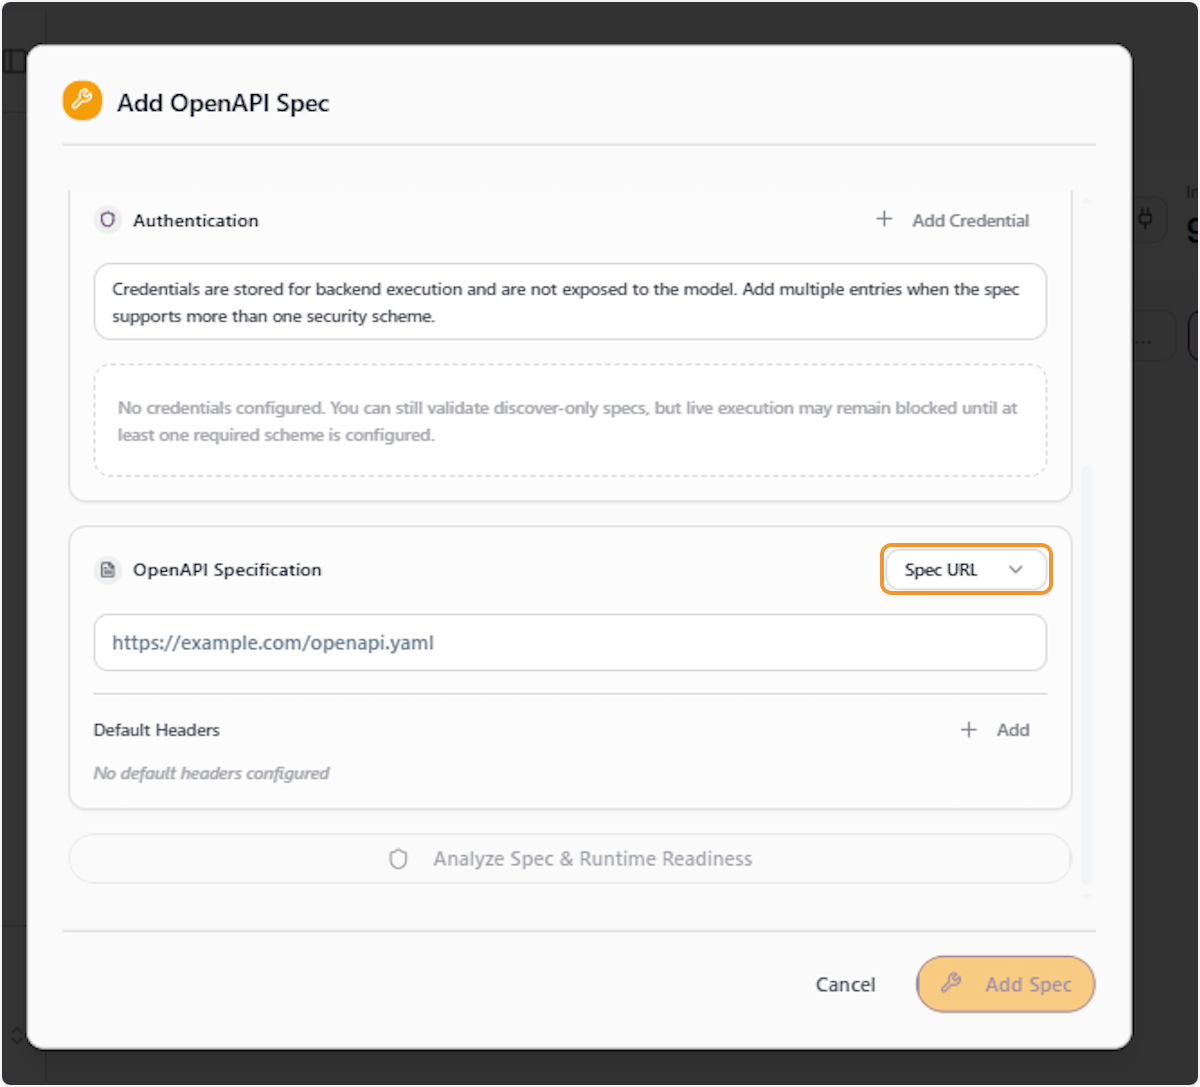
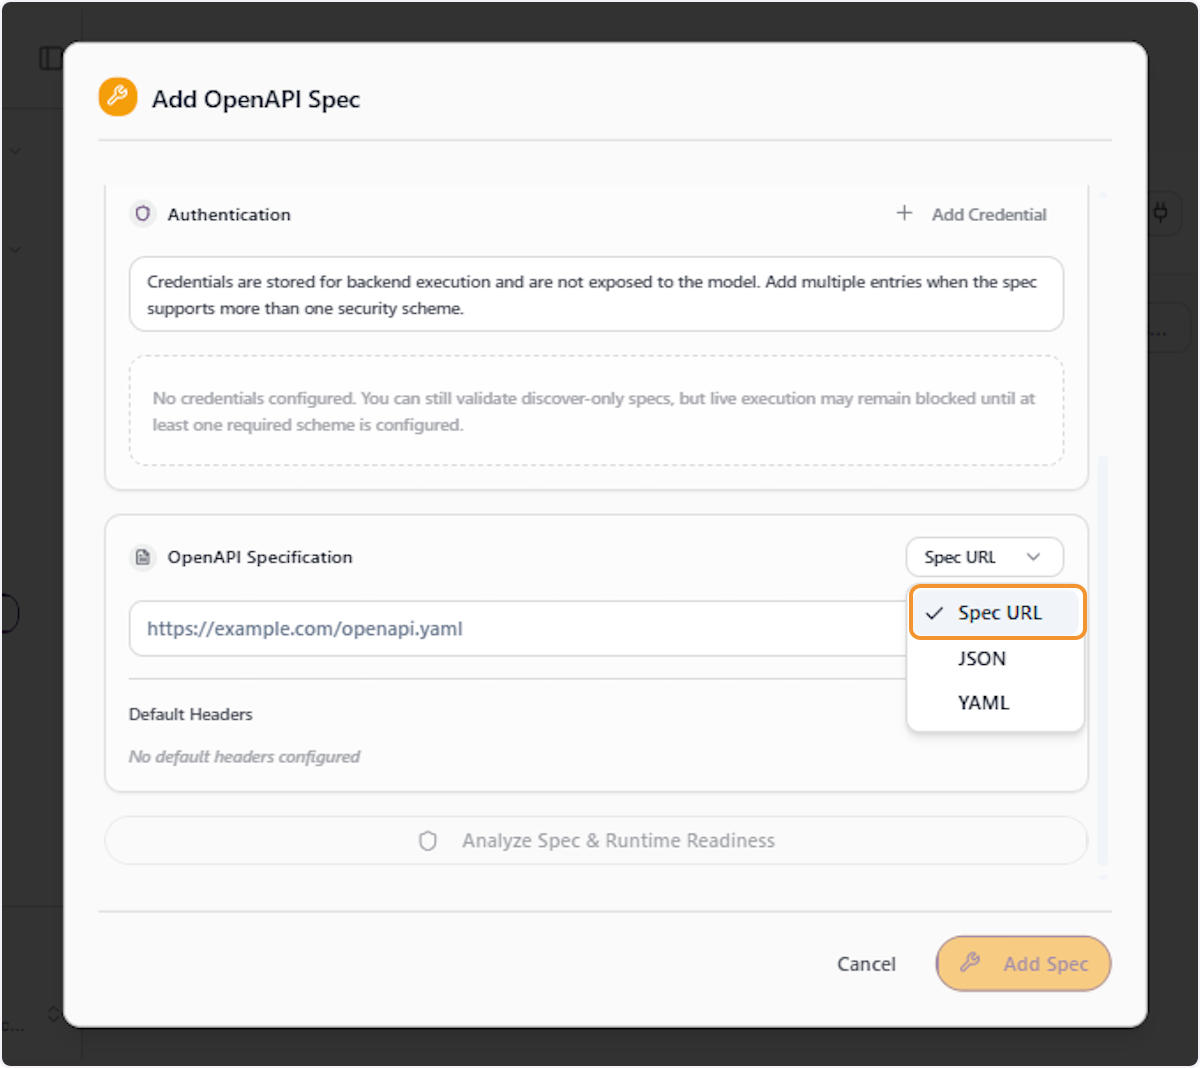
Select the Specification Input Format
The dropdown will reveal three options: ‘Spec URL’ (link to a hosted spec file), ‘JSON’ (paste raw JSON content), and ‘YAML’ (paste raw YAML content). Select the format that best matches how your API specification is available.
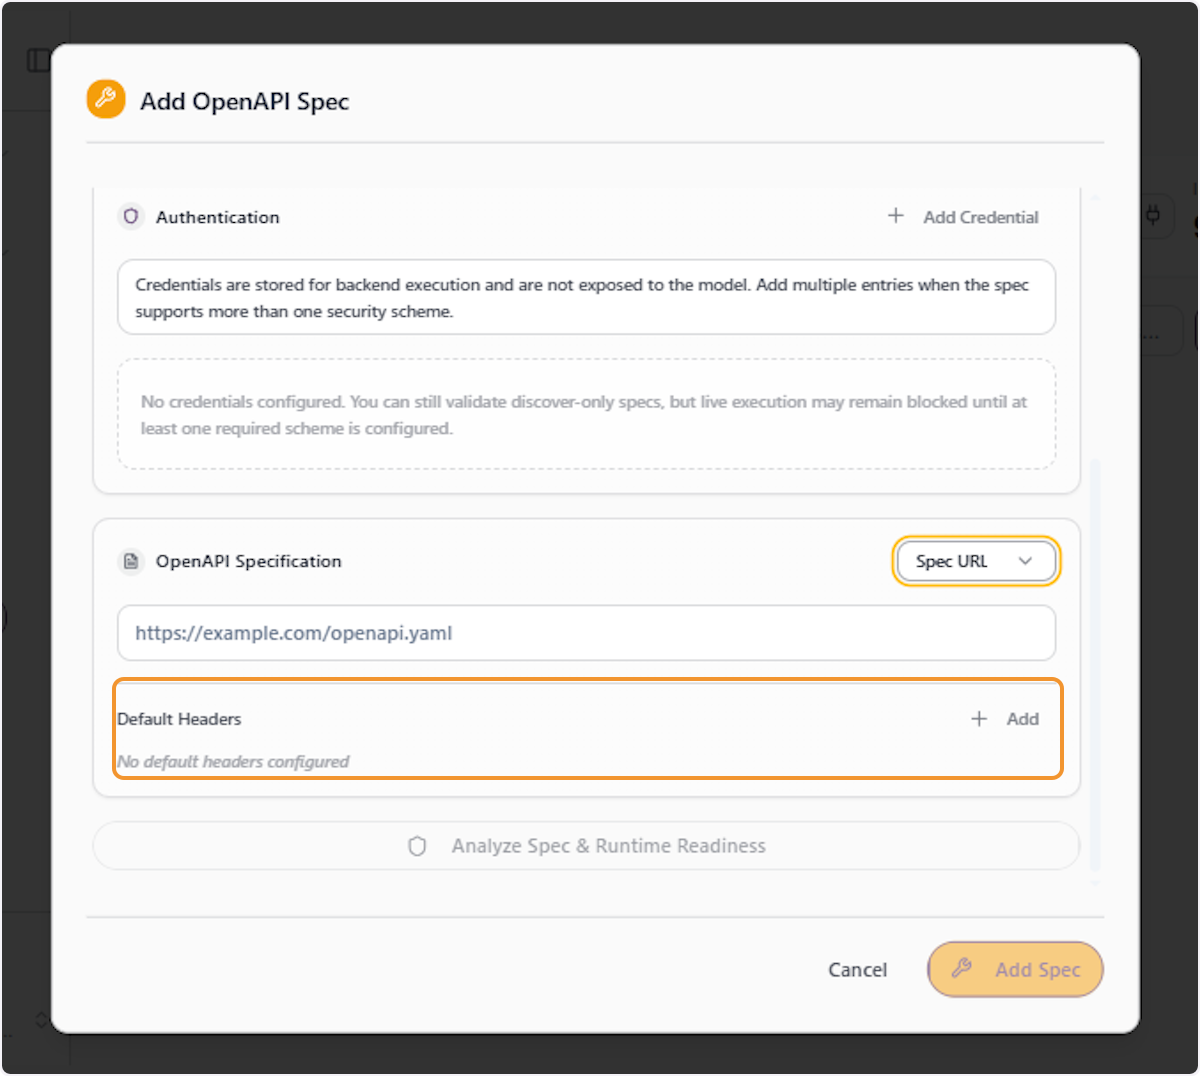
Review the Default Headers Section
Scroll to the ‘Default Headers’ section of the OpenAPI Spec form. This section allows you to define HTTP headers that will be sent with every request to the API. Click ’+ Add’ to configure headers such as authorization tokens, content types, or custom metadata.
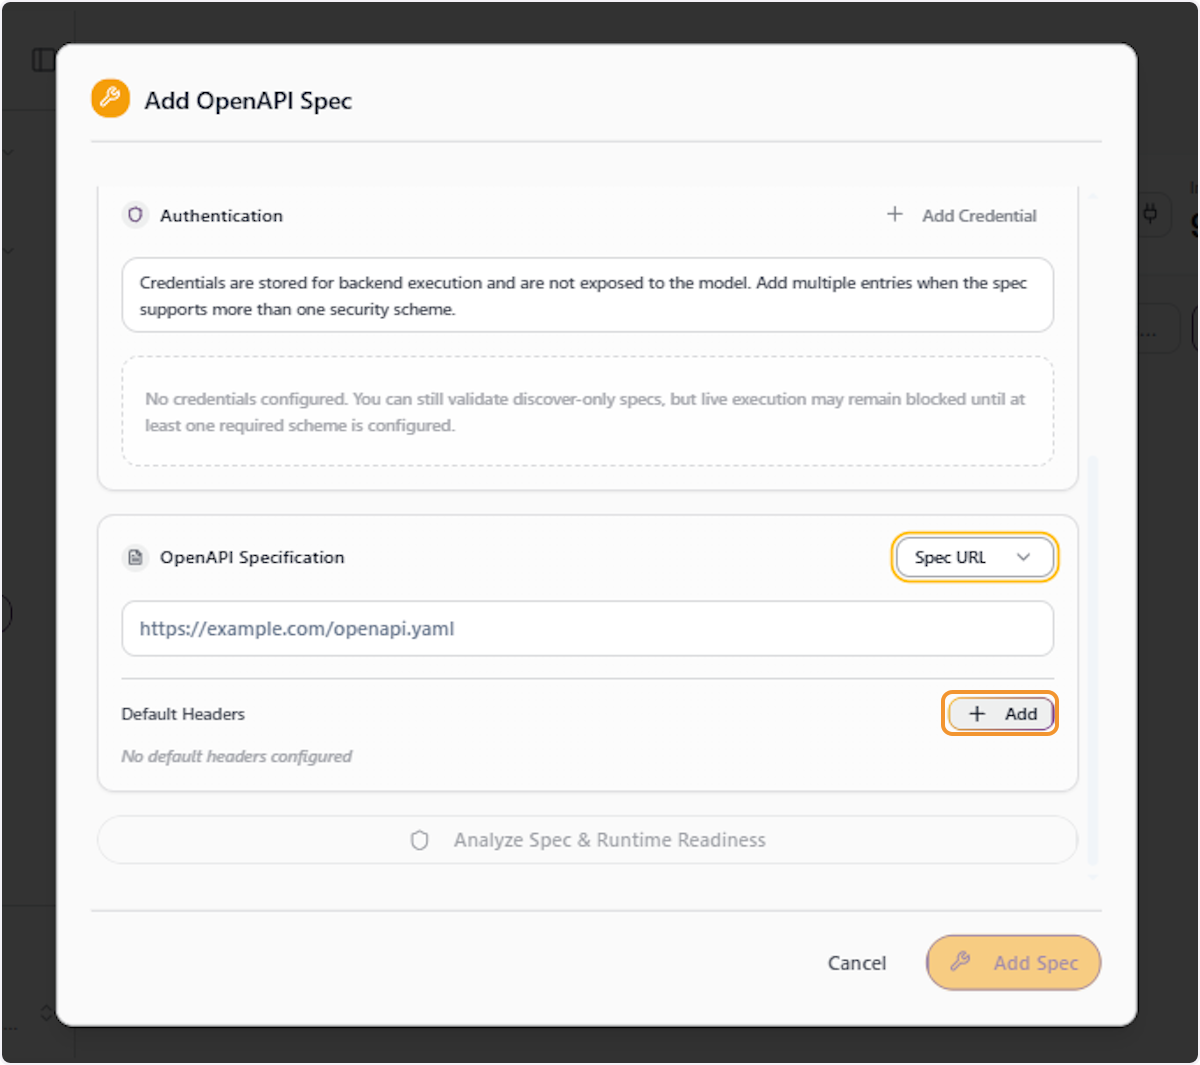
Click Add to Configure a Default Header
Click the ’+ Add’ button within the Default Headers section to open the header input fields. Each header requires a name and a corresponding value, which will be automatically included in all requests made to this API integration.
Enter the Header Name and Value
With the header row now visible, click on the ‘Header name’ field and type the name of the HTTP header you wish to add (e.g., Authorization, X-API-Key). Then click the adjacent ‘Header value’ field and enter the corresponding value for that header.
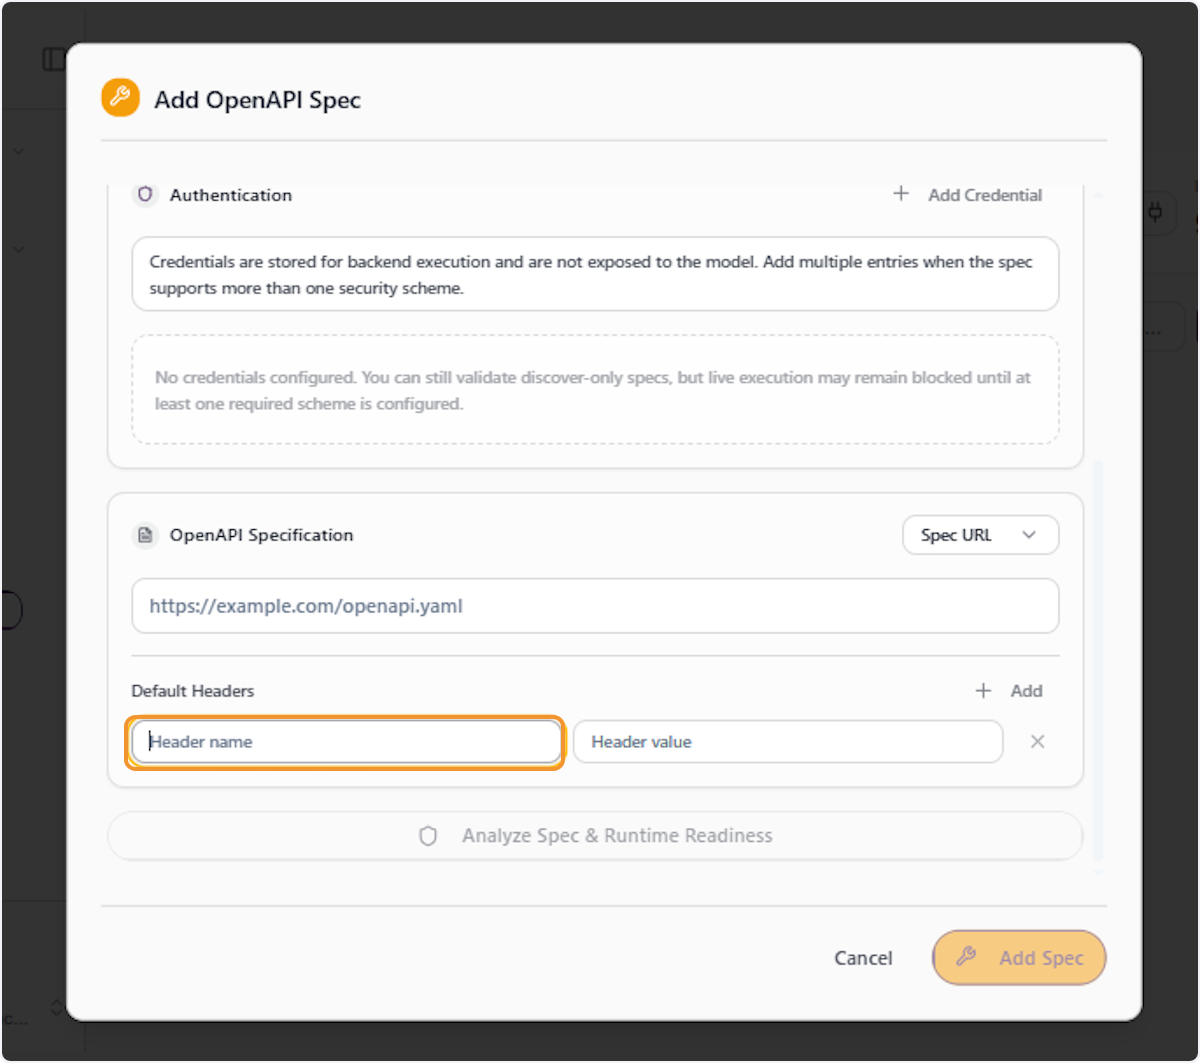
Cancel or Save the OpenAPI Spec Configuration
Once you have reviewed all configuration fields, click ‘Add Spec’ to save the OpenAPI integration, or click ‘Cancel’ to discard changes and exit the form without saving. Clicking ‘Add Spec’ will register the API with the platform and make it available for use by AI agents