Copilot — Workspace Access
Navigation and Workspace Access
Access the Workspaces Section
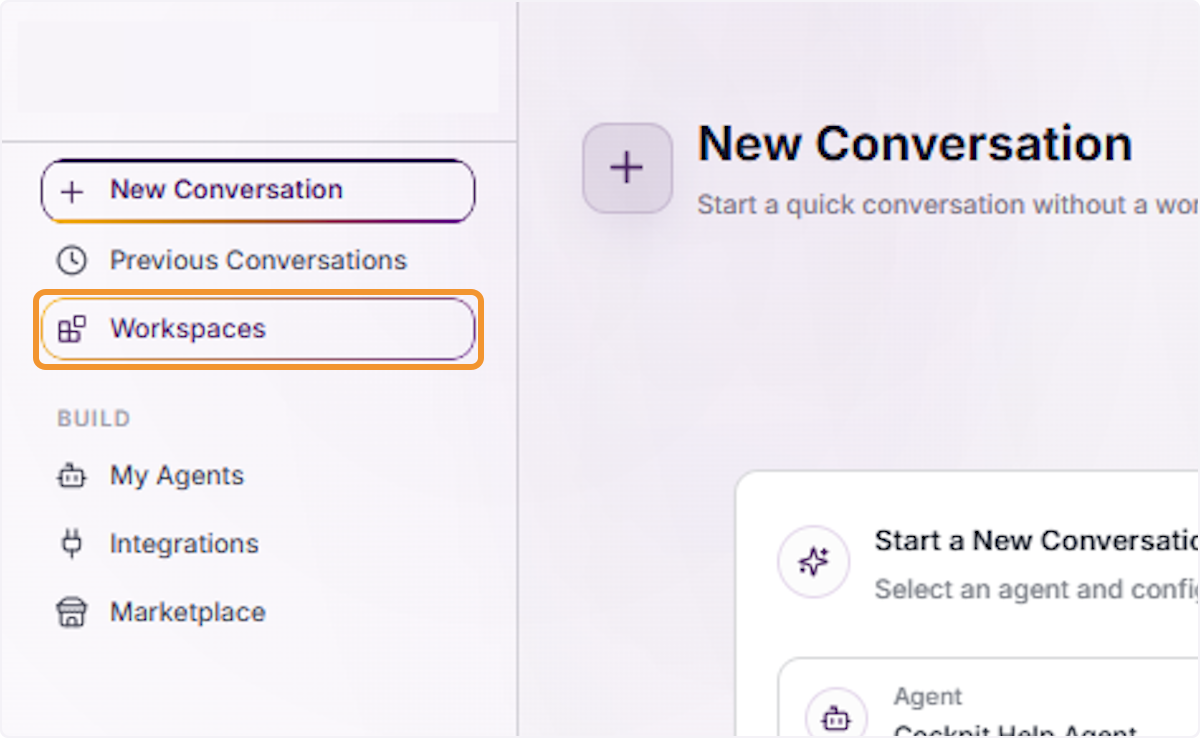
From the main navigation panel on the left side of the Orchestra AI interface, locate and click the ‘Workspaces’ option. This will open the Workspaces hub where you can create, manage, and access all your collaborative AI-powered spaces.
Initiate a New Workspace Creation
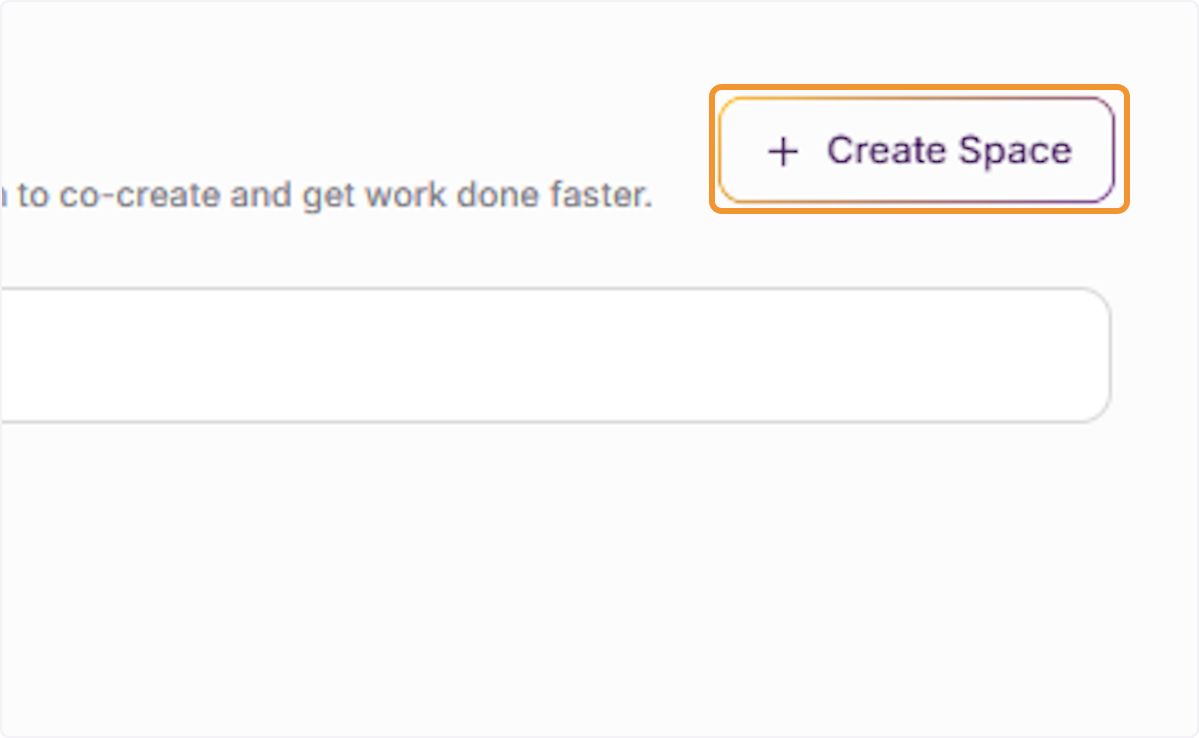
Click the ’+ Create Space’ button located in the upper-right corner of the Workspaces screen. This action launches the workspace creation flow, allowing you to set up a new collaborative environment where AI agents will work alongside your team.
View All Your Workspaces
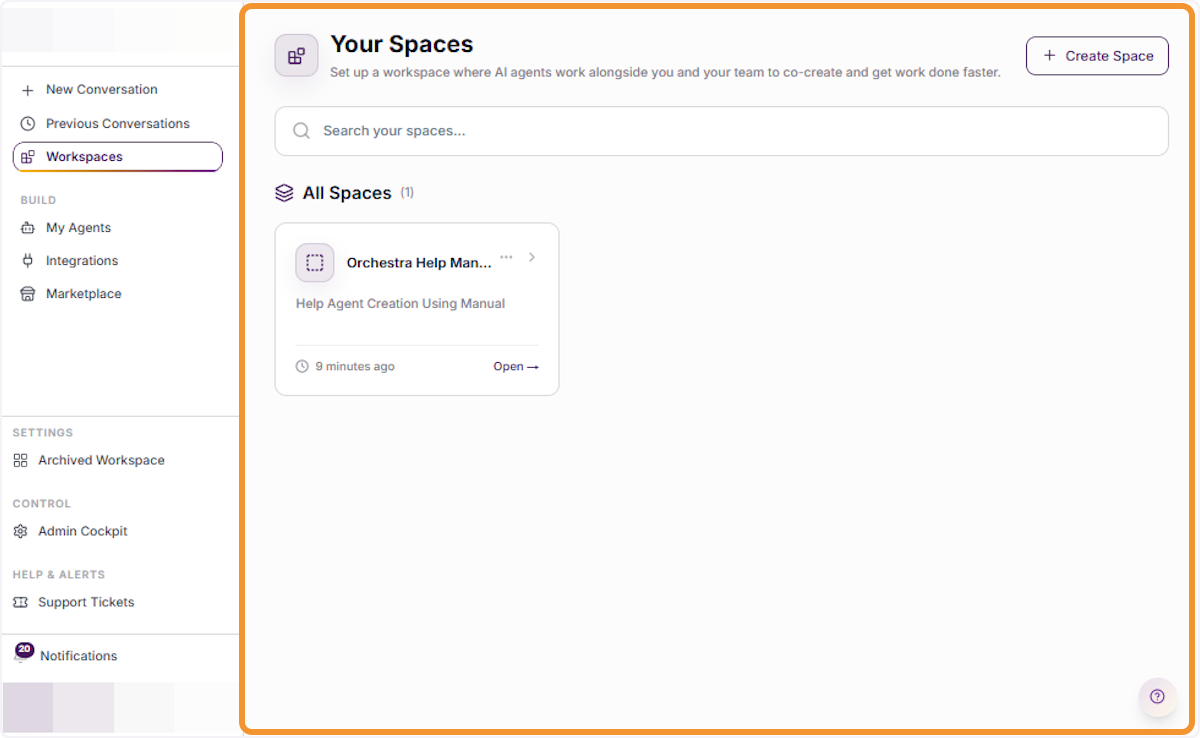
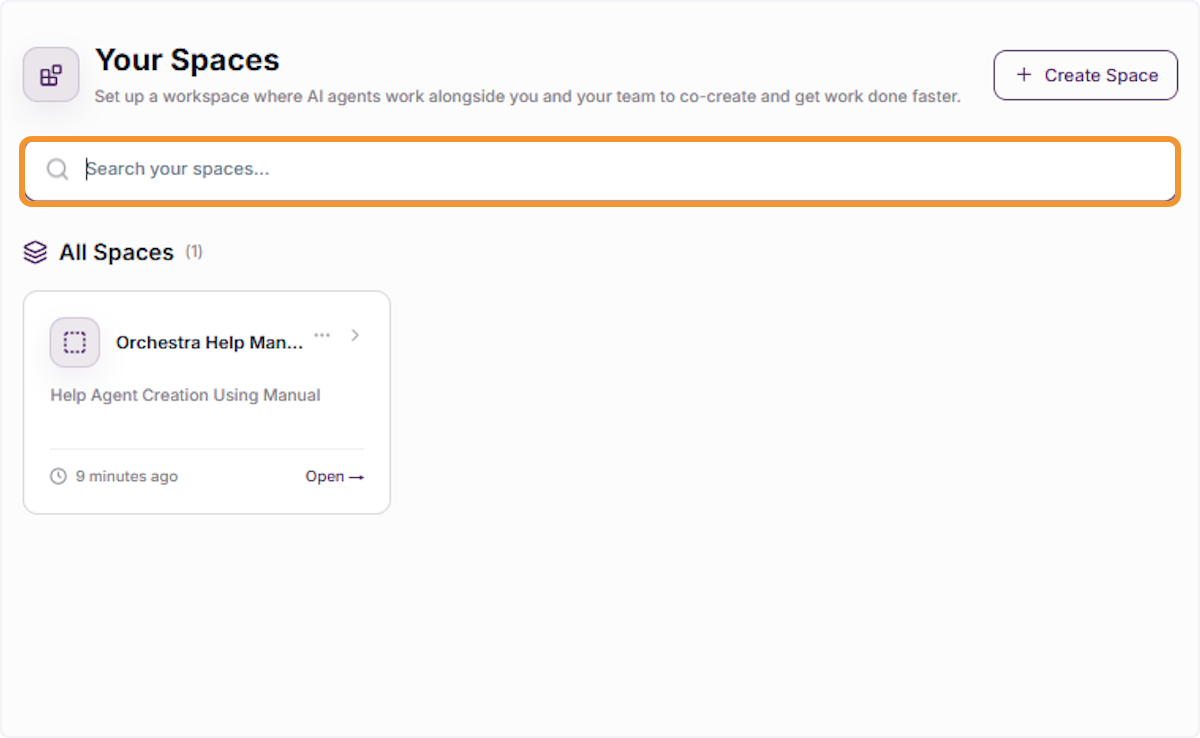
The ‘Your Spaces’ panel displays all workspaces you own or have access to. Here you can search existing spaces, view recently updated workspaces, and manage your workspace portfolio. Use this view as your central hub for navigating between projects.
Search Within Your Workspaces
Click on the search field labeled ‘Search your spaces…’ to quickly locate a specific workspace by name or keyword. This is useful when you have multiple active workspaces and need to navigate efficiently without scrolling through the full list.
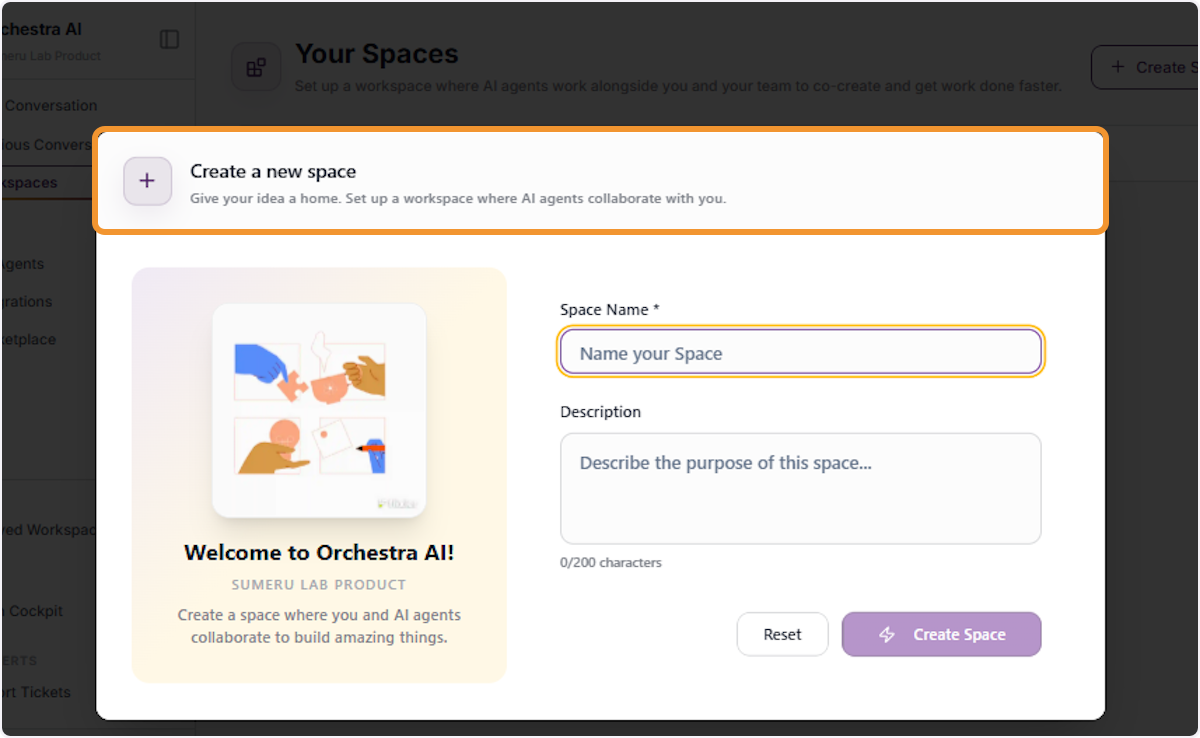
Open the New Space Creation Form
Select ‘Create a new space’ from the workspace panel or search dropdown. This opens the space creation form where you will provide a name and description for your new workspace, setting the foundation for your team’s collaborative environment.
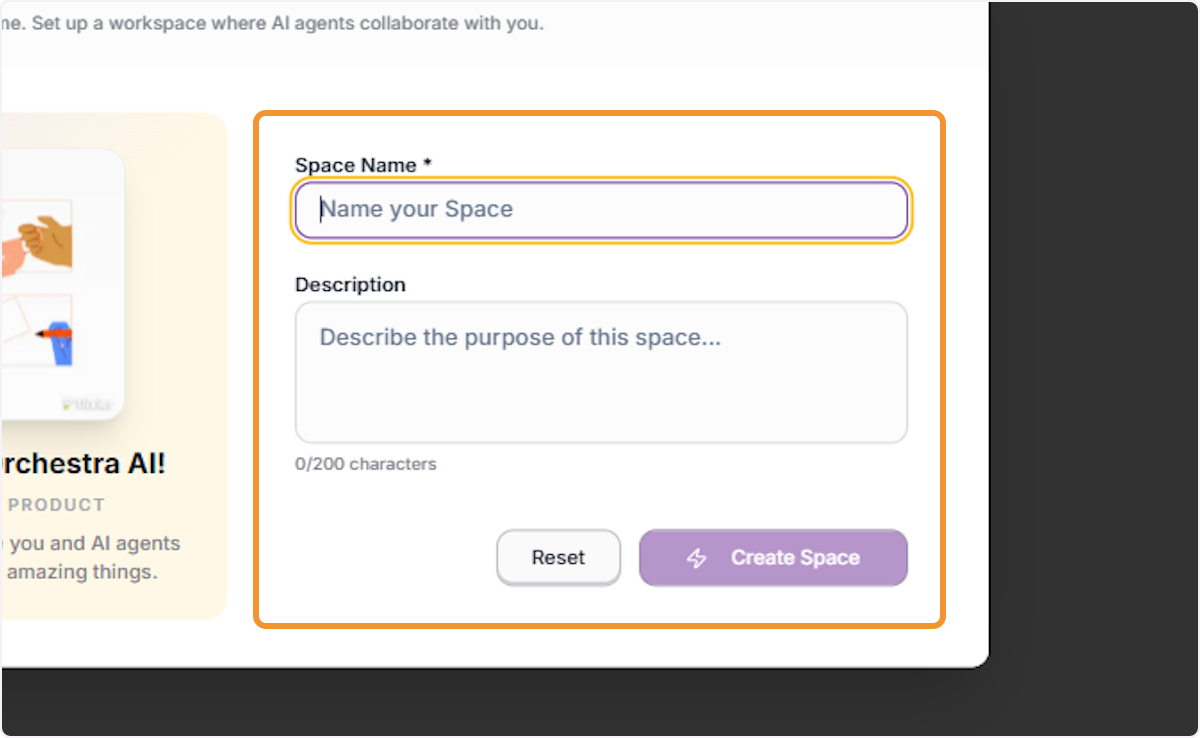
Focus on the Space Name Input
Click inside the ‘Space Name *’ text field to activate it. This is a required field. The name you enter will serve as the primary identifier for your workspace and will be visible to all members who are added to it.
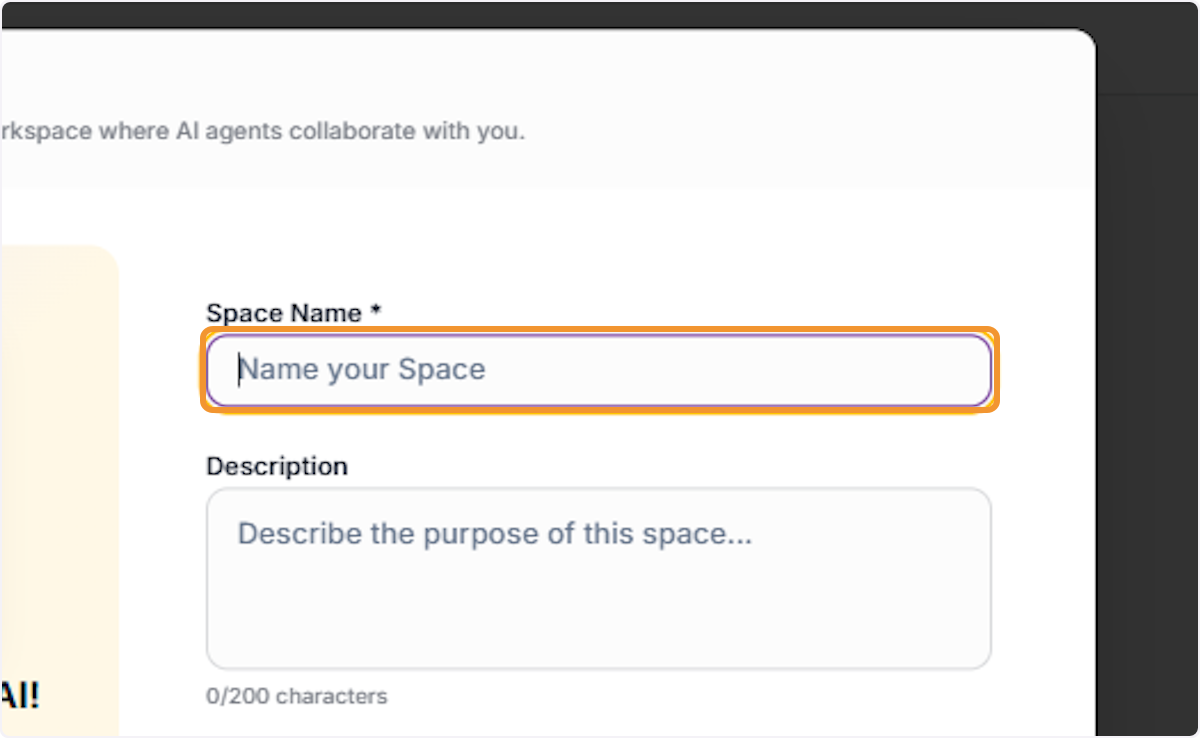
Enter Your Workspace Name
Type a clear, descriptive name for your workspace in the Space Name field. Choose a name that reflects the project, team, or purpose of the workspace (e.g., ‘Marketing Q3 Campaign’ or ‘Product Development Hub’) to make it easy for collaborators to identify.
Add a Workspace Description
Click into the ‘Description’ text area and enter a brief summary of the workspace’s purpose. A good description helps team members understand the workspace’s goals and scope. You have up to 200 characters to describe the intent and context of this space.
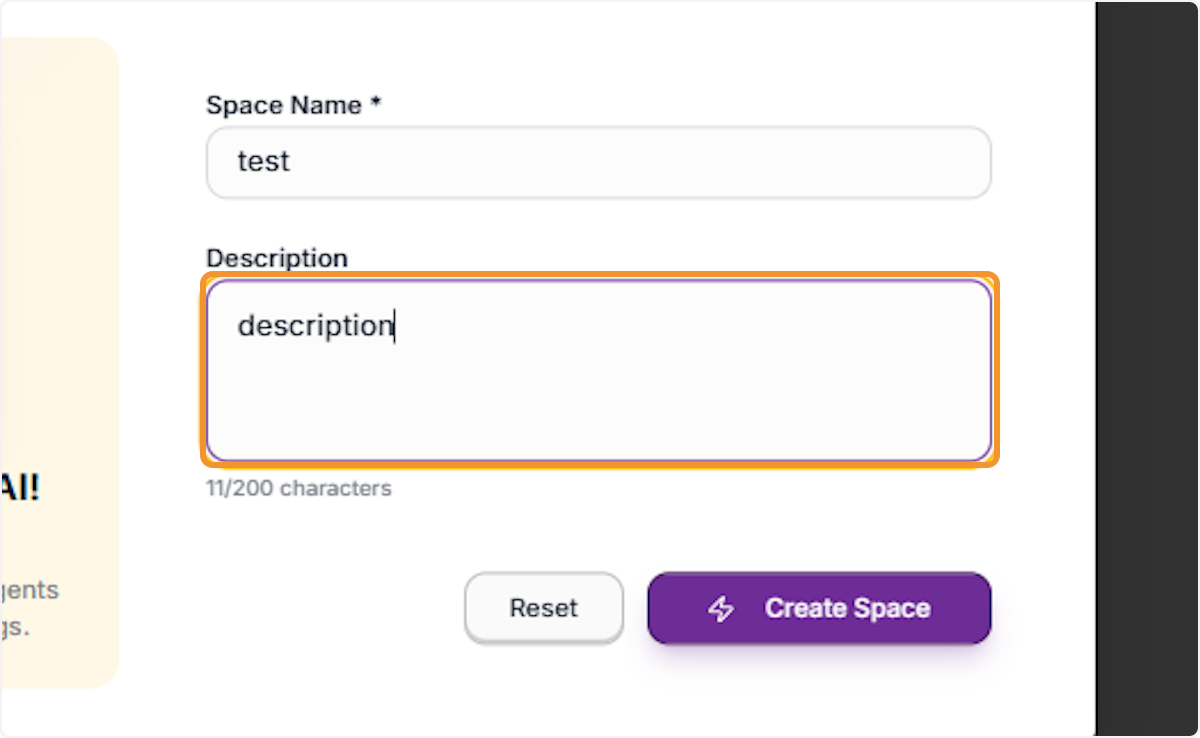
Confirm and Create the Workspace
After filling in the Space Name and Description, click the ’+ Create Space’ button to finalize the creation. The system will process your request and generate the new workspace, making it immediately available for configuration and team collaboration.
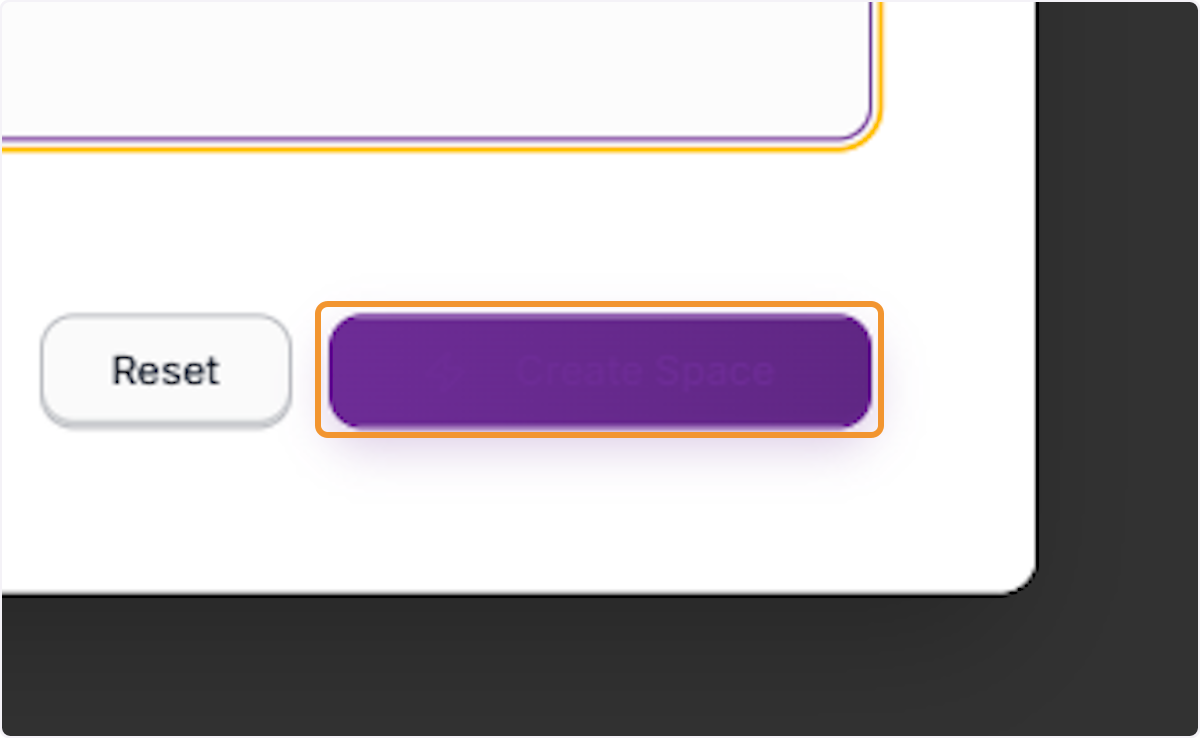
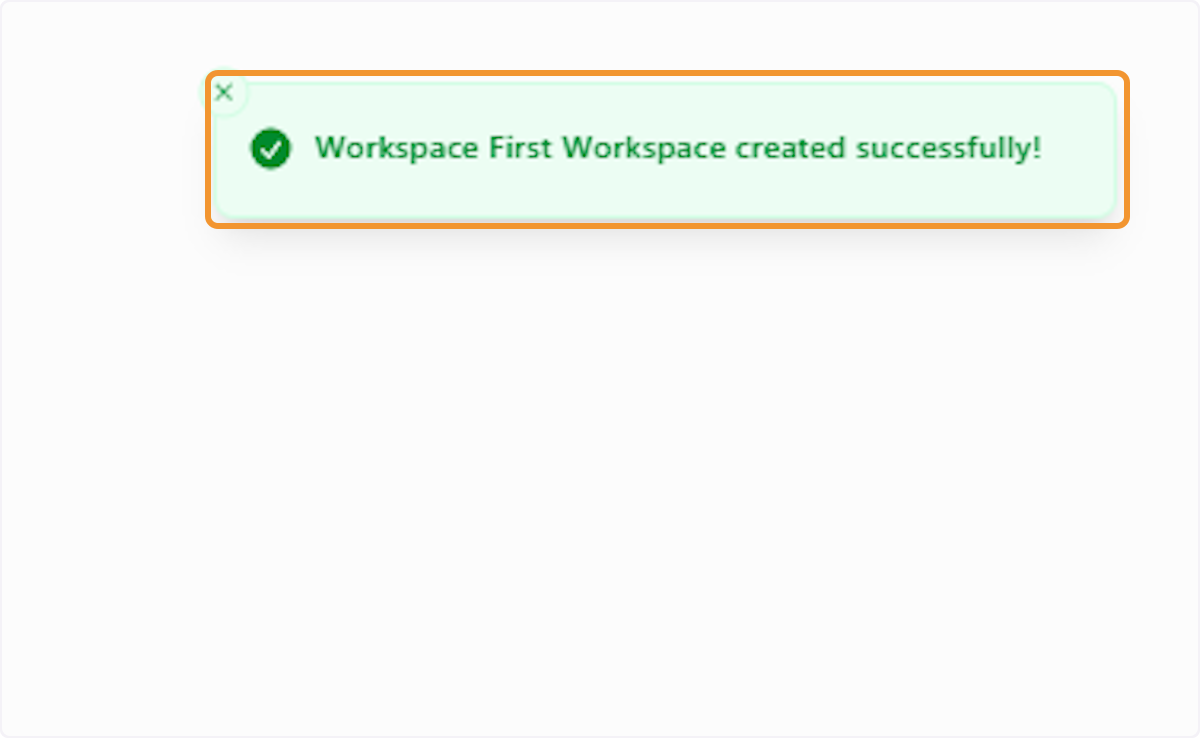
Workspace Created Successfully
A green confirmation banner will appear at the top of the screen reading ‘Workspace created successfully!’ This confirms your new workspace has been provisioned and is ready to use. You will be automatically redirected to the workspace’s home view.
Workspace Thread Management
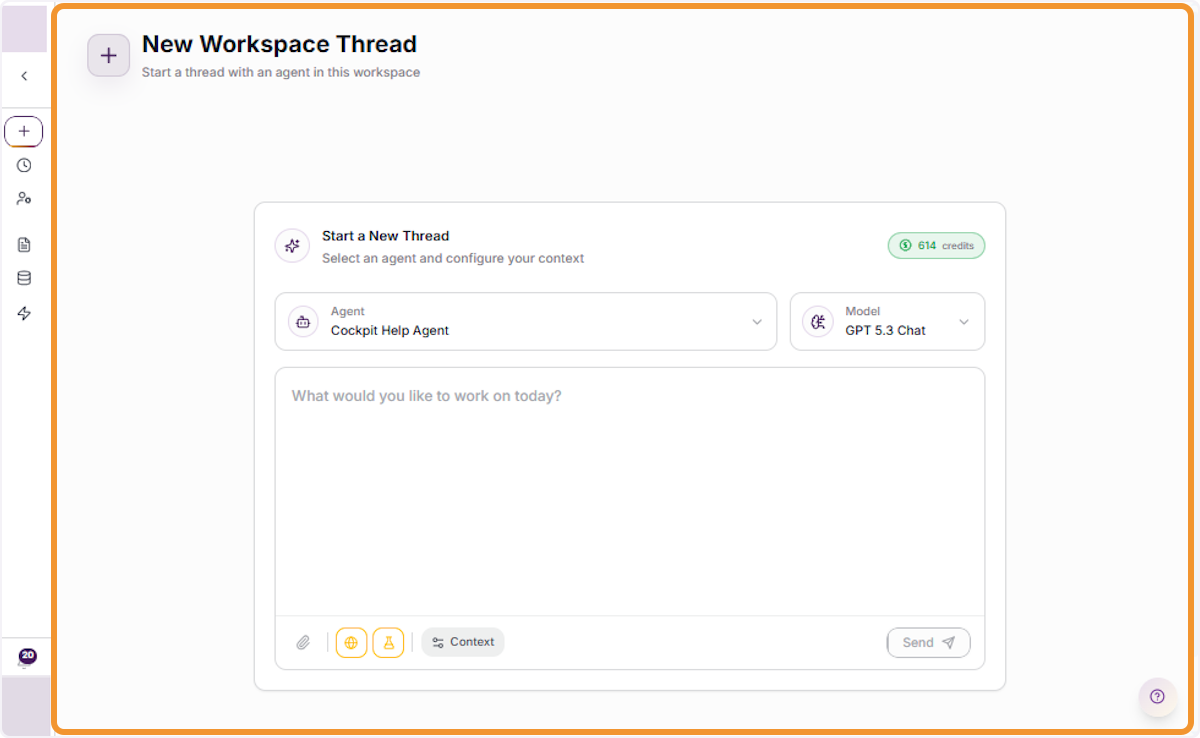
Start a New Workspace Thread
The ‘New Workspace Thread’ panel is the primary starting point for interacting with AI agents within your workspace. From here, you can select an agent, configure your context, and initiate a new collaborative conversation or task session.
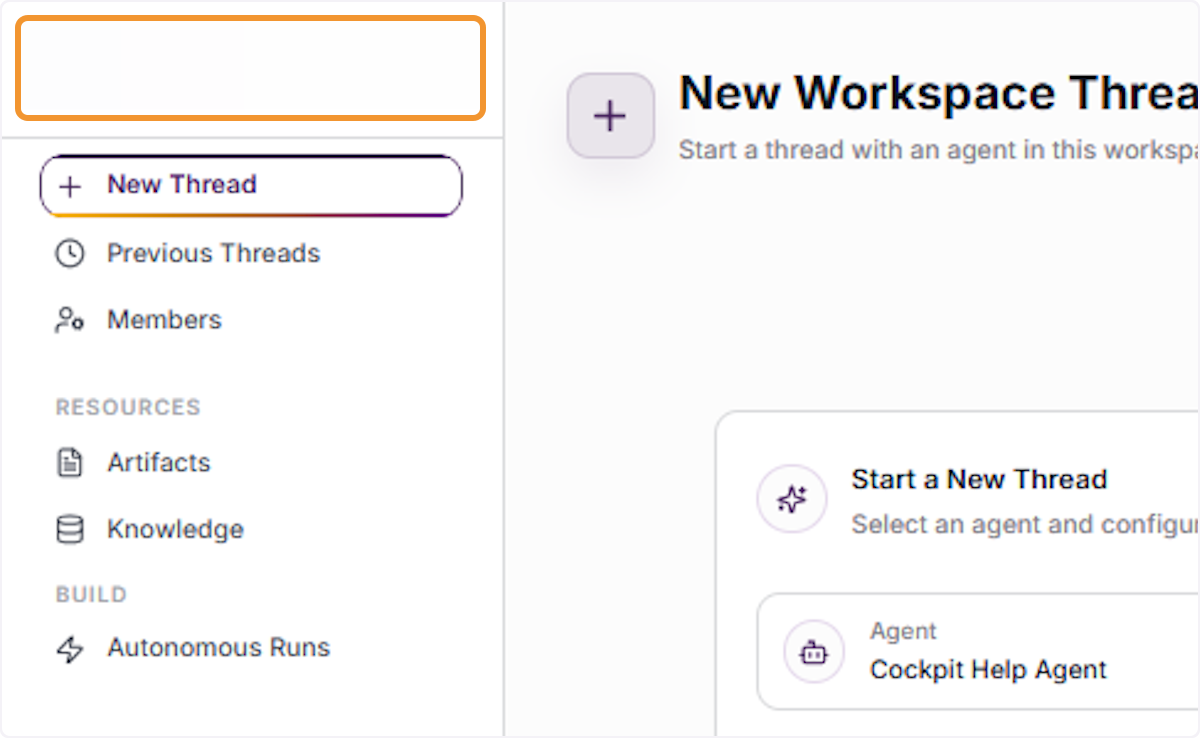
Open Your Workspace
Click on the name of your workspace in the left navigation panel to open it. This reveals the full workspace menu, including options to start New Threads, view Previous Threads, manage Members, access Resources (Artifacts, Knowledge), and configure Autonomous Runs.
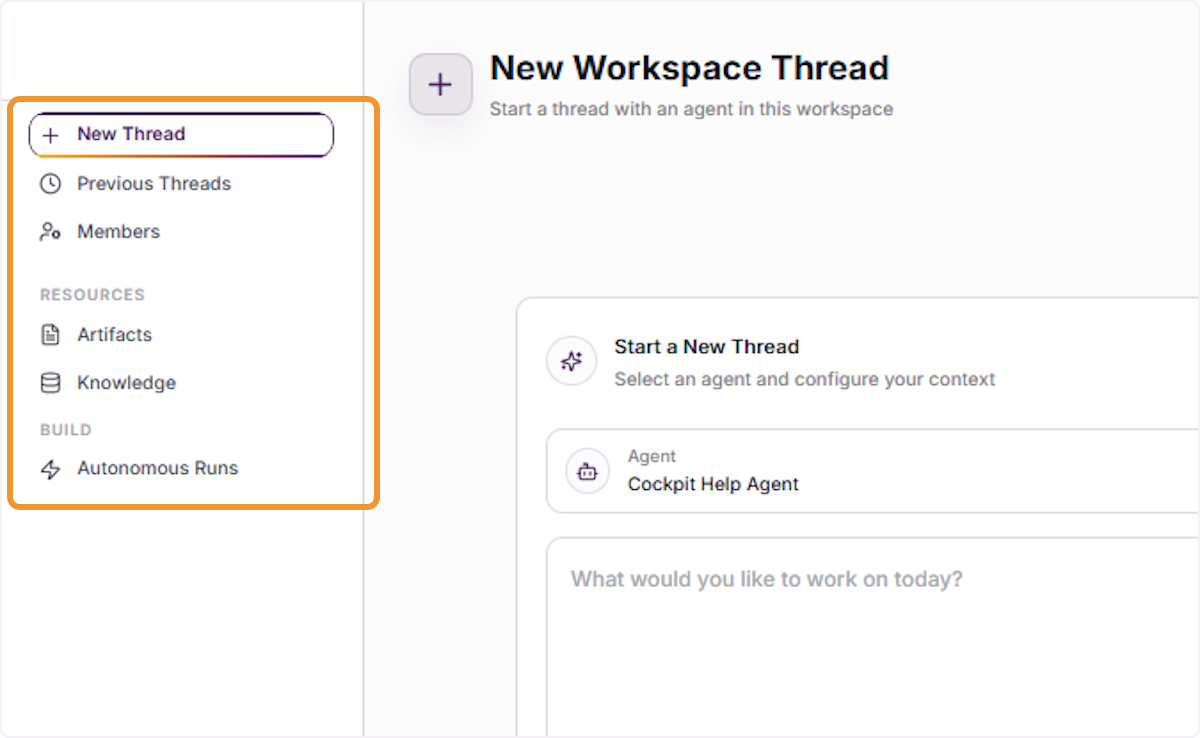
Create a New Conversation Thread
Click ’+ New Thread’ from the workspace sidebar to initiate a fresh conversation session with an AI agent. Each thread represents an independent interaction context, allowing you to manage multiple parallel tasks or discussions within the same workspace.
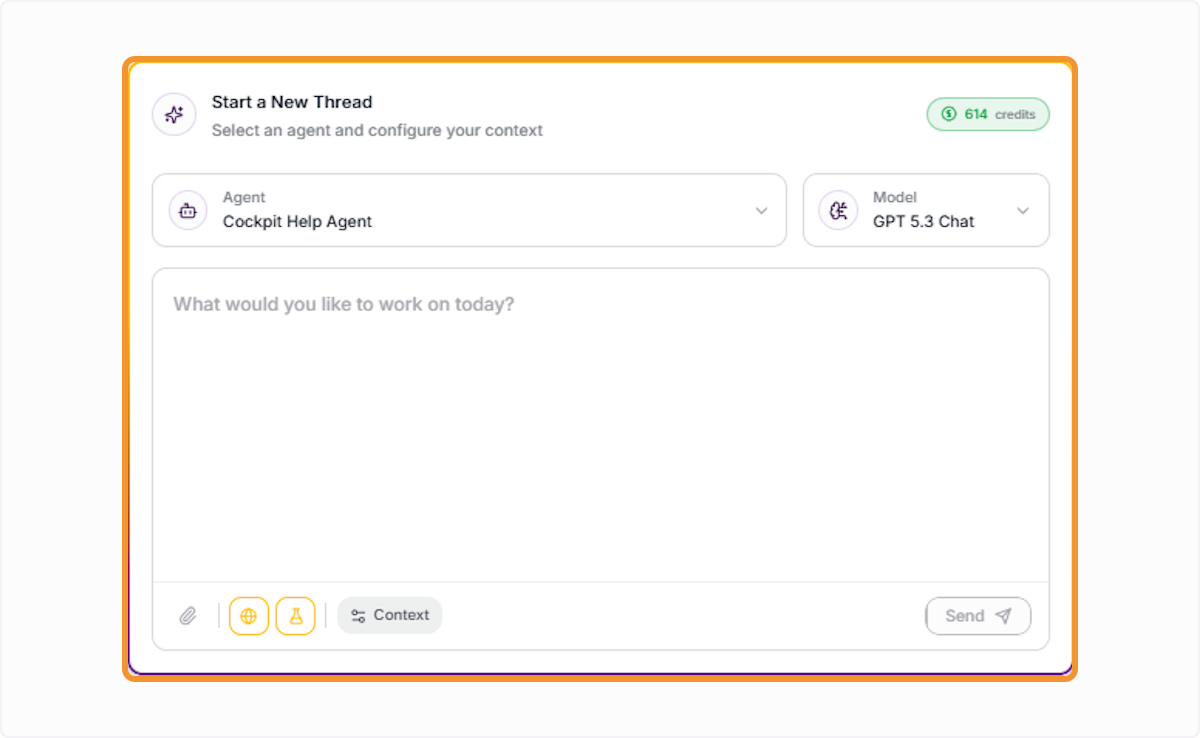
Configure and Launch a Thread
In the thread creation panel, you can select your preferred AI Agent and Model before starting. Add your initial message or task description in the text area, then click ‘Send’ to begin the session with the selected agent.
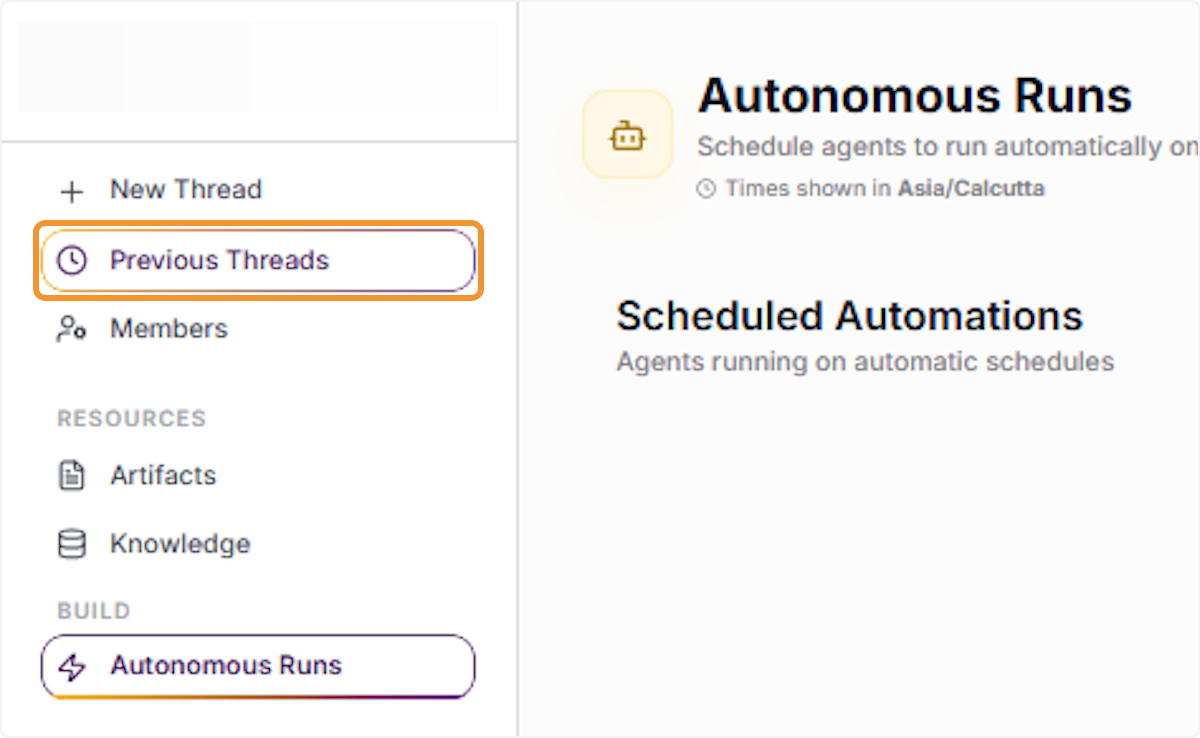
Access Previous Conversation History
Click ‘Previous Threads’ in the workspace sidebar to view and resume past conversation sessions. This section stores all prior interactions with AI agents in this workspace, allowing you to review outputs, continue unfinished tasks, or reference earlier work.
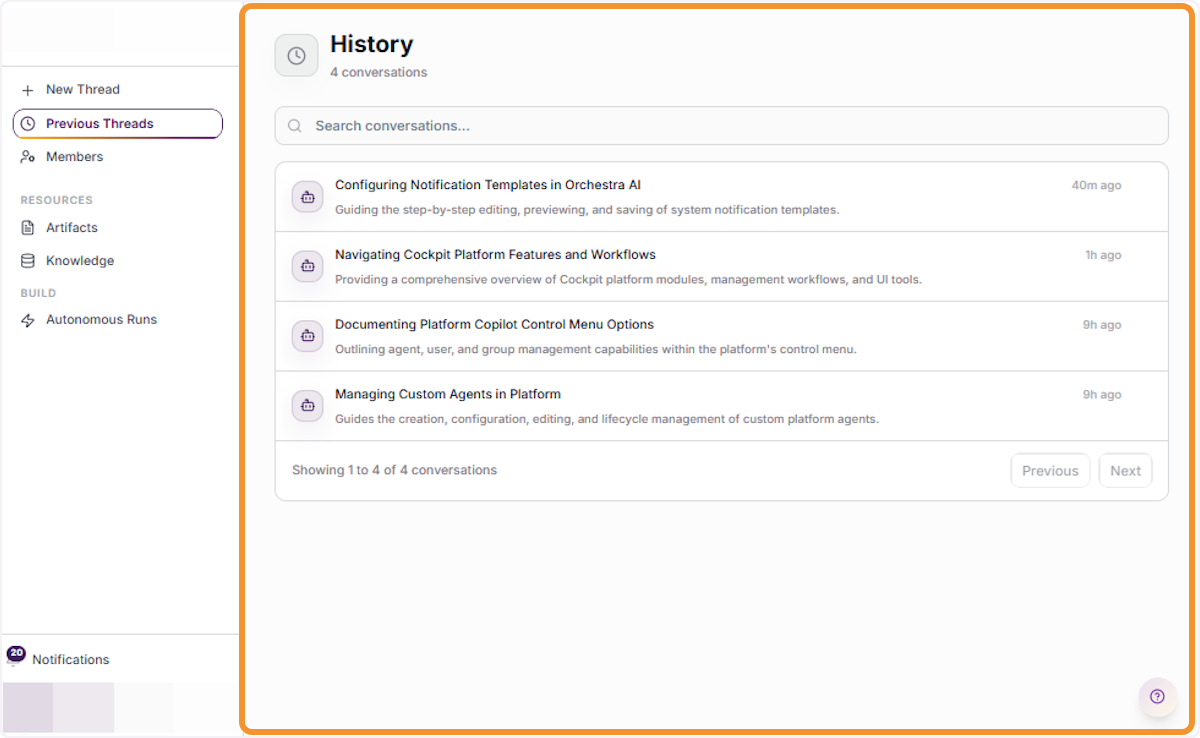
Browse Conversation History
The History panel displays all past conversation threads in chronological order, with titles and timestamps. You can search through your conversation history and click any entry to reopen and review the full thread, including all agent responses and actions taken.
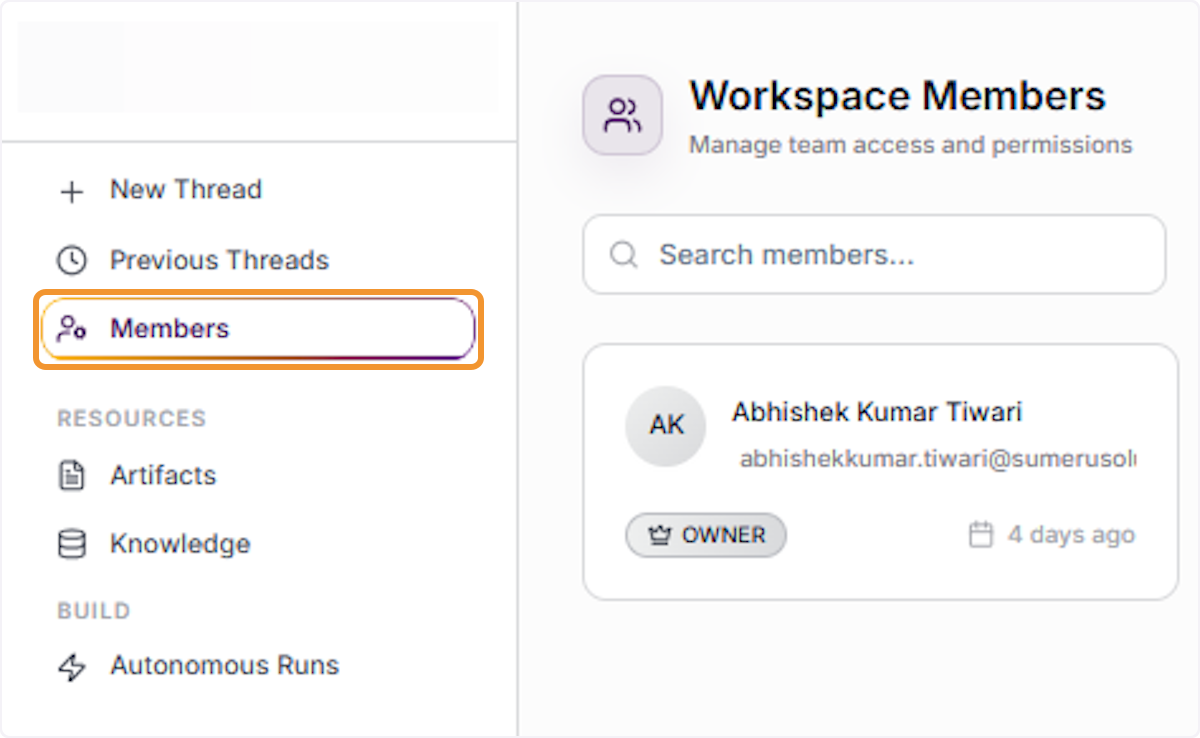
Open Workspace Members Panel
Click ‘Members’ in the workspace sidebar to open the Workspace Members panel. This view displays all users who currently have access to this workspace, along with their roles (Owner or Collaborator) and the date they were added.
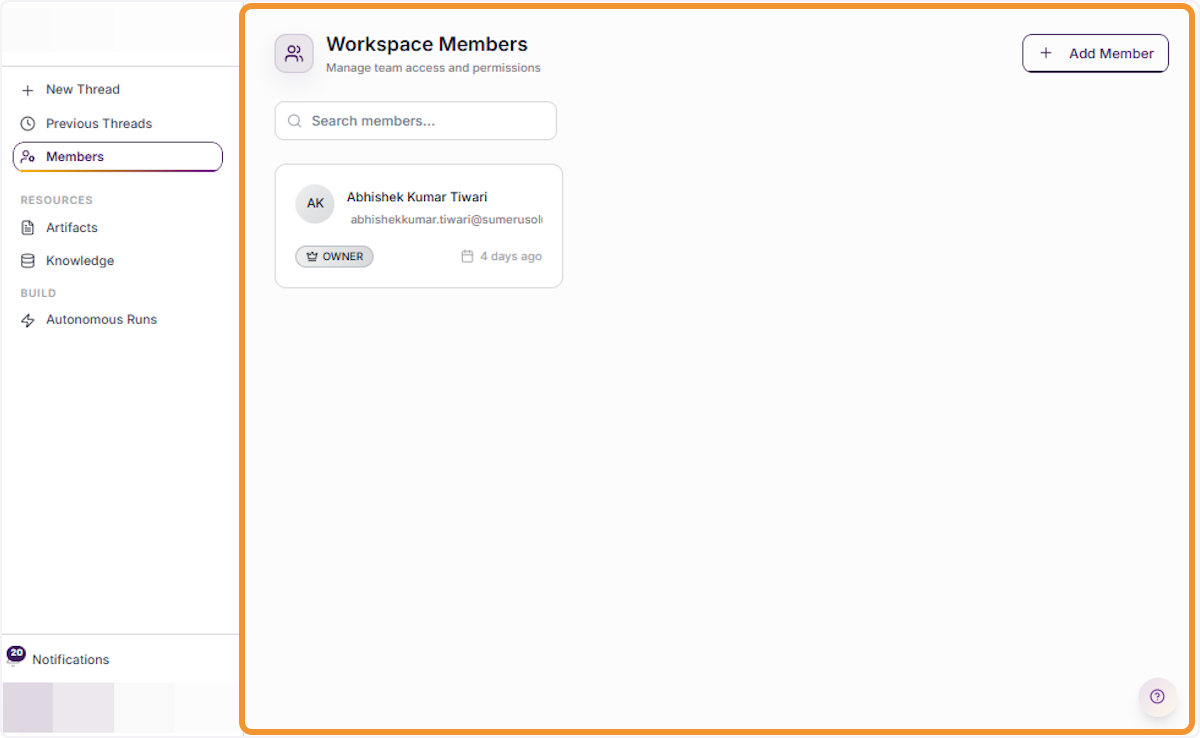
View Full Members List
The Workspace Members panel provides a comprehensive view of all team members in this workspace. You can see each member’s name, email address, role badge, and last active timestamp. Use the ’+ Add Member’ button to invite additional collaborators to the workspace.
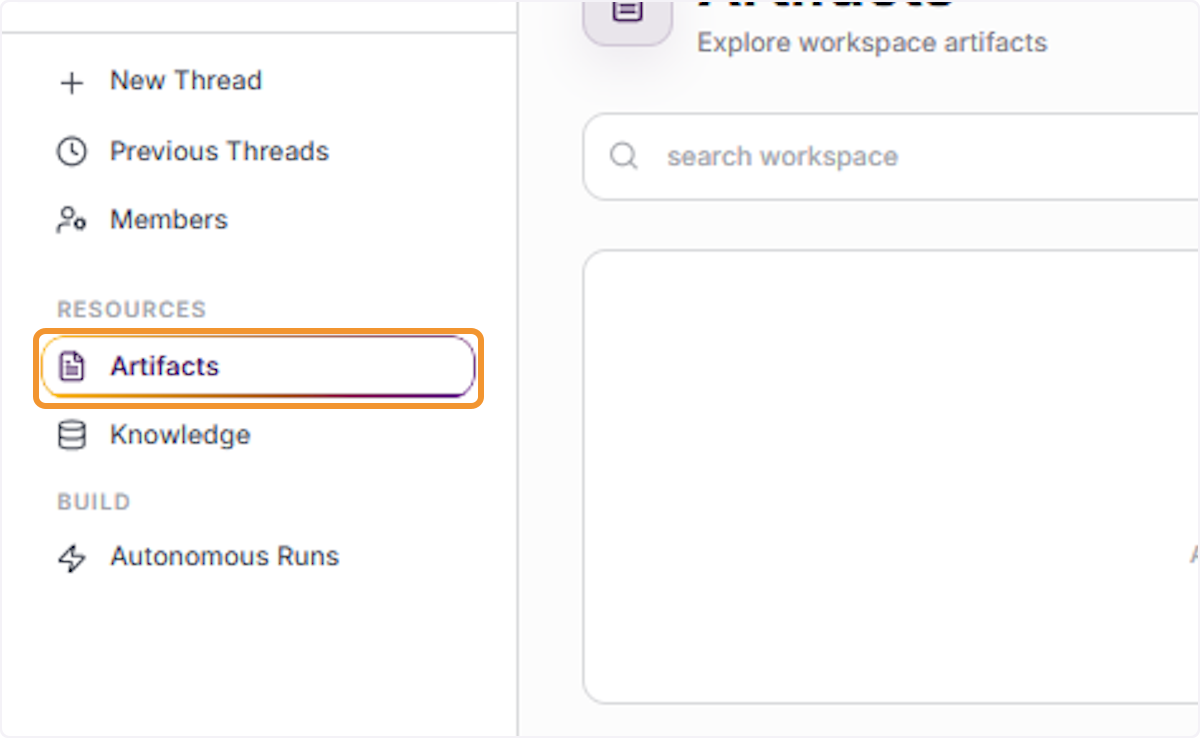
Artifacts Repository
Click ‘Artifacts’ under the Resources section in the workspace sidebar. Artifacts are documents, files, and structured outputs generated by AI agents during your conversation threads. This section serves as a central repository for all AI-produced content within your workspace.
Artifacts Section (Empty State)
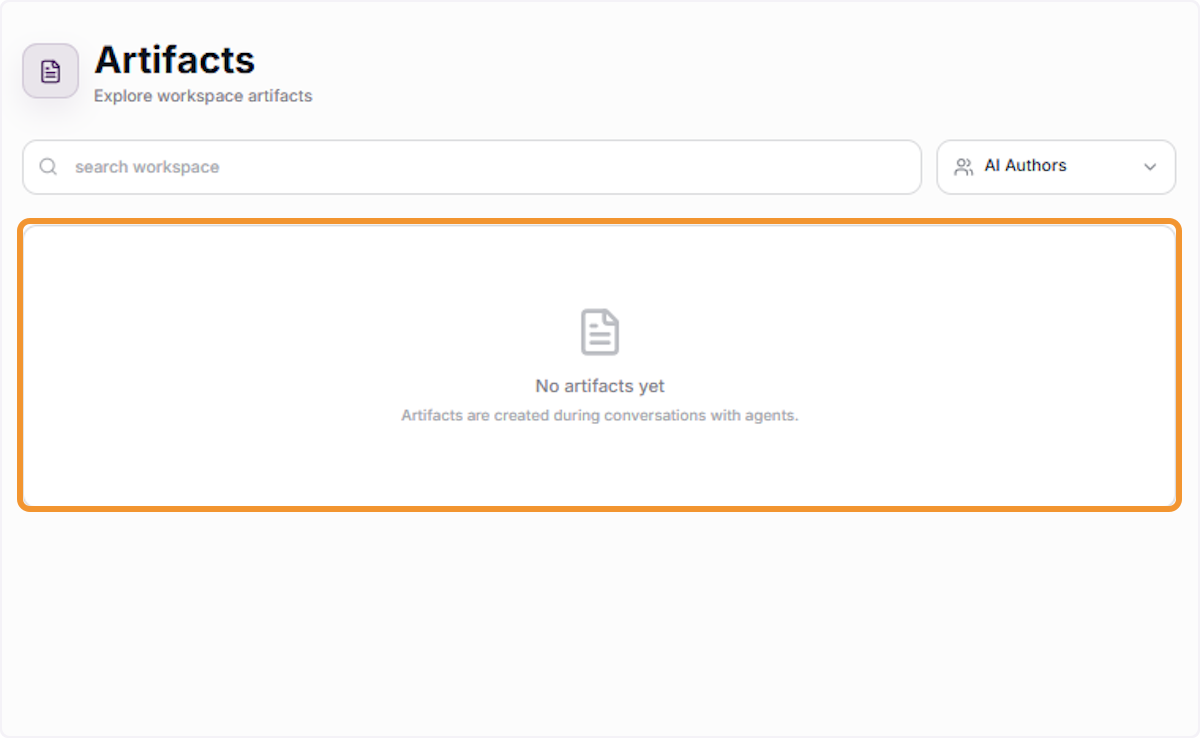
When no artifacts have been created yet, the Artifacts panel displays an empty state with the message ‘No artifacts yet — Artifacts are created during conversations with agents.’ Begin a thread with an agent and request document creation or data output to populate this section.
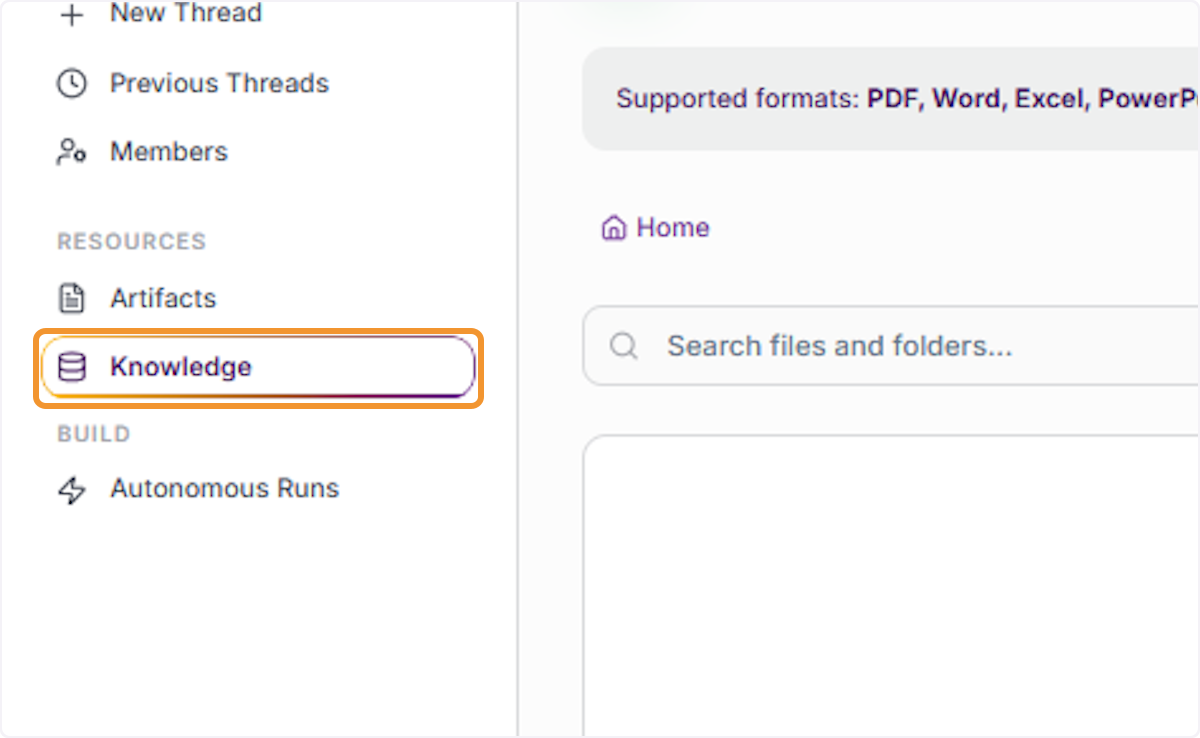
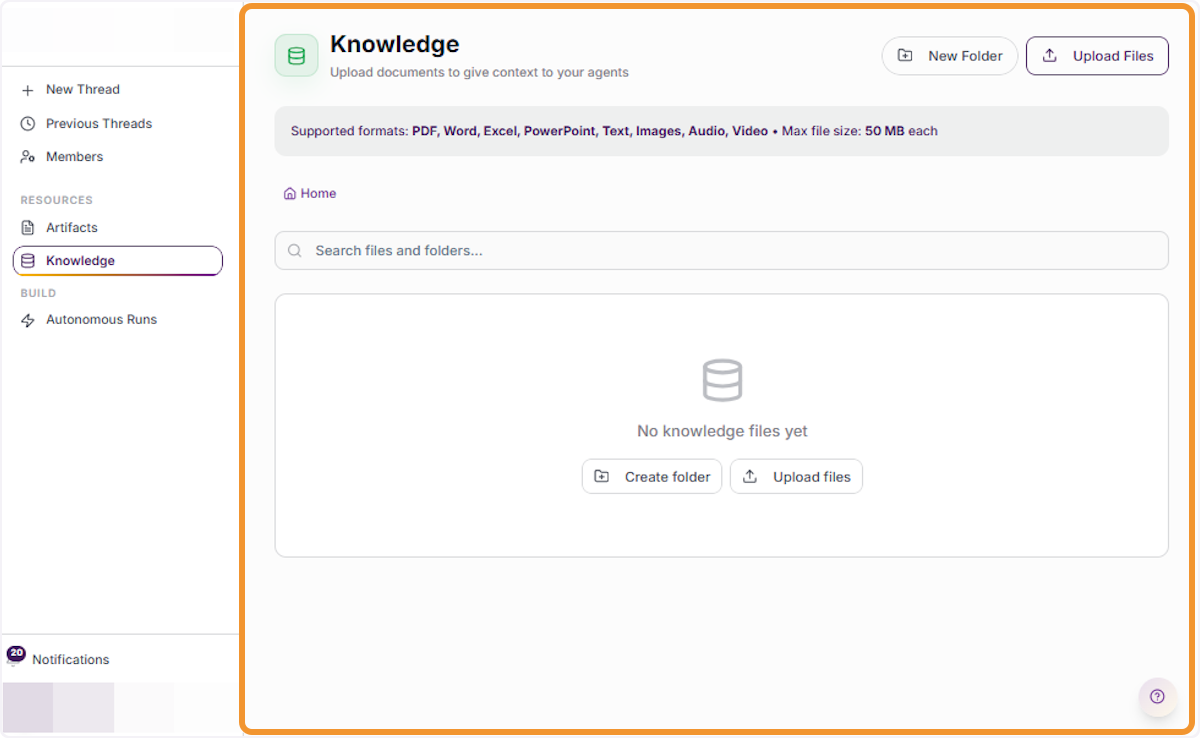
Click ‘Knowledge’ under the Resources section in the workspace sidebar. The Knowledge Base allows you to upload reference documents that AI agents can access during conversations. Supported formats include PDF, Word, Excel, PowerPoint, Text, Images, Audio, and Video files up to 50 MB each.
Explore the Knowledge Base
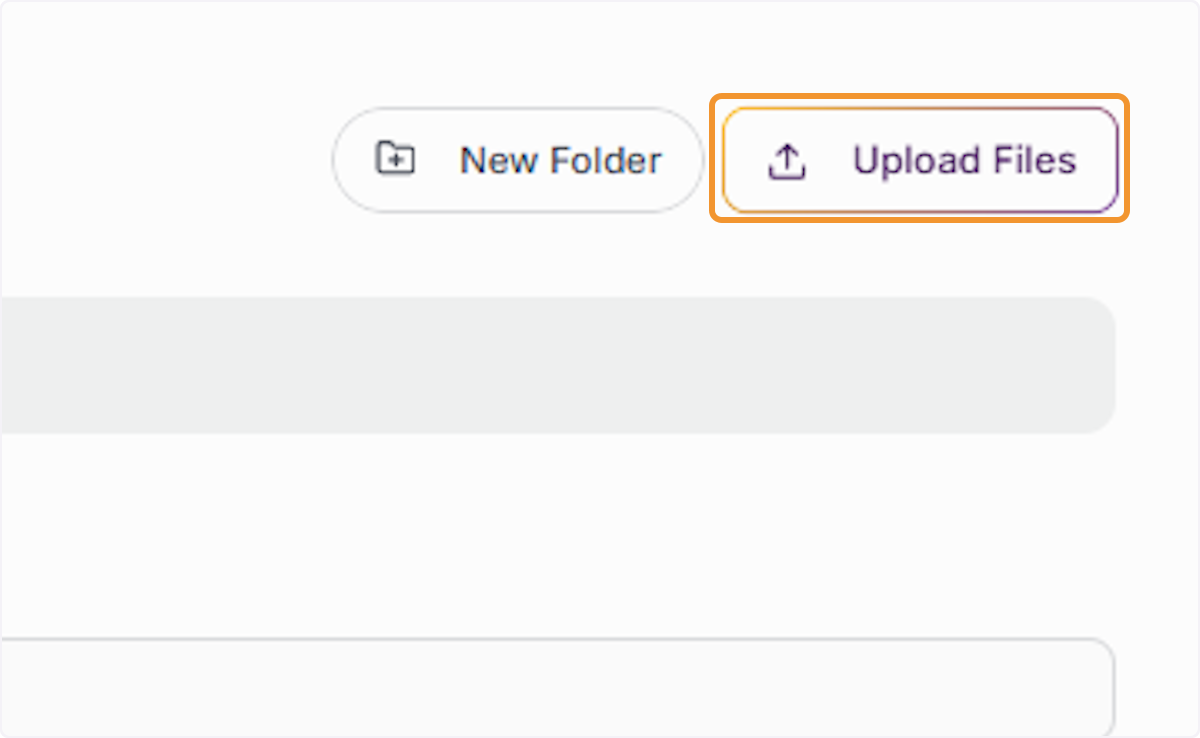
The Knowledge panel displays all uploaded documents in a folder-based structure, starting with the Home directory. Use the search bar to locate specific files or folders. You can organize documents into subfolders and upload new files using the ‘Upload Files’ button in the top-right corner.
Autonomous Runs & Scheduling
Access Autonomous Runs
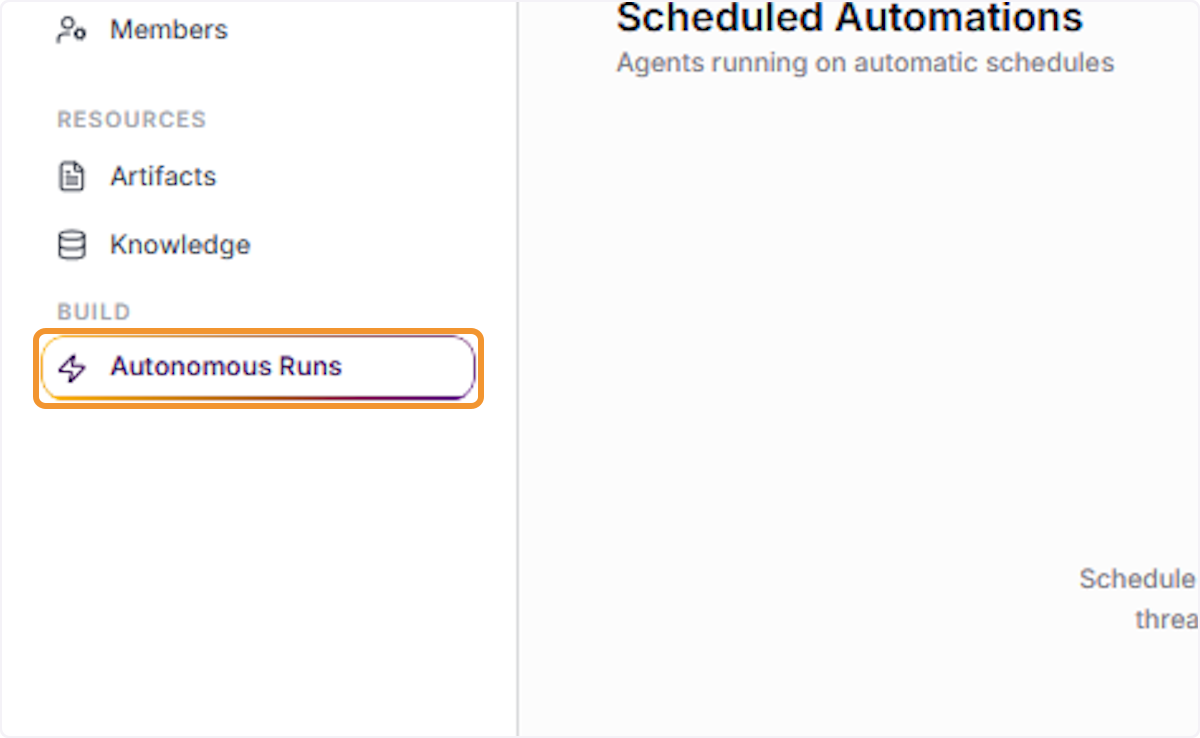
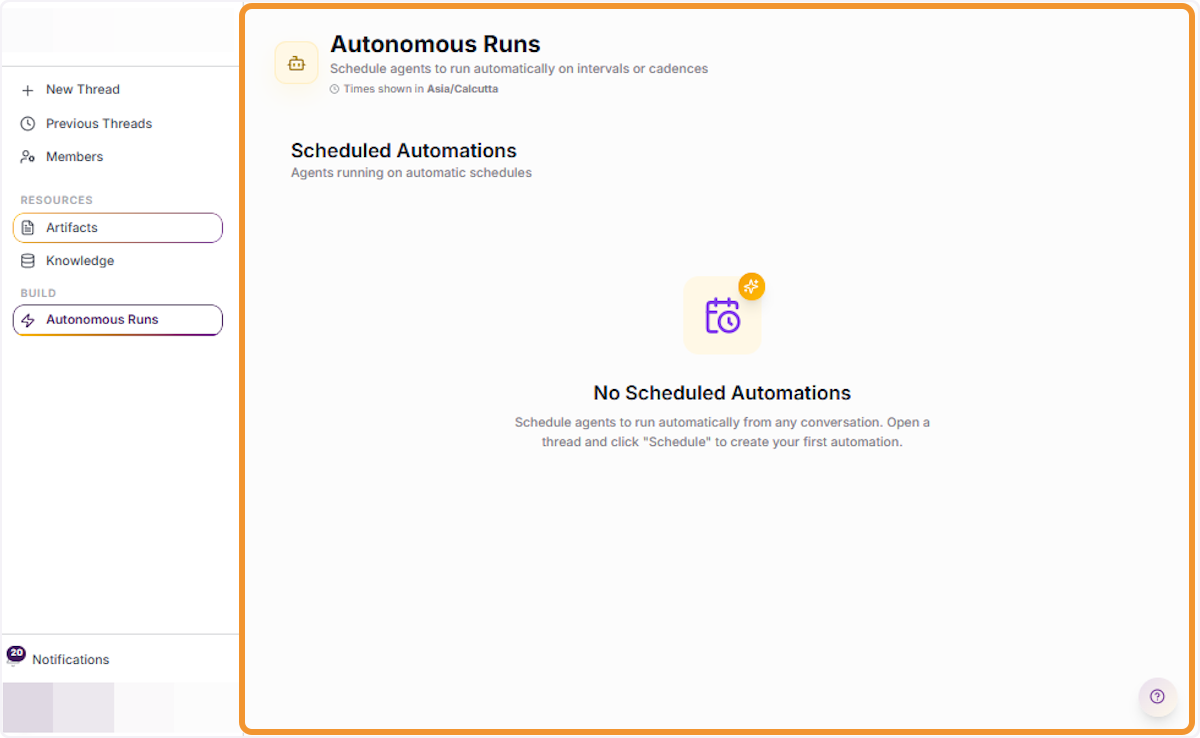
Click ‘Autonomous Runs’ under the Build section in the workspace sidebar. Autonomous Runs allow you to schedule AI agents to execute tasks automatically at defined intervals or on a set calendar. Times are displayed in your local timezone.
View Scheduled Automations
The Autonomous Runs panel shows all configured scheduled automations. When no automations are configured, an empty state is displayed. To create your first automation, open a thread, click ‘Schedule’, and configure the frequency and timing of the automated agent runs.
Member Management
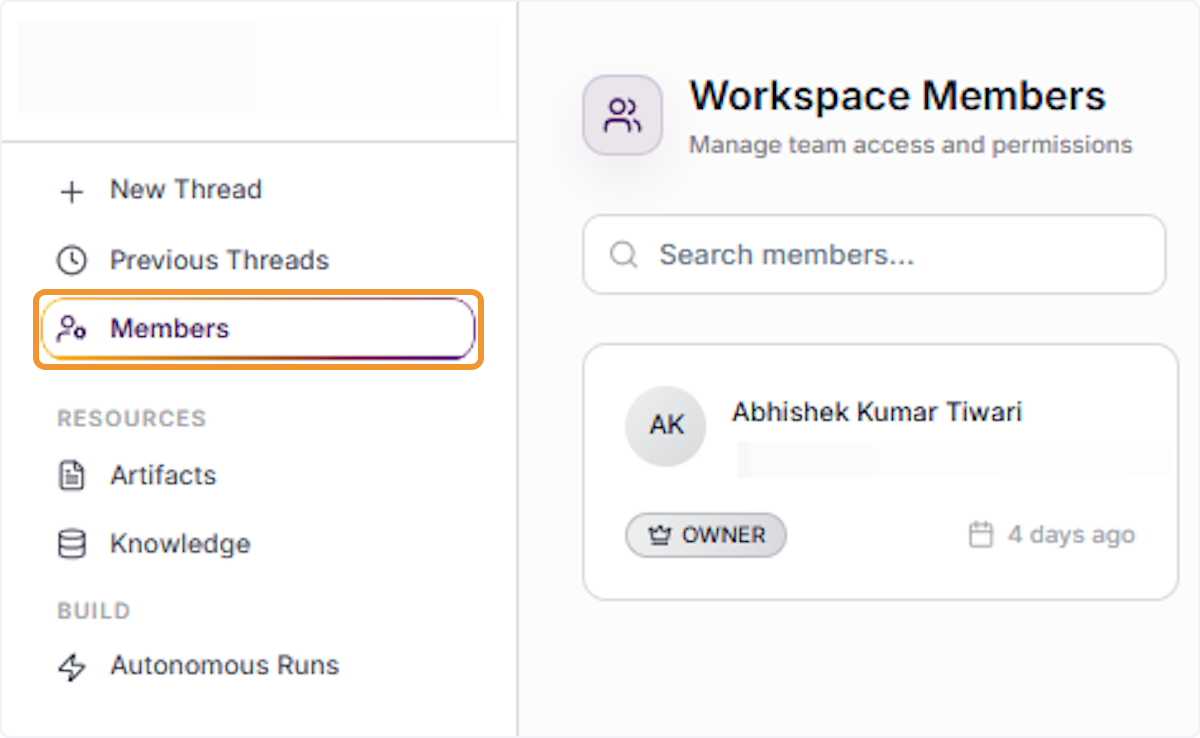
Return to Members Management
Navigate back to the Members section to manage team access and permissions. The Workspace Members panel shows all current collaborators along with their role (Owner or Collaborator) and join date, giving you a clear overview of who has access to the workspace.
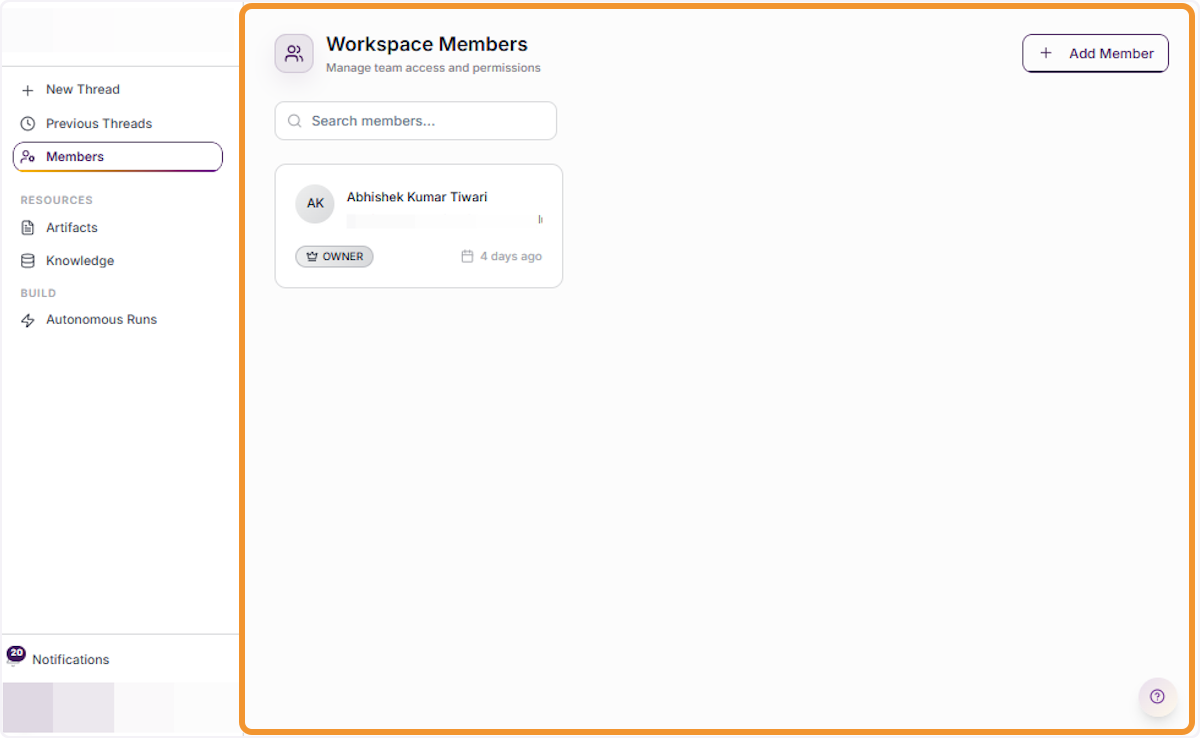
View Member Details and Add Members
The expanded Workspace Members view shows the complete member list with their email addresses and role badges. The ’+ Add Member’ button in the top-right corner allows the workspace owner to invite new team members by searching for users within the organization.
Select a Member to Manage
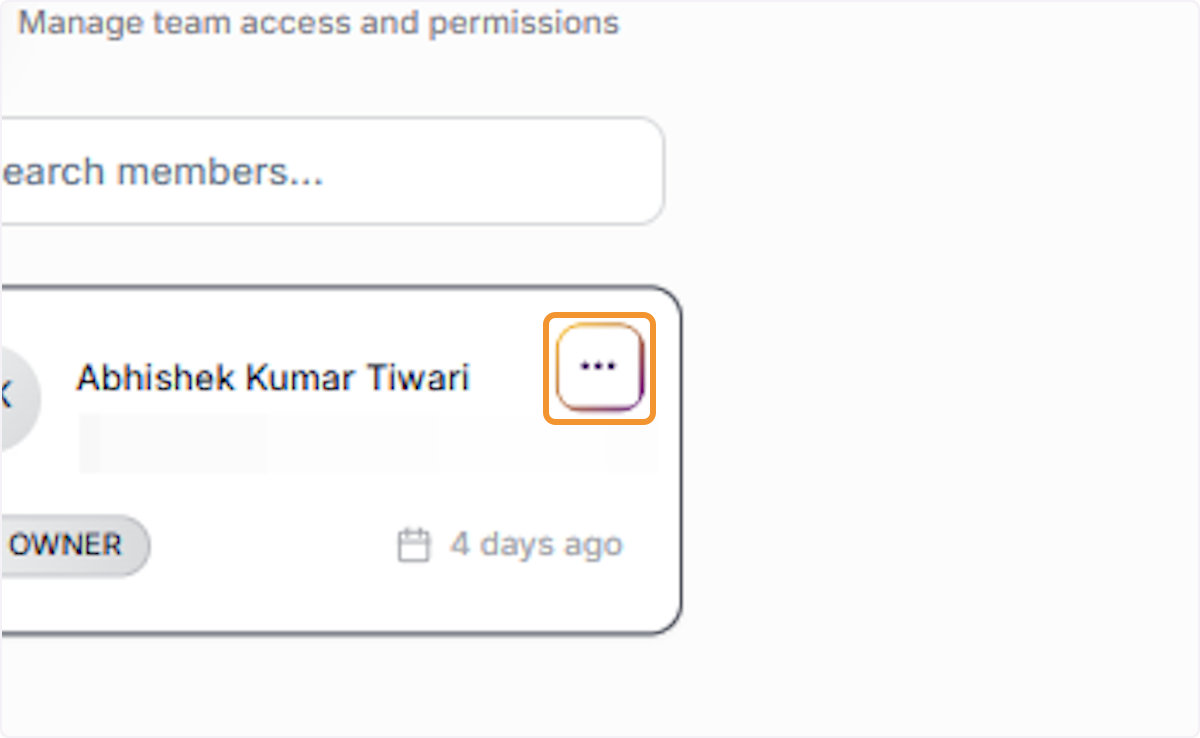
Hover over a member’s card in the Workspace Members list to reveal the options menu (three-dot icon). Click on a specific member’s entry to highlight them and access available management actions, such as copying their email address or modifying their workspace access.
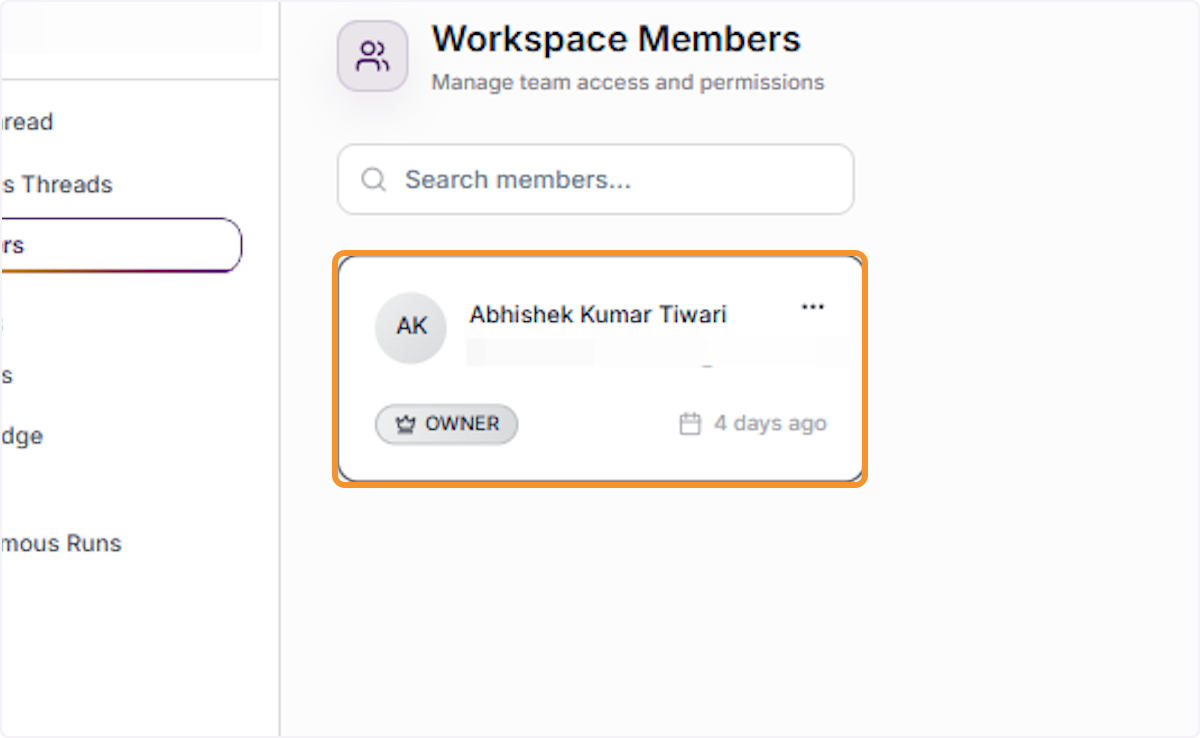
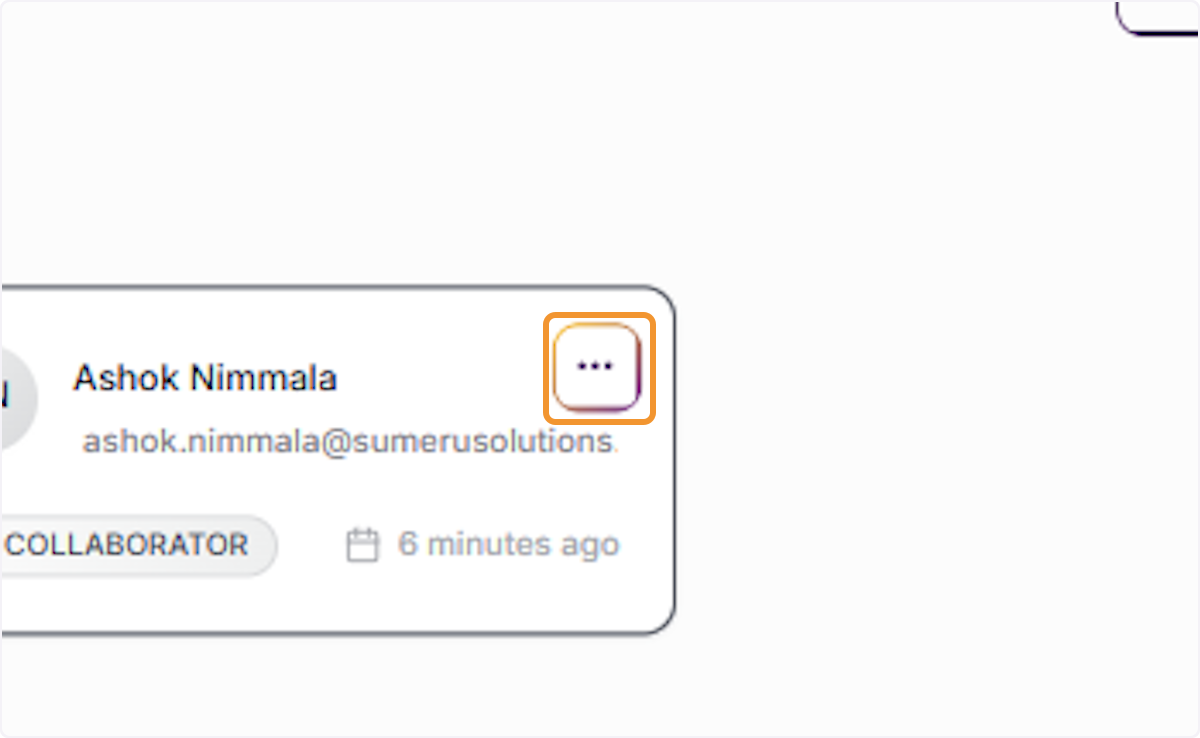
Click the three-dot (···) icon on any member’s card to reveal the member management dropdown menu. This menu provides quick actions for that specific member, including options to copy their email address, transfer workspace ownership, or remove them from the workspace.
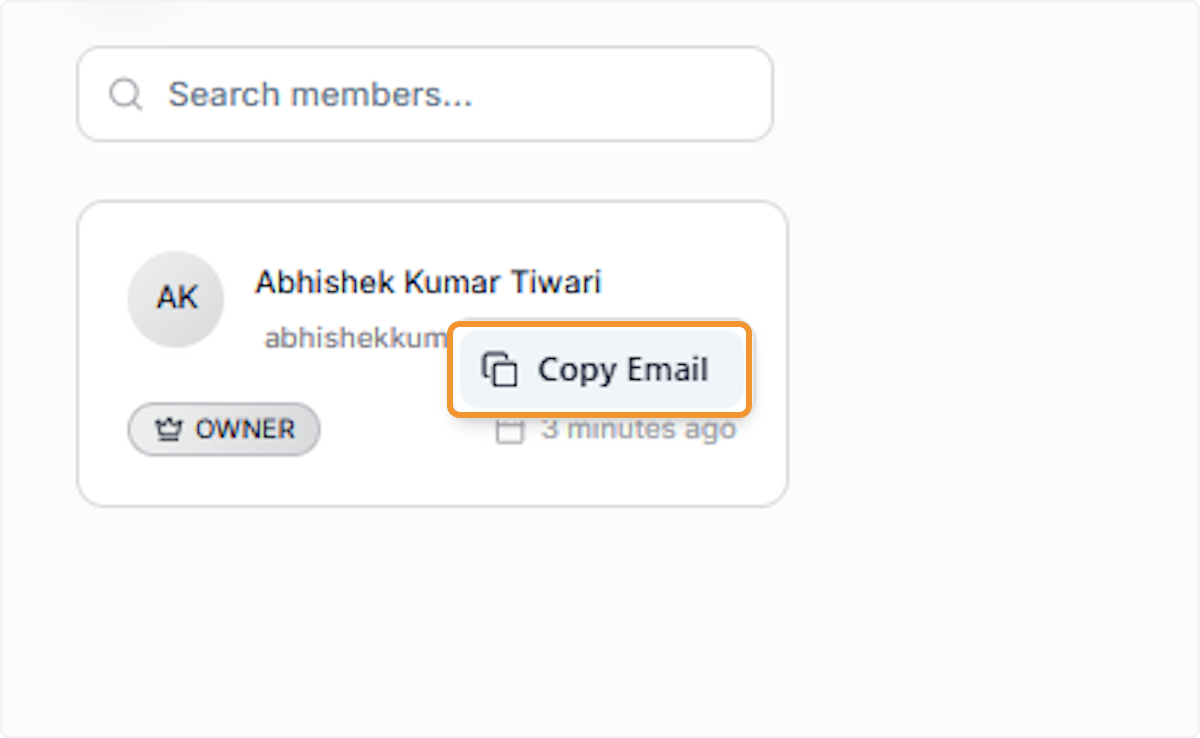
Copy Member Email Address
Select ‘Copy Email’ from the member options dropdown to copy the selected member’s email address to your clipboard. This is useful for quickly sharing workspace-related information, sending invitations, or contacting a team member outside the platform.
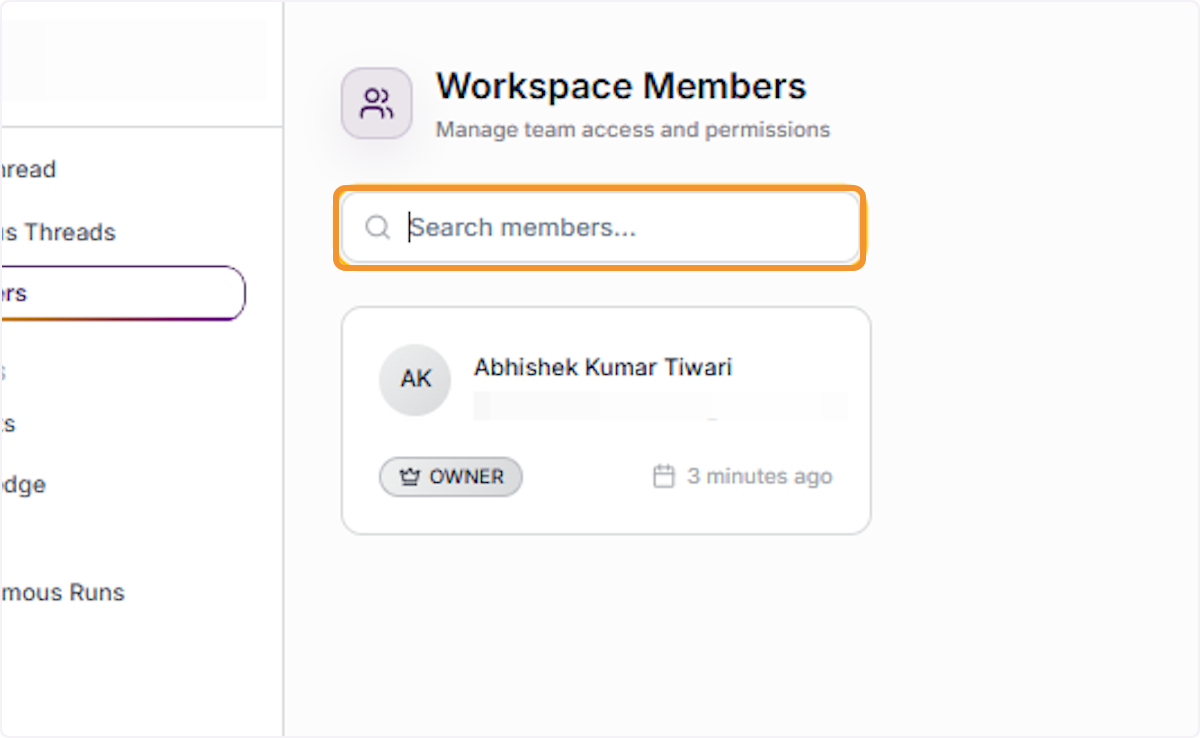
Search for a Specific Member
Use the ‘Search members…’ field at the top of the Workspace Members panel to filter the member list by name or email address. This is particularly useful in workspaces with a large number of collaborators, helping you quickly find and manage specific team members.
Adding New Members
Initiate Adding a New Member
Click the ’+ Add Member’ button in the top-right corner of the Workspace Members panel. This opens a modal window that allows you to search for and select users within your organization to add to the workspace as collaborators.

Search Users to Add
The Add Member modal displays a searchable list of all users in your organization. Browse the list or type a name or email address in the search field to filter results. Select one or more users from the list to add them to this workspace.
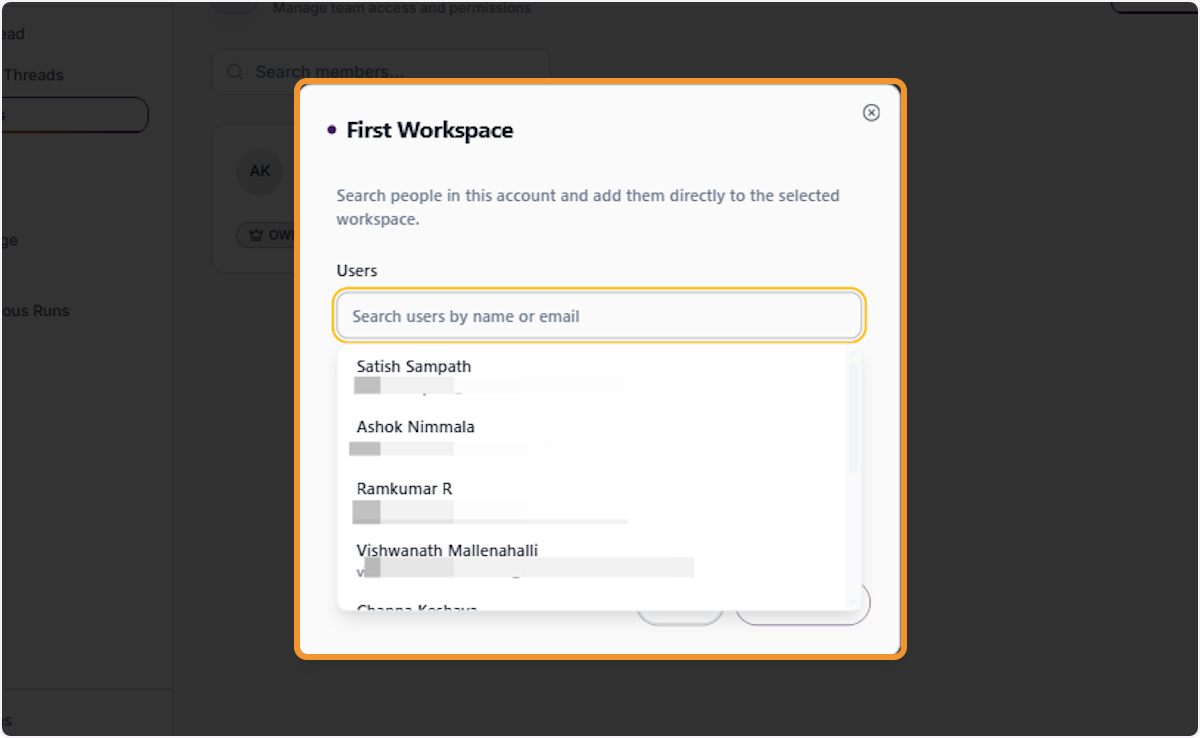
Filter Users by Name or Email
Type a name or email address in the search field within the Add Member modal to filter the user list in real time. As you type, the system searches across all users in your organization and displays matching results, making it easy to find the right person to add.
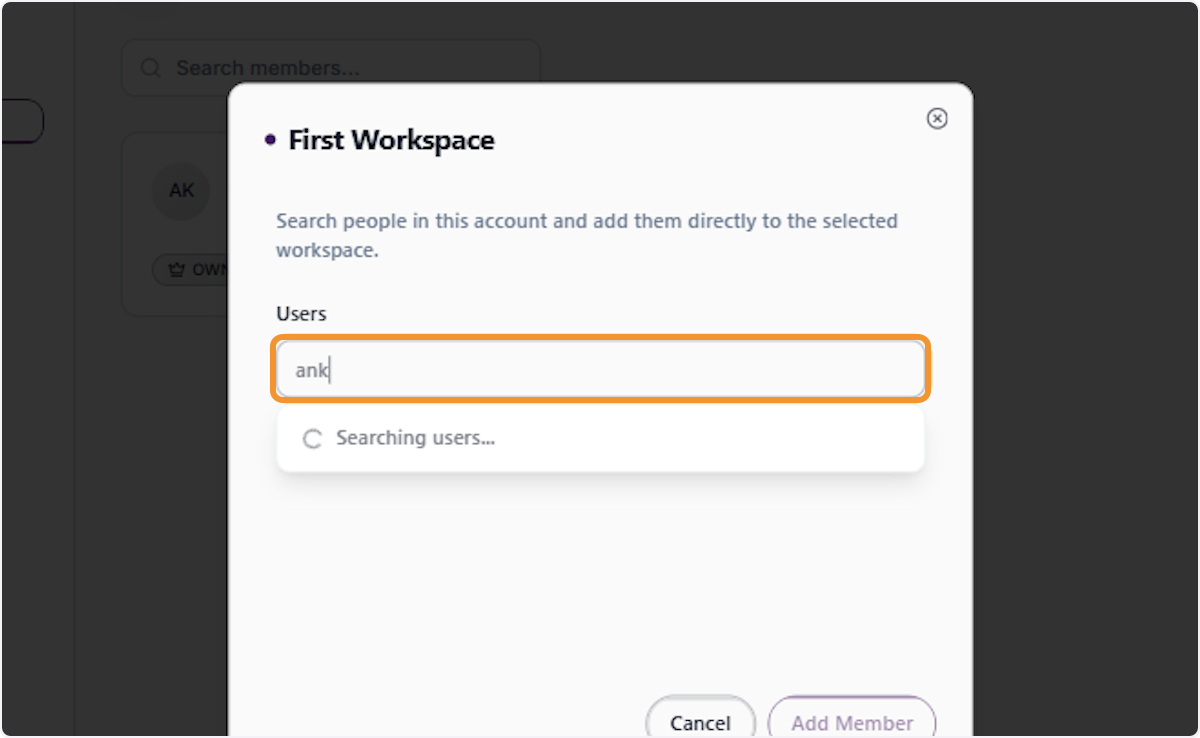
Select a User to Add
Click on a user’s name in the filtered list to select them for addition to the workspace. Selected users will appear as tags above the search field, indicating they are queued to be added. You can select multiple users before confirming.
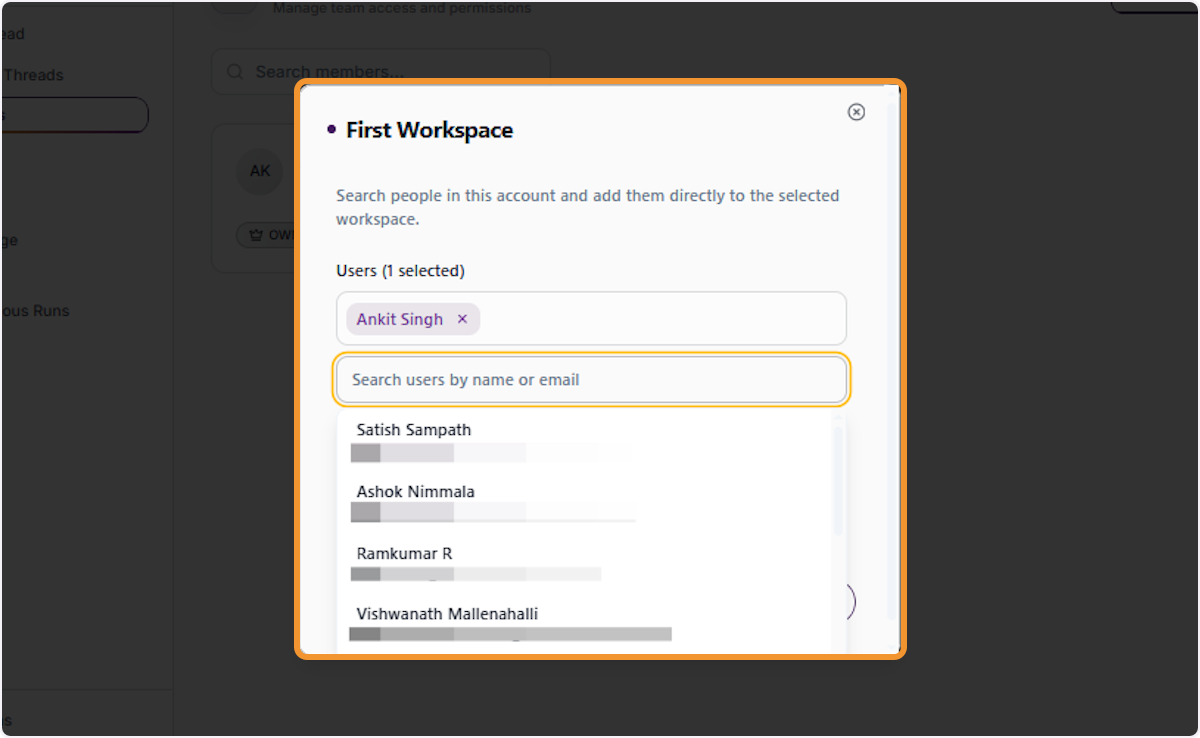
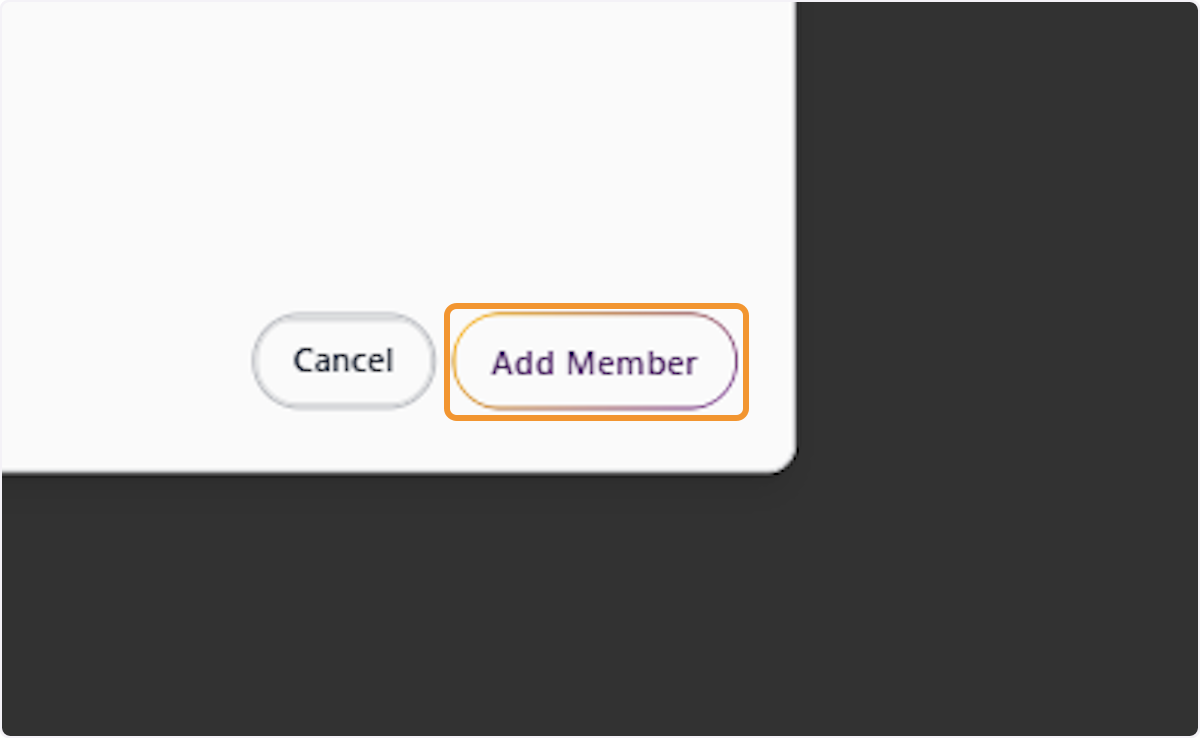
Confirm Adding Selected Members
After selecting all desired users, click the ‘Add Member’ button at the bottom of the modal to confirm. The selected users will be granted Collaborator access to the workspace and will receive a notification informing them they have been added.
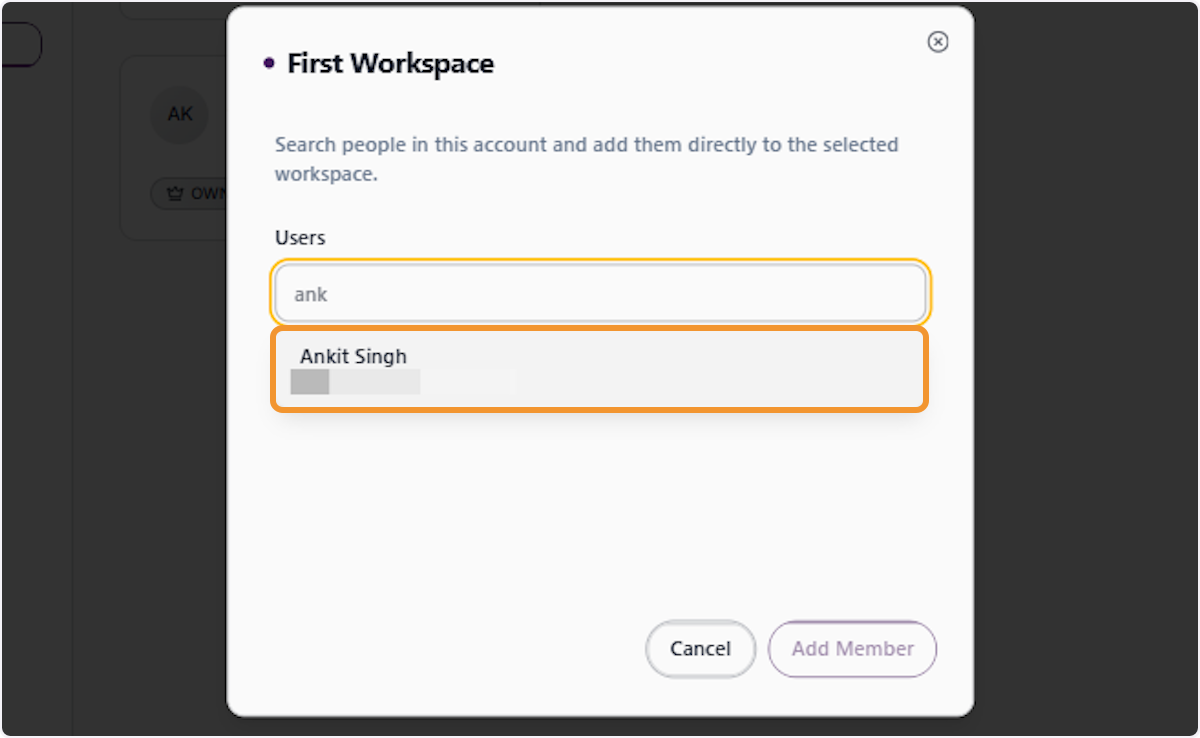
Select a Specific User from Search Results
Click on the desired user from the search results list to select them. Their name and email address will be displayed in the results, confirming the correct user has been identified. The selected user will be highlighted and added to the selection queue.
View Current Member Roles
The Workspace Members panel now shows multiple members with their respective roles displayed as badges. The workspace creator holds the ‘OWNER’ role, while all other added users appear as ‘COLLABORATOR’. Owners have full administrative rights, including the ability to add, remove members and transfer ownership.
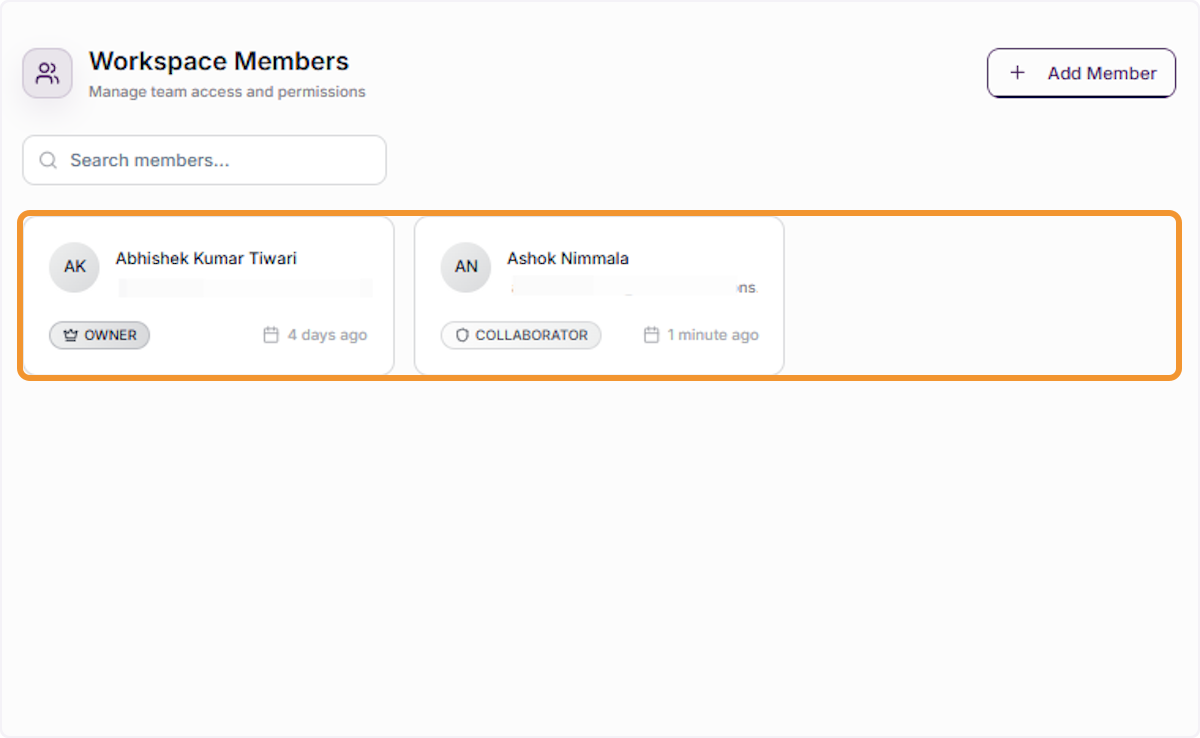
Member Role & Access Control
Select a Collaborator for Management
Click on a Collaborator’s member card to highlight it and access management options. The ‘COLLABORATOR’ badge indicates the user has standard access to participate in threads and view workspace resources, but cannot manage members or workspace settings.
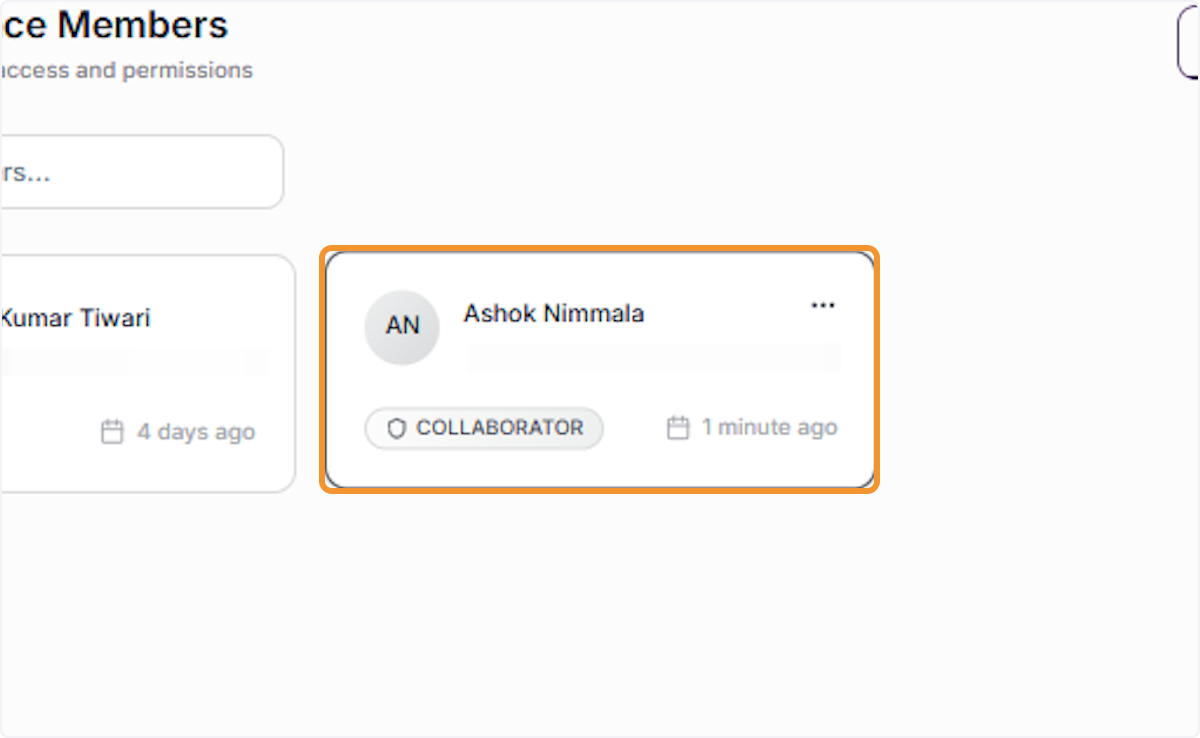
Open Collaborator Management Options
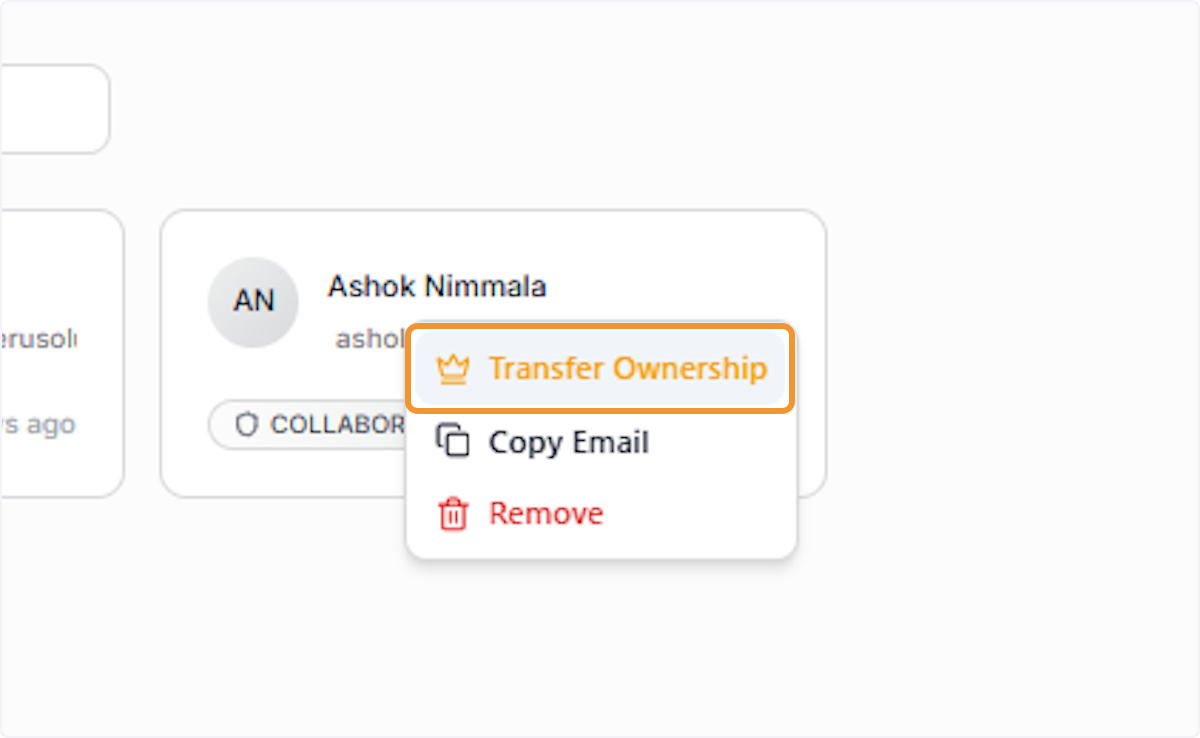
Click the three-dot (···) icon on a Collaborator’s member card to open the management dropdown. The available options include: ‘Transfer Ownership’ (to make them the workspace owner), ‘Copy Email’, and ‘Remove’ (to revoke their access to this workspace).
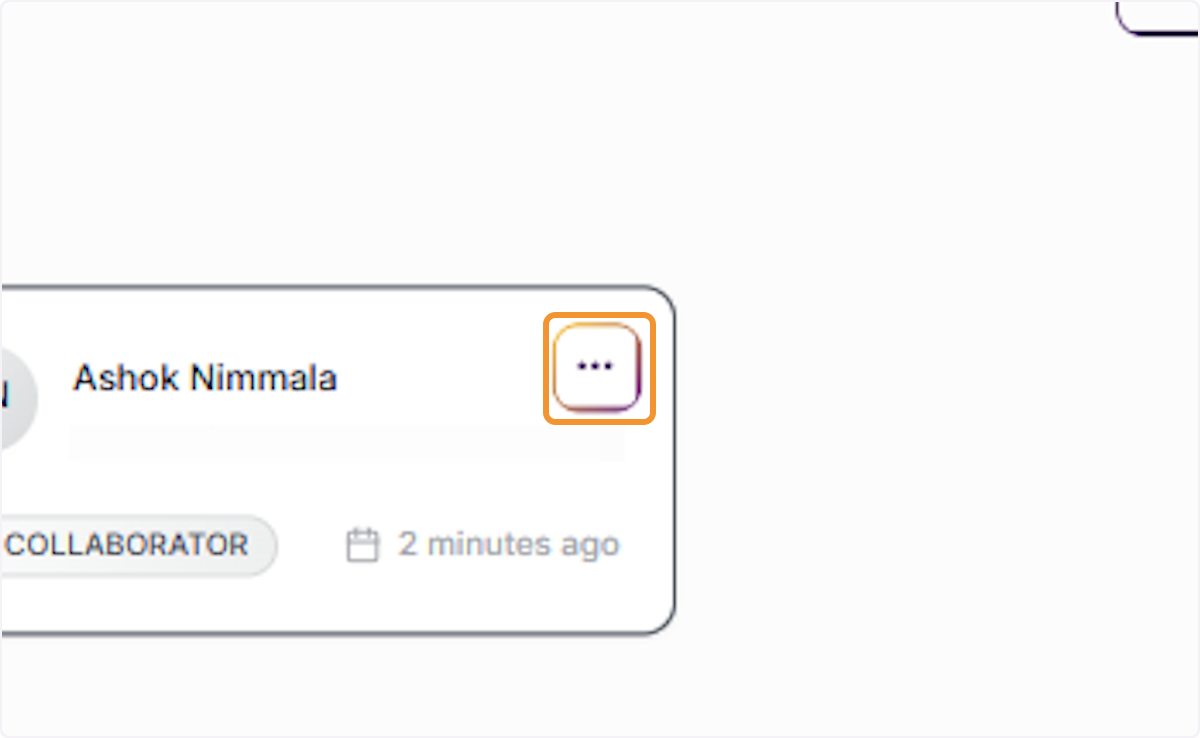
View Ownership Transfer Options
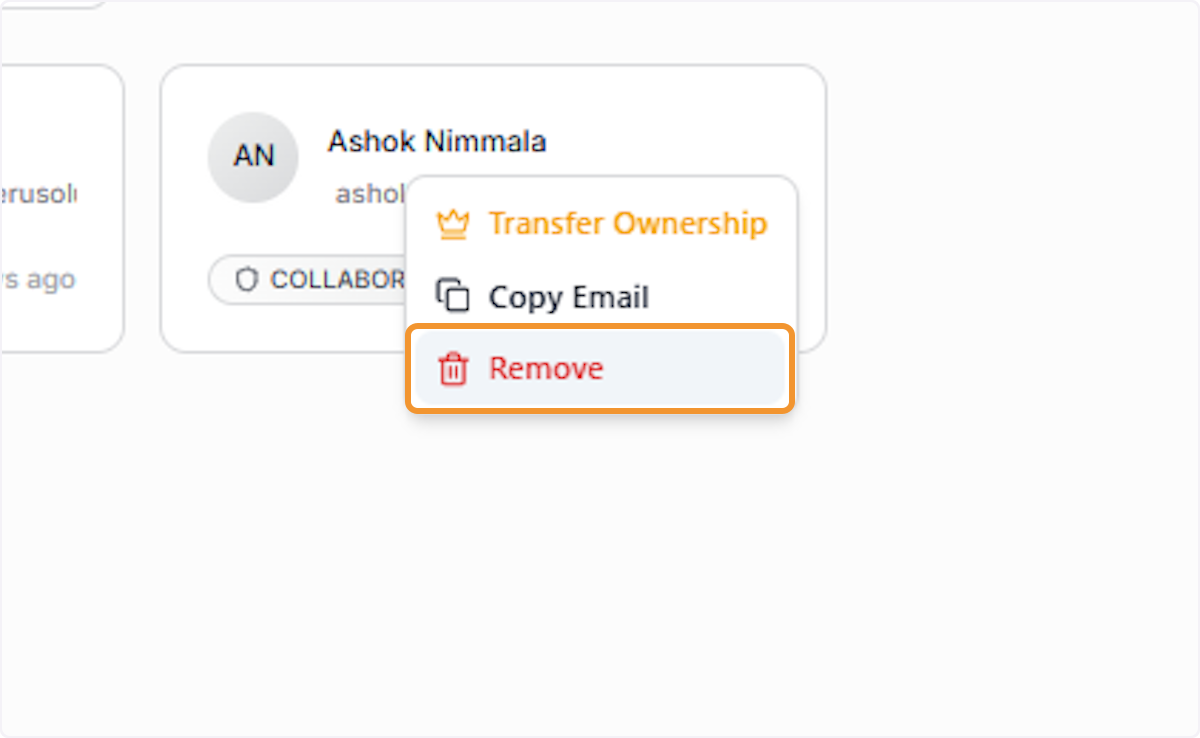
With the member options dropdown open, you can see three management actions: ‘Transfer Ownership’ (highlighted in gold, indicating an elevated action), ‘Copy Email’, and ‘Remove’ (shown in red, indicating a destructive action). These options allow full lifecycle management of member access.
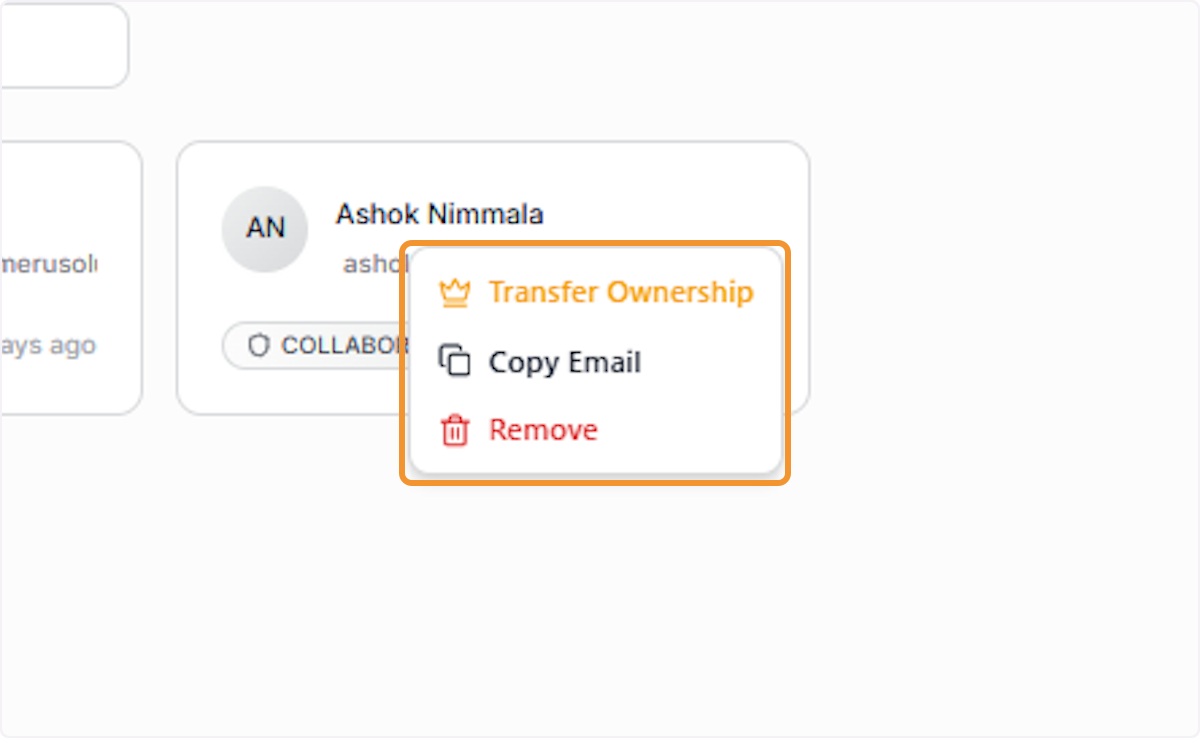
Initiate Ownership Transfer
Click ‘Transfer Ownership’ to begin the process of transferring the workspace owner role to the selected collaborator. This action will trigger a confirmation dialog before proceeding, as it changes administrative rights within the workspace.
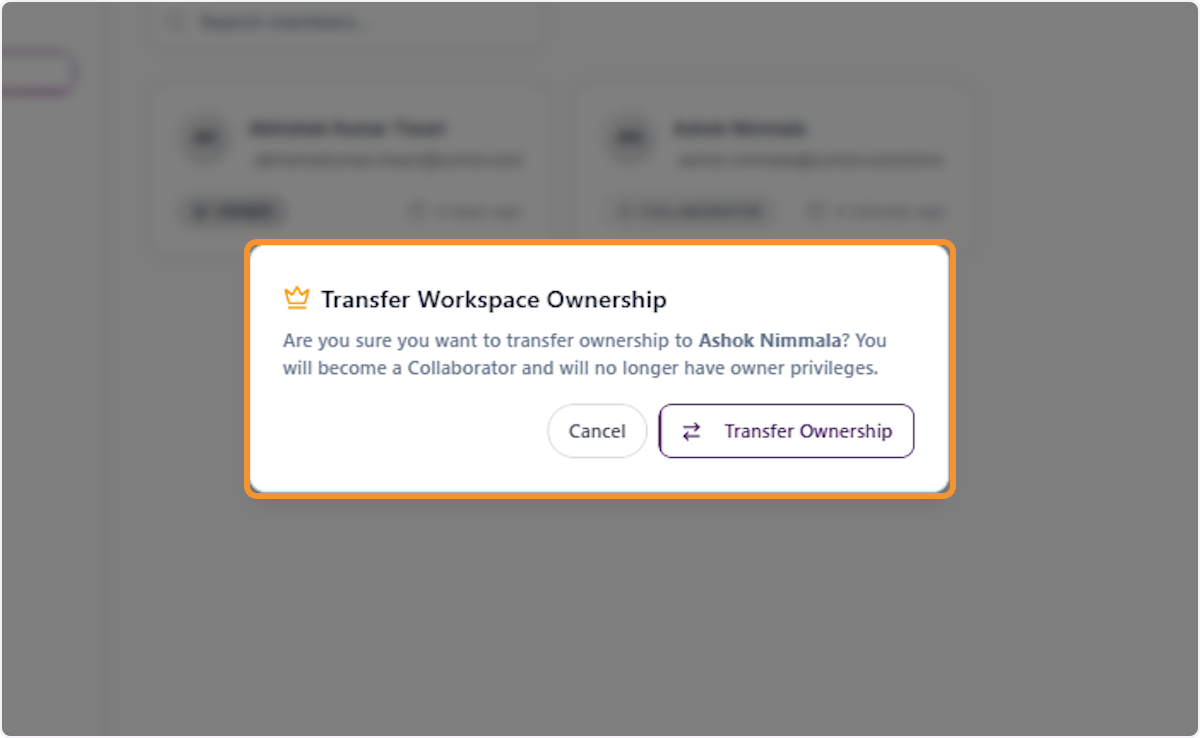
Review Ownership Transfer Confirmation
A confirmation dialog titled ‘Transfer Workspace Ownership’ will appear, asking you to confirm the transfer. Review this carefully before proceeding — once confirmed, you will become a Collaborator and will no longer have owner privileges over this workspace.
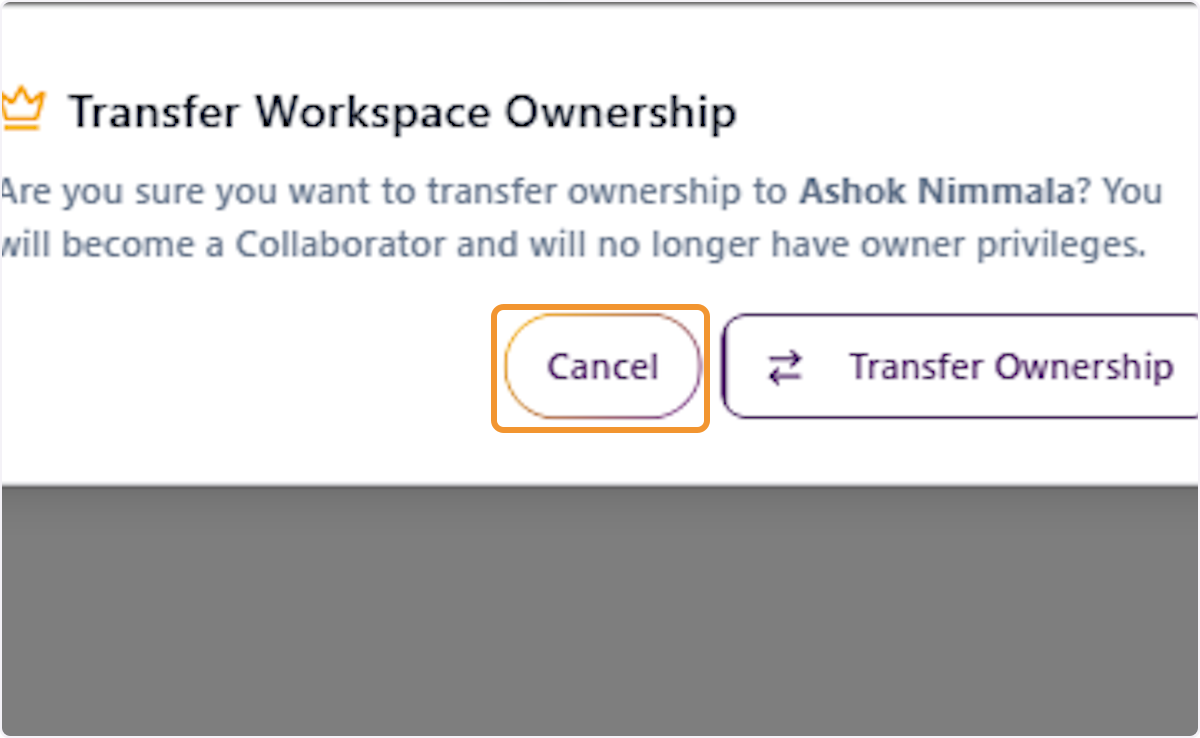
Cancel the Ownership Transfer
Click ‘Cancel’ to dismiss the Transfer Workspace Ownership confirmation dialog without making any changes. The current owner and member roles will remain unchanged. Use this option if you initiated the transfer by mistake or need more time to verify the action.
Open Member Options to Remove
Click the three-dot (···) icon on the target member’s card to open the member management dropdown. This is the first step to removing a collaborator from the workspace. The dropdown will display the available actions: Transfer Ownership, Copy Email, and Remove.
Select the Remove Option
Click ‘Remove’ (displayed in red) from the member options dropdown to initiate the removal process for the selected collaborator. This will trigger a confirmation dialog to ensure the action is intentional before permanently revoking the user’s access to the workspace.
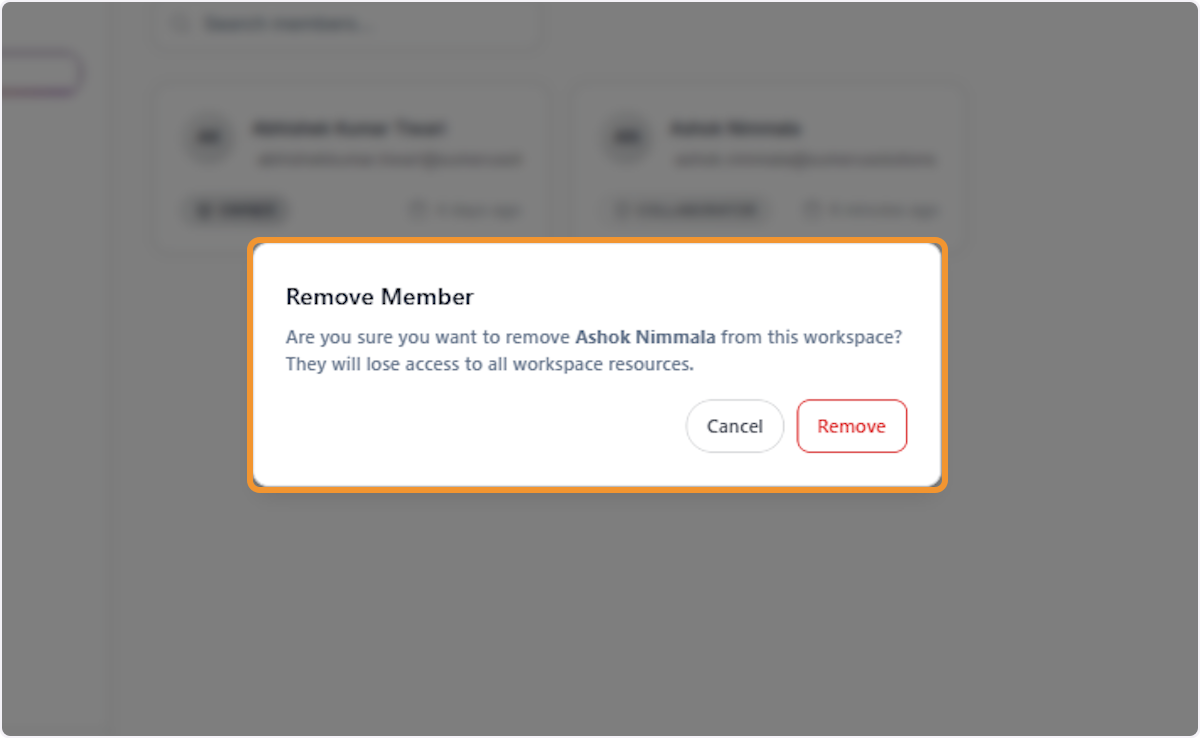
Review Member Removal Confirmation
A ‘Remove Member’ confirmation dialog will appear asking you to verify the removal. The dialog confirms the user’s name and states that they will lose access to all workspace resources. Review the dialog carefully to confirm you are removing the correct user.
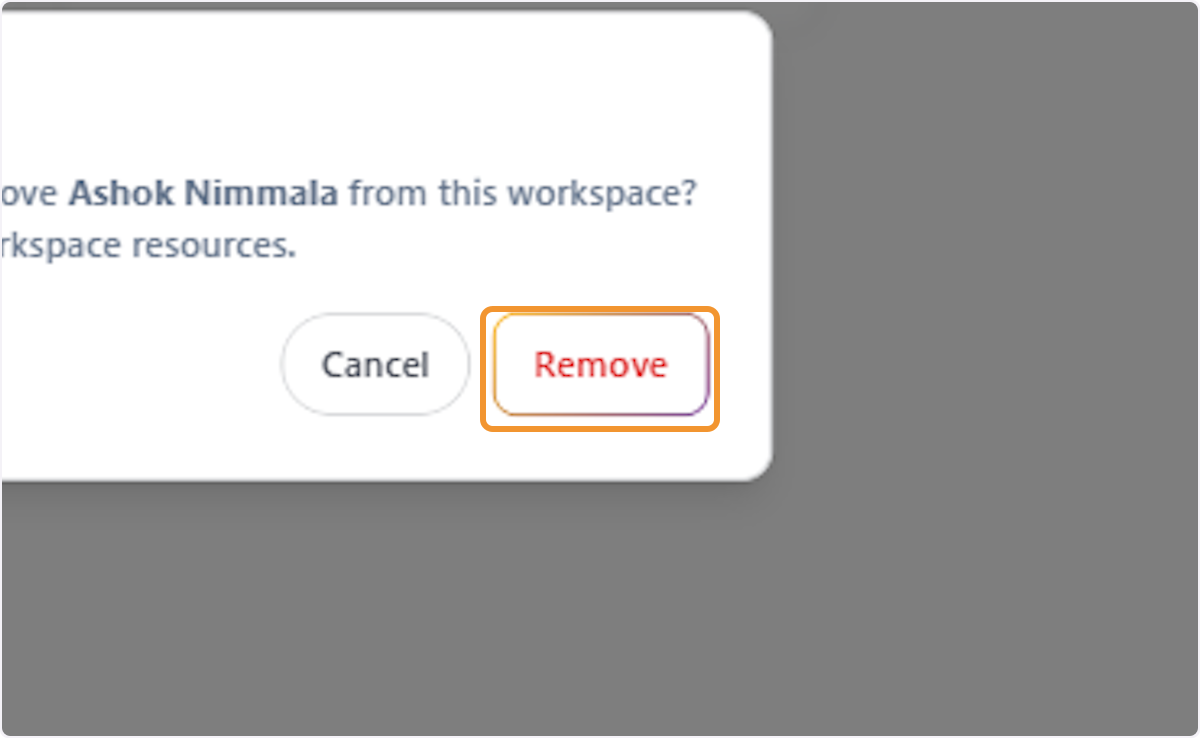
Confirm Member Removal
Click the ‘Remove’ button (in red) within the confirmation dialog to permanently remove the selected user from the workspace. The user will immediately lose access to all workspace threads, artifacts, and knowledge resources. This action cannot be undone.
Knowledge Base Management
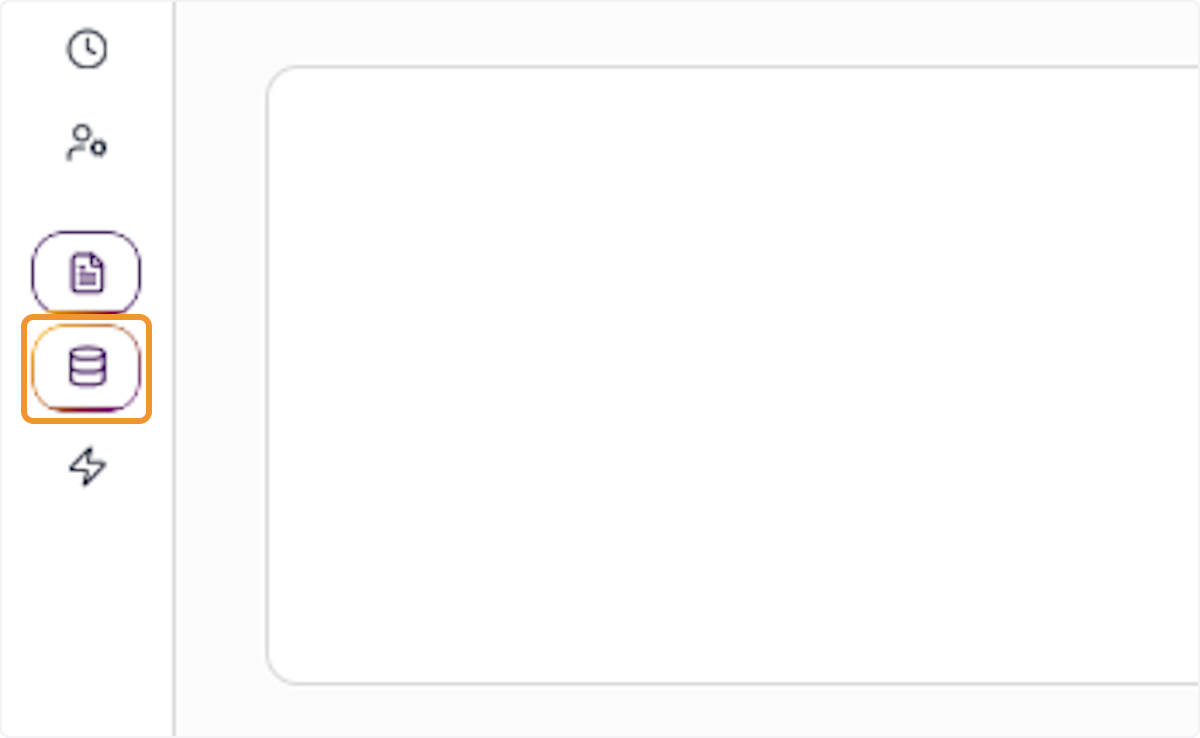
Return to the Knowledge Base
Click ‘Knowledge’ in the workspace sidebar to return to the Knowledge Base management panel. From here, you can upload new documents, organize files into folders, and manage the reference materials available to AI agents during conversations in this workspace.
Initiate a File Upload
Click the ‘Upload Files’ button in the upper-right corner of the Knowledge panel to open the file upload dialog. You can upload documents in multiple formats including PDF, Word, Excel, PowerPoint, plain text, images, audio, and video. Each file can be up to 50 MB in size.
Access the File Upload Modal
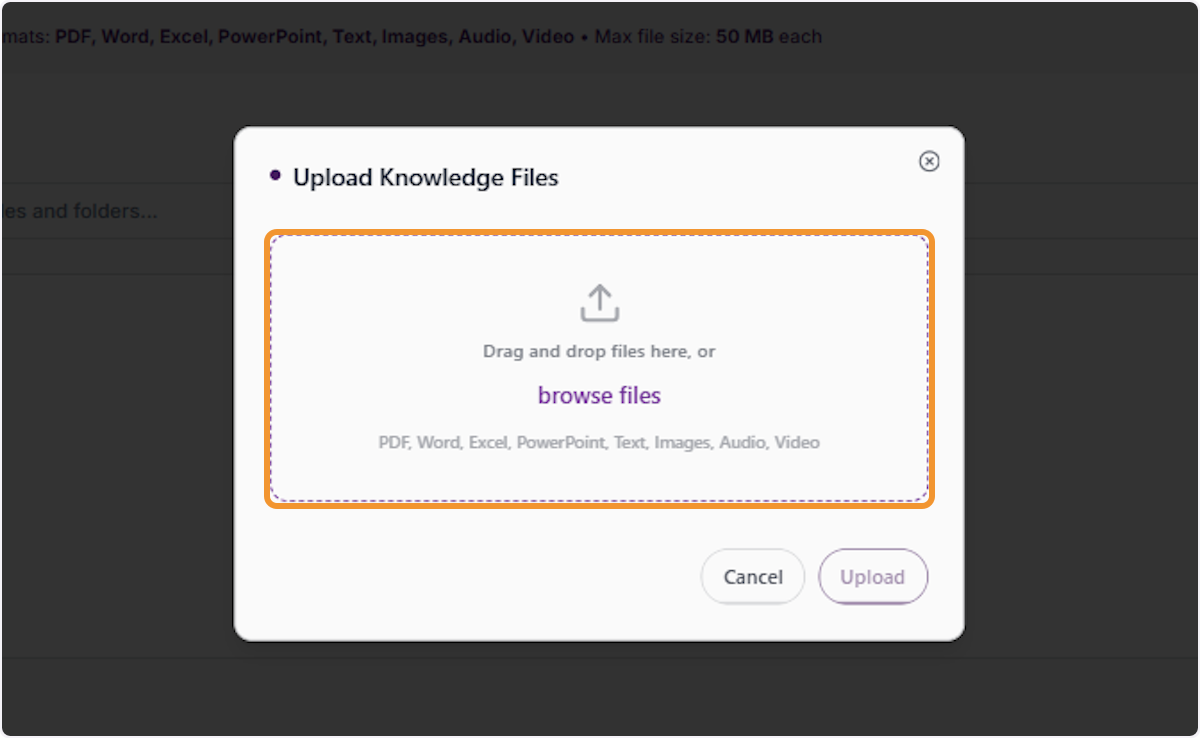
The ‘Upload Knowledge Files’ modal appears with a drag-and-drop zone in the center. You can either drag files directly from your file explorer into the highlighted area, or click the ‘browse files’ link to open a standard file picker dialog to select files from your device.
Browse and Select Files for Upload
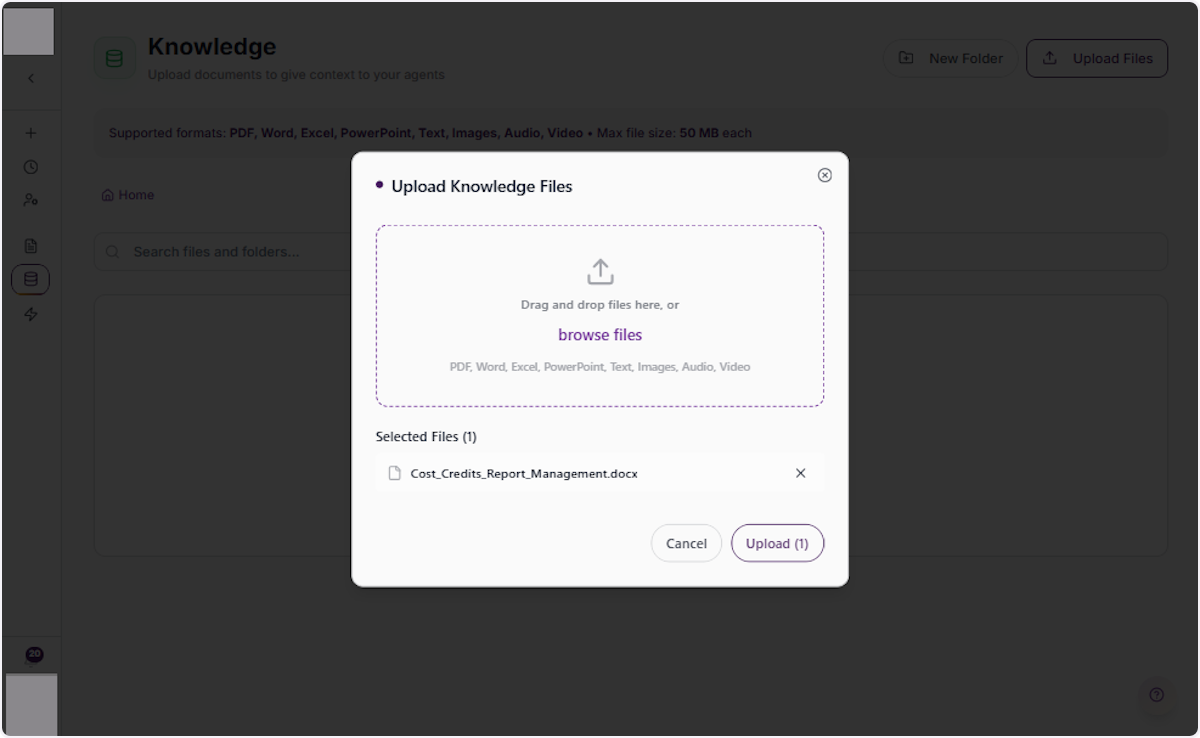
Click ‘browse files’ within the upload modal to open your device’s file picker. Navigate to the location of the document you want to upload, select the file, and click Open. The selected file will appear in the ‘Selected Files’ list within the modal before uploading.
Confirm File Selection
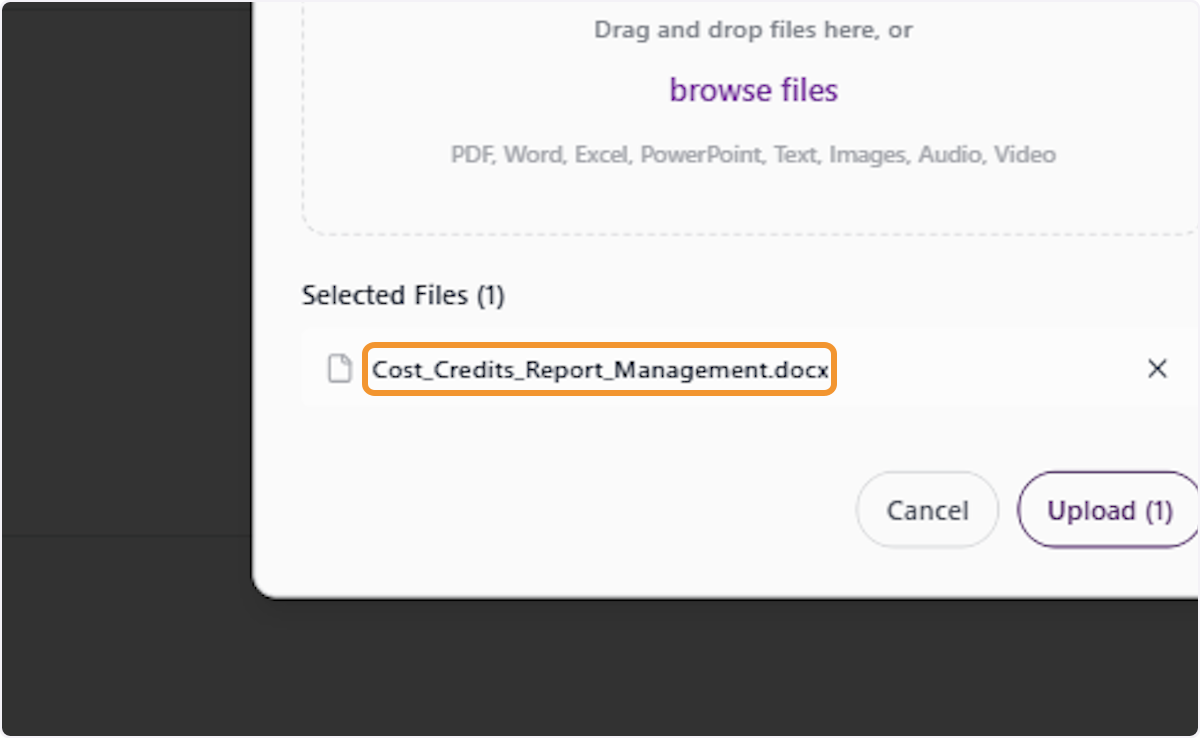
The selected file will appear in the ‘Selected Files (1)’ section of the upload modal. Review the filename to confirm the correct document has been chosen. You can click the x icon next to any file to remove it from the selection before uploading.
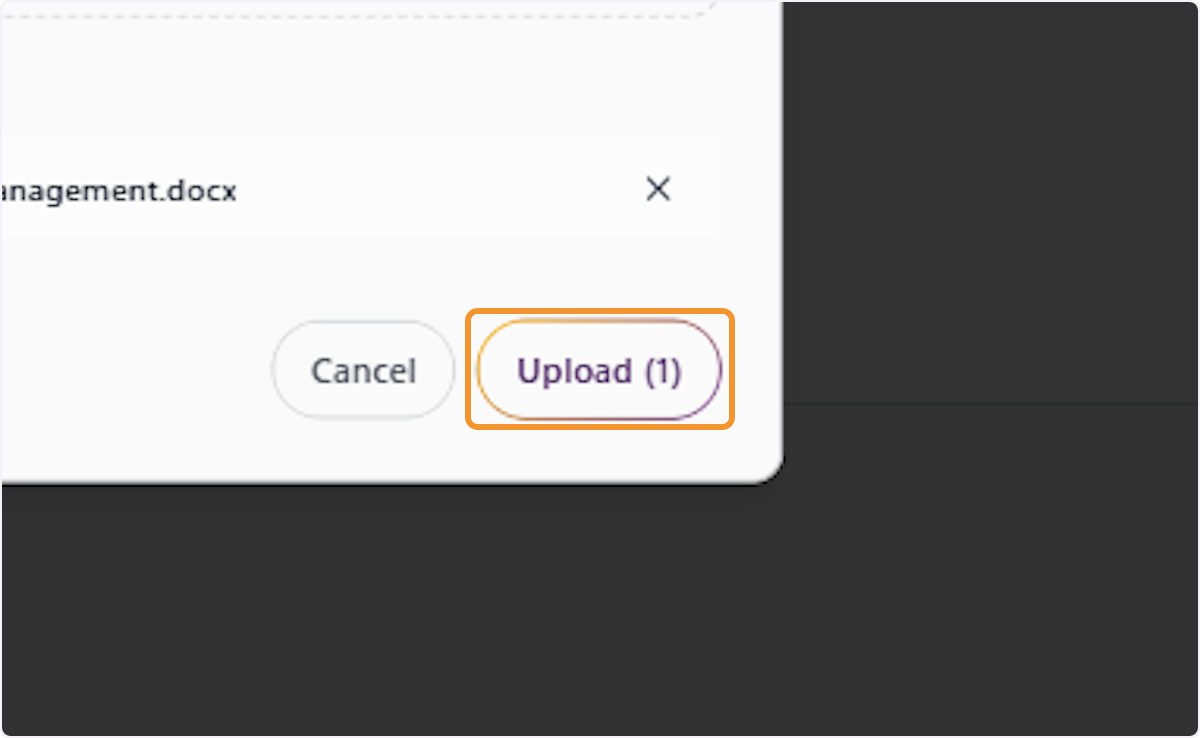
Start the File Upload
Click ‘Upload (1)’ to begin uploading the selected file to the workspace Knowledge Base. The number in parentheses indicates how many files are queued for upload. The system will begin processing the file immediately after this action is confirmed.
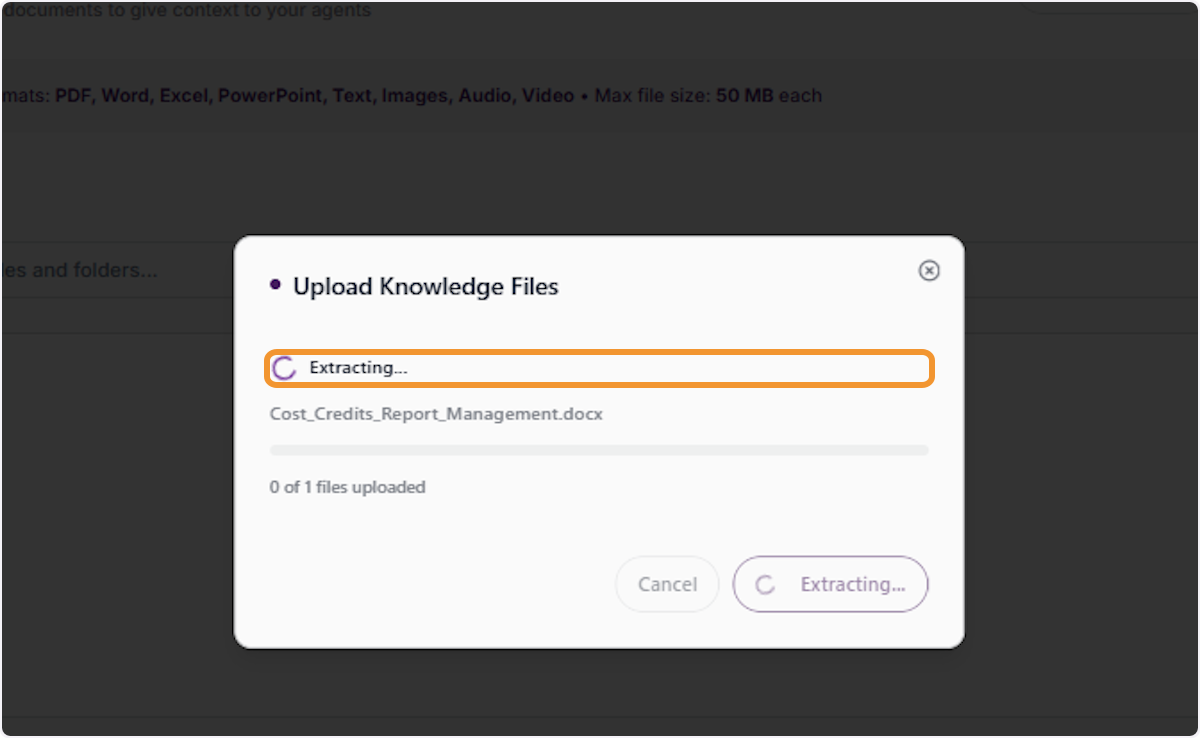
File Extraction in Progress
After uploading, the system displays an ‘Extracting…’ status, indicating that the platform is processing and indexing the document’s content. This extraction process makes the file’s text and data searchable and accessible to AI agents during workspace conversations.
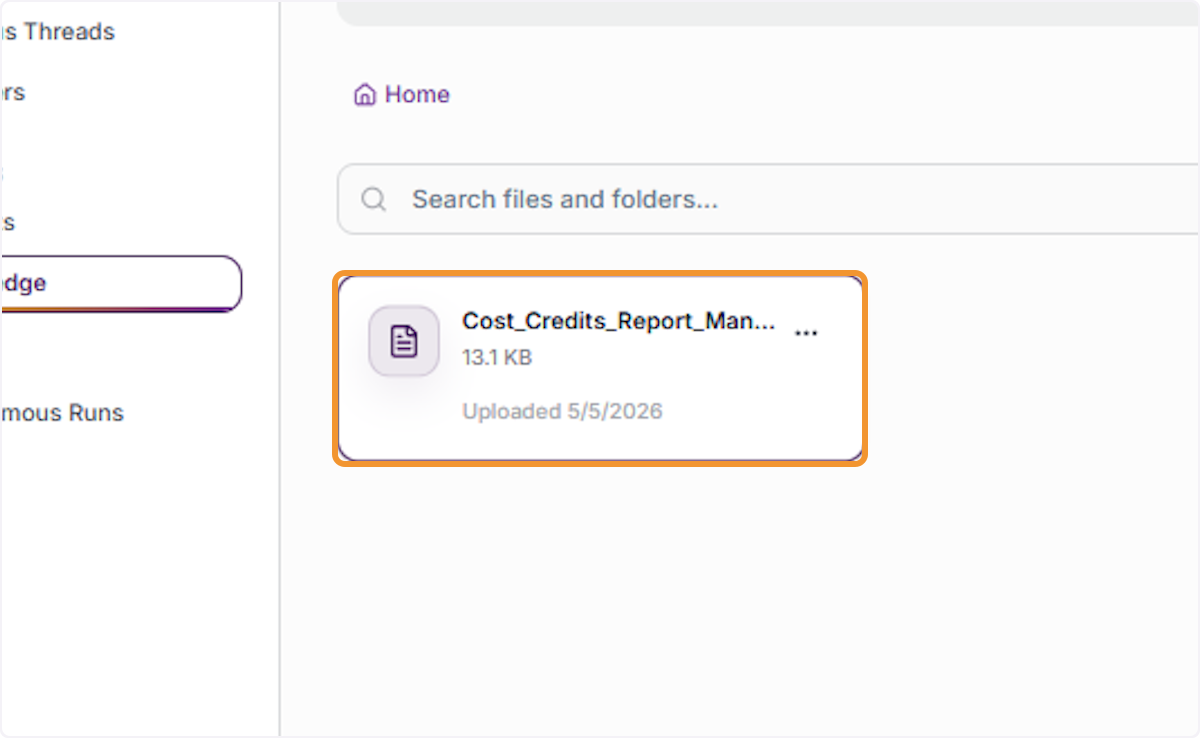
View Uploaded File in Knowledge Base
Once extraction is complete, the uploaded file appears in the Knowledge Base list with its filename, file size, and upload timestamp. The file is now available for AI agents to reference during conversations. Click on the filename to view its details or access management options.
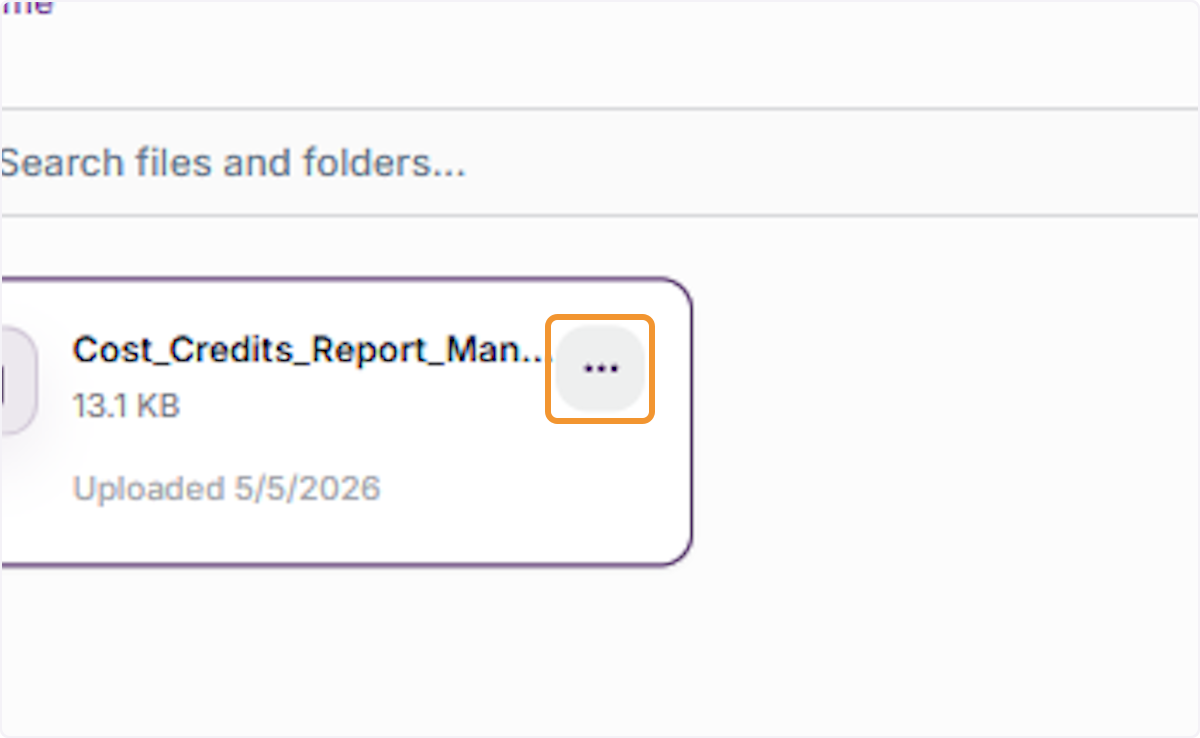
Access File Management Options
Click the three-dot (···) icon that appears when hovering over a file in the Knowledge Base to open its management dropdown. This menu provides options to organize or remove the file from the workspace knowledge repository.
View Available File Actions
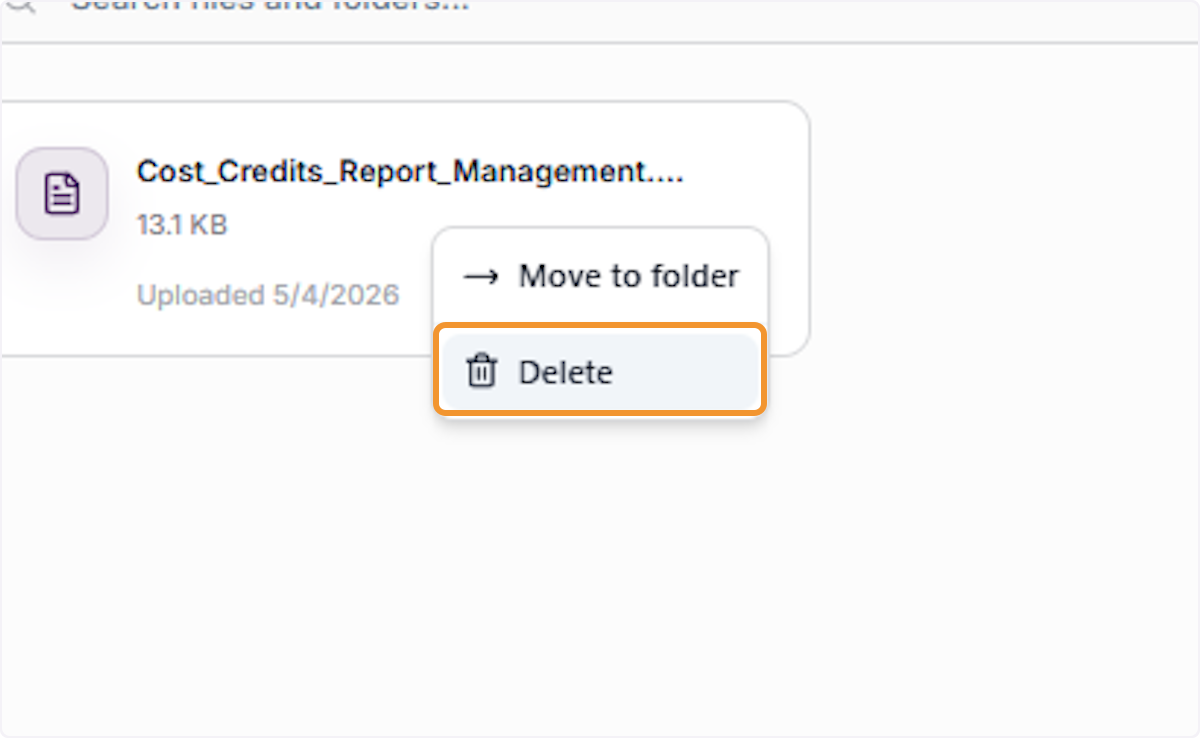
The file options dropdown reveals two available actions: ‘Move to folder’ (to organize the file into a specific knowledge folder) and ‘Delete’ (to permanently remove the file from the Knowledge Base). Select the appropriate action based on your file management needs.
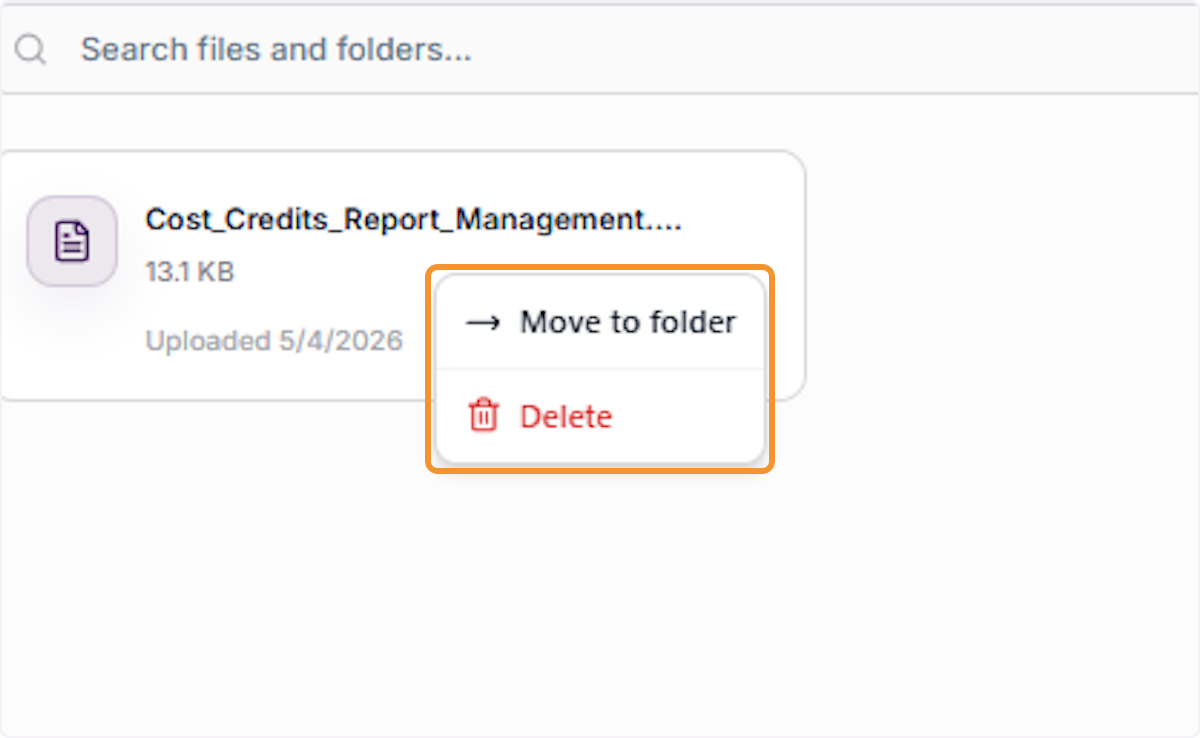
Select Delete to Remove a File
Click ‘Delete’ from the file options dropdown to initiate the deletion of the selected knowledge file. This will open a confirmation dialog before permanently removing the file from the Knowledge Base. Note that deleted files cannot be recovered and must be re-uploaded if needed.
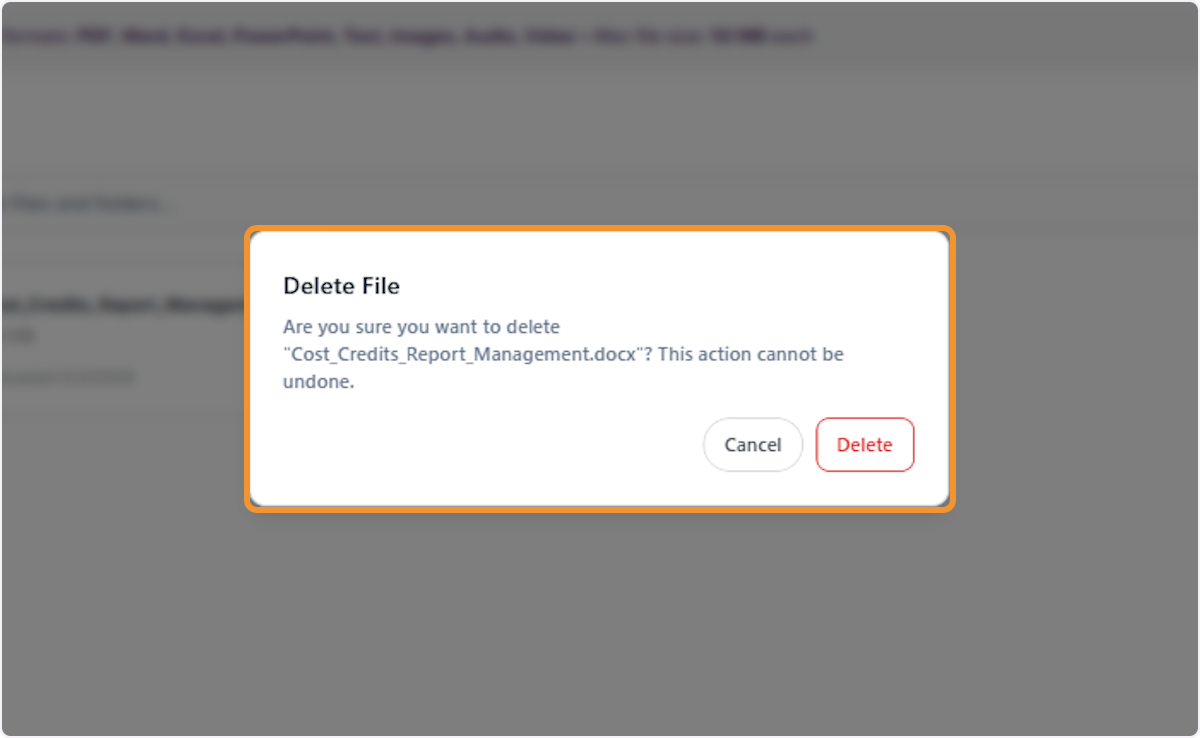
Review File Deletion Confirmation
The ‘Delete File’ confirmation dialog will appear asking you to verify the deletion. Confirm the filename displayed in the dialog matches the file you intend to remove before proceeding. This action is permanent and cannot be undone once confirmed.
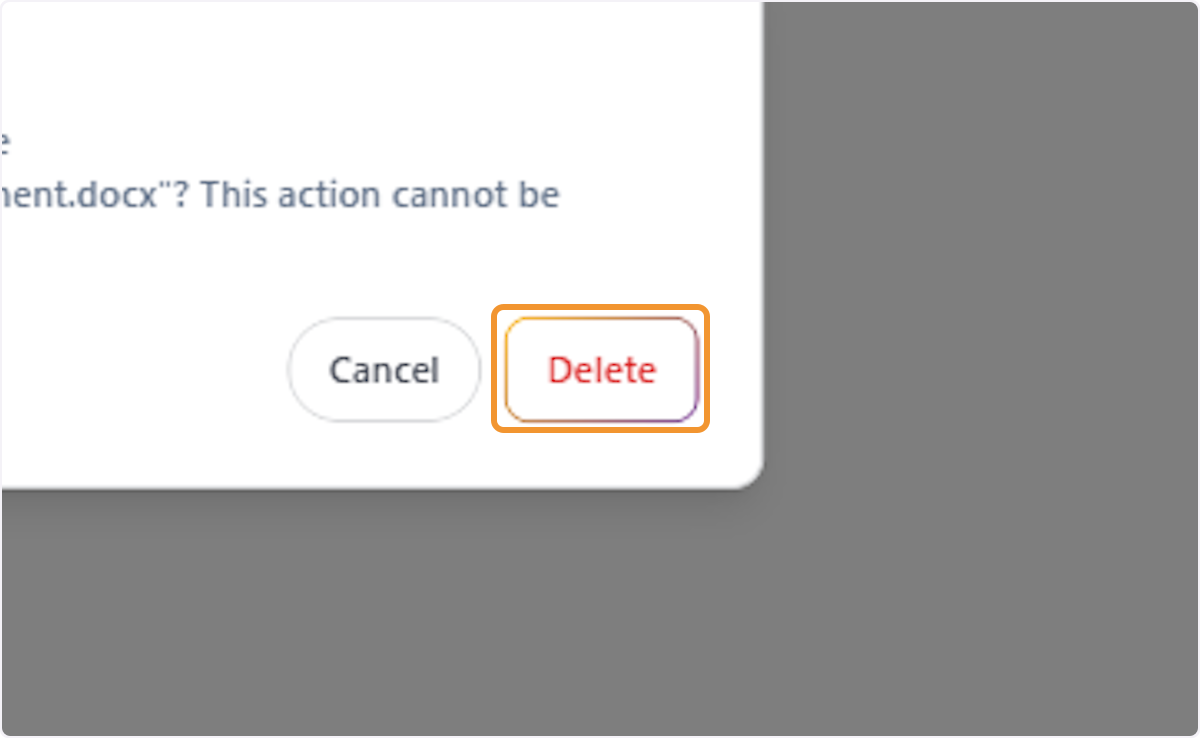
Confirm File Deletion
Click the ‘Delete’ button (shown in red) in the confirmation dialog to permanently remove the file from the workspace Knowledge Base. The file will be immediately deleted and will no longer be accessible to AI agents in this workspace.
Knowledge Base Empty State
After deleting all files, the Knowledge Base returns to its empty state. Use the ‘Upload Files’ option to add new reference documents, or ‘Create folder’ to set up an organized folder structure before uploading new knowledge content.
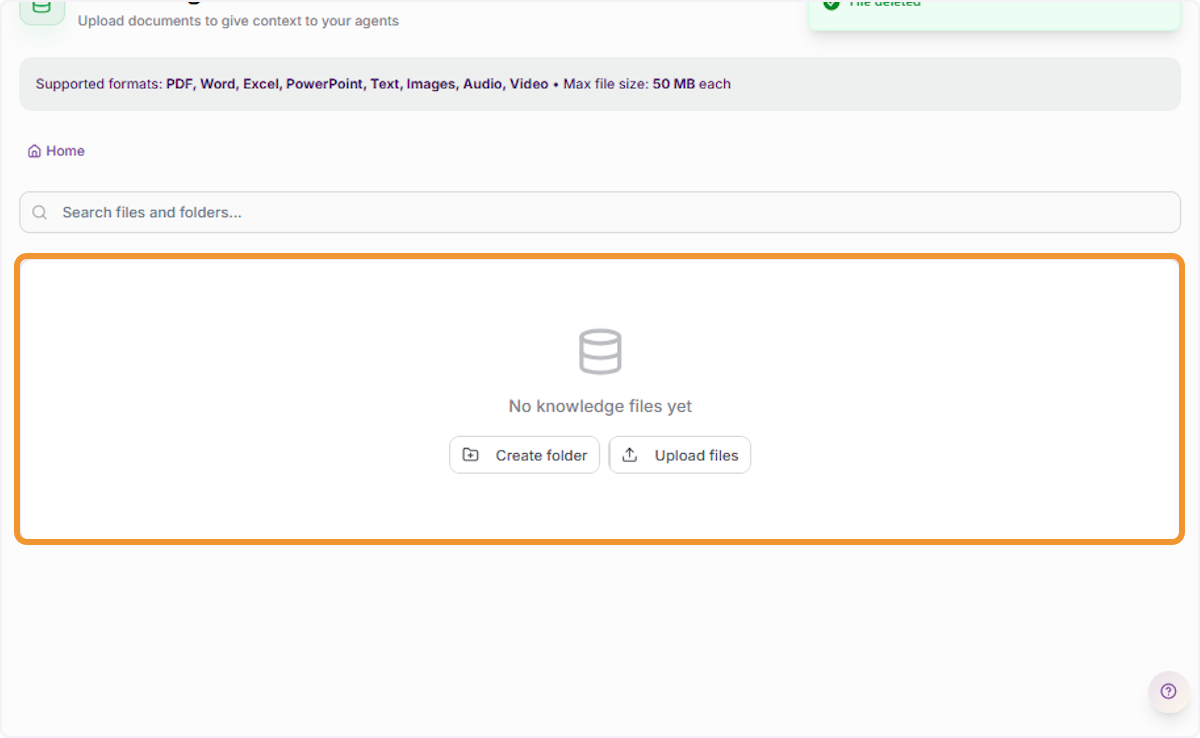
Click the back arrow in the navigation panel to return to the previous workspace view. This collapses the current resource panel and takes you back to the workspace home or the Workspaces overview, depending on your navigation context.
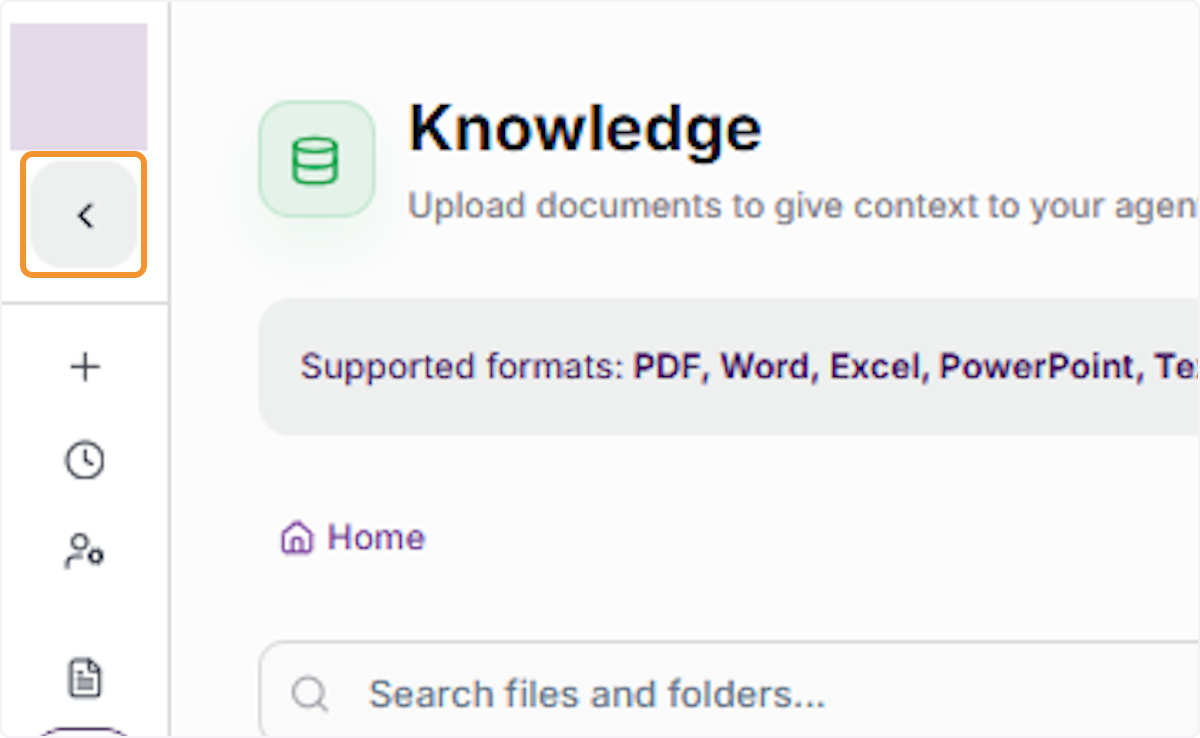
Return to the Workspaces Overview
Clicking back navigates you to the ‘Your Spaces’ overview, which displays all your active workspaces as cards. Each card shows the workspace name, a brief description, the last updated time, and an ‘Open’ button to re-enter the workspace directly.
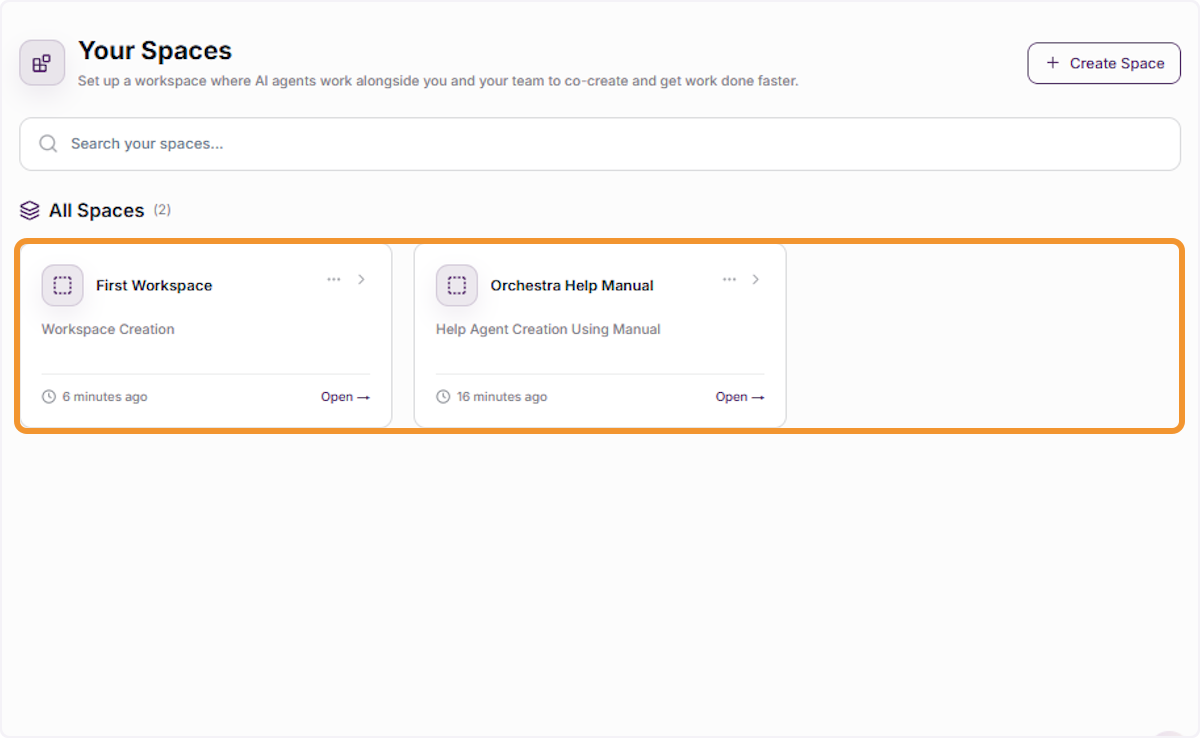
Workspace Administrative Actions
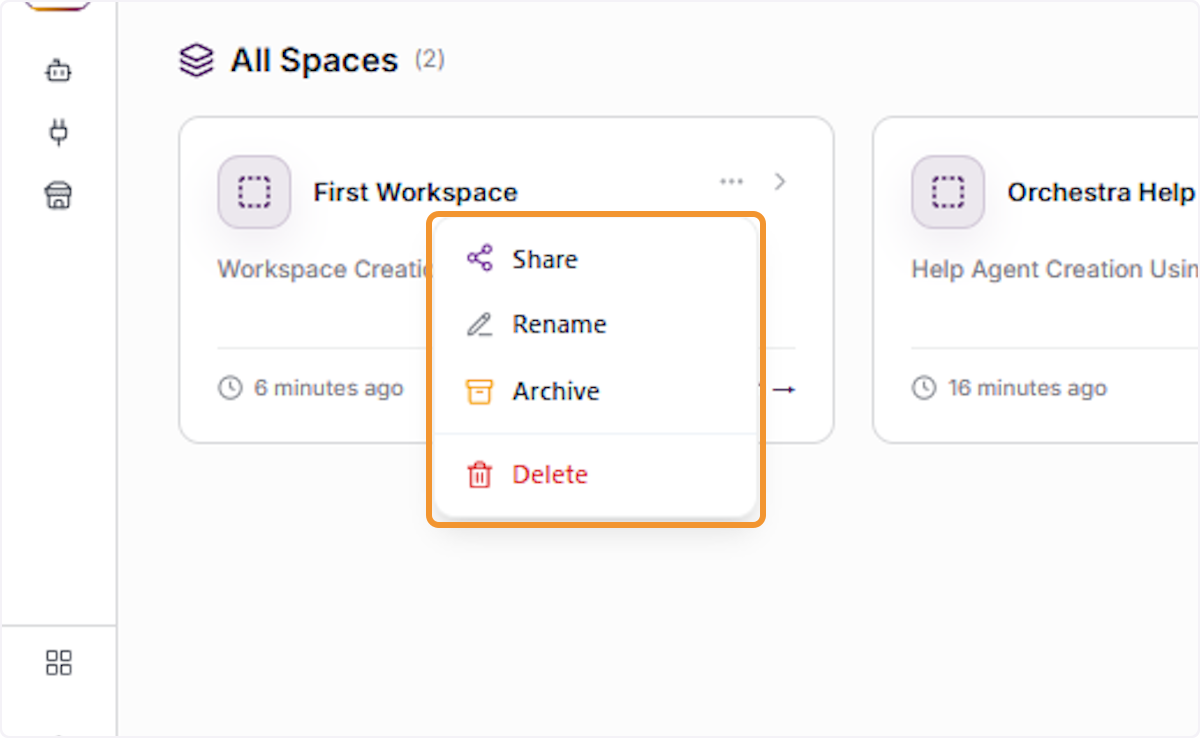
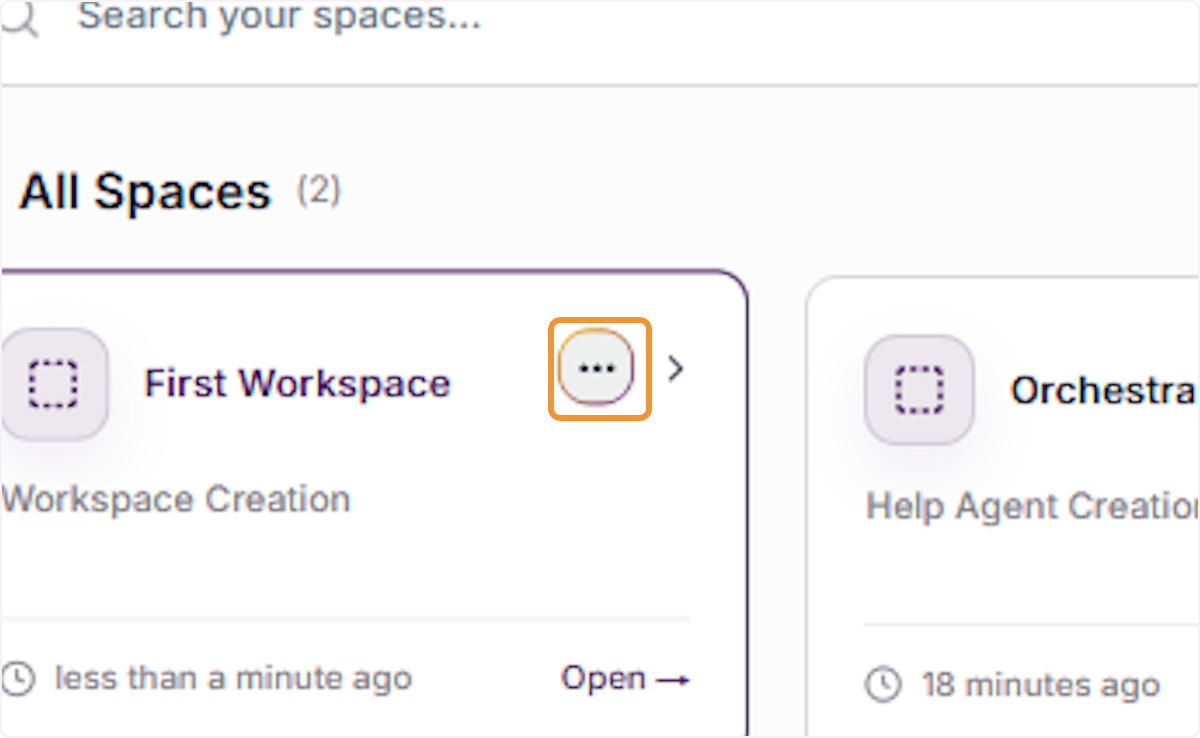
Hover over any workspace card in the ‘Your Spaces’ view to reveal the three-dot (···) options icon in the top-right corner of the card. Click this icon to open the workspace management dropdown menu, which provides administrative actions for that workspace.
View Workspace Administrative Options
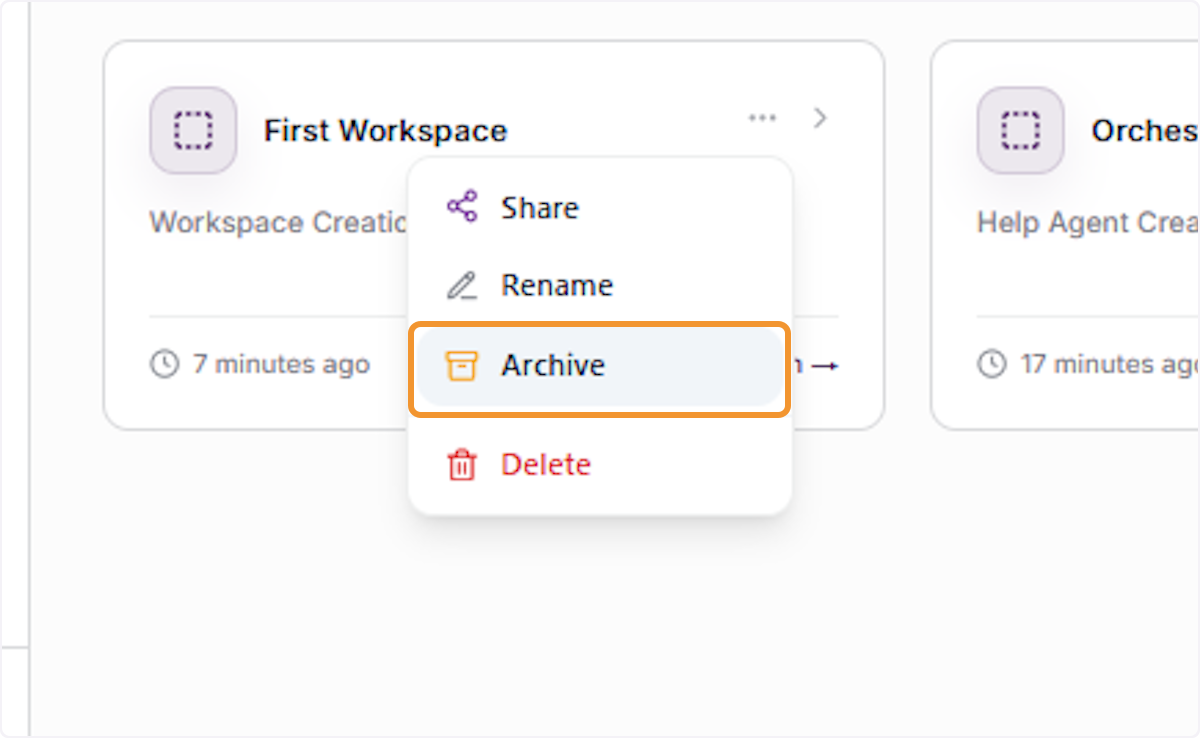
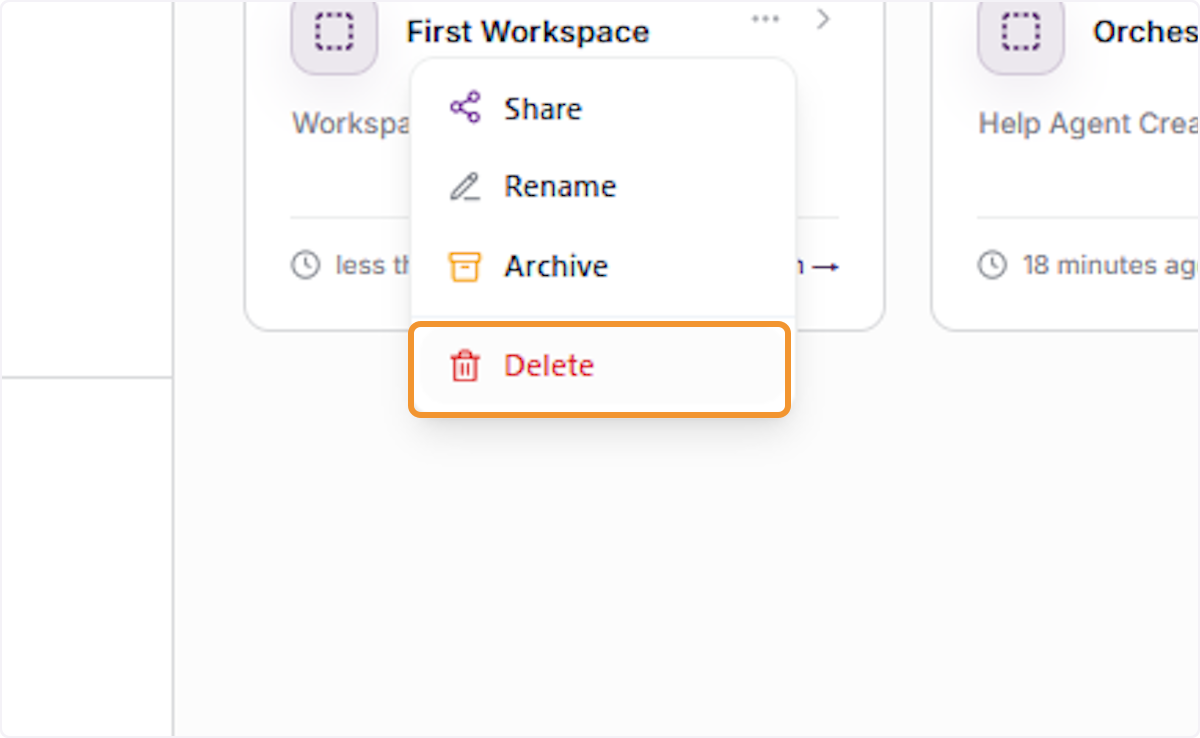
The workspace options dropdown menu displays four administrative actions: ‘Share’ (add members), ‘Rename’ (change the workspace name), ‘Archive’ (hide the workspace from active view while preserving data), and ‘Delete’ (permanently remove the workspace and all its contents).
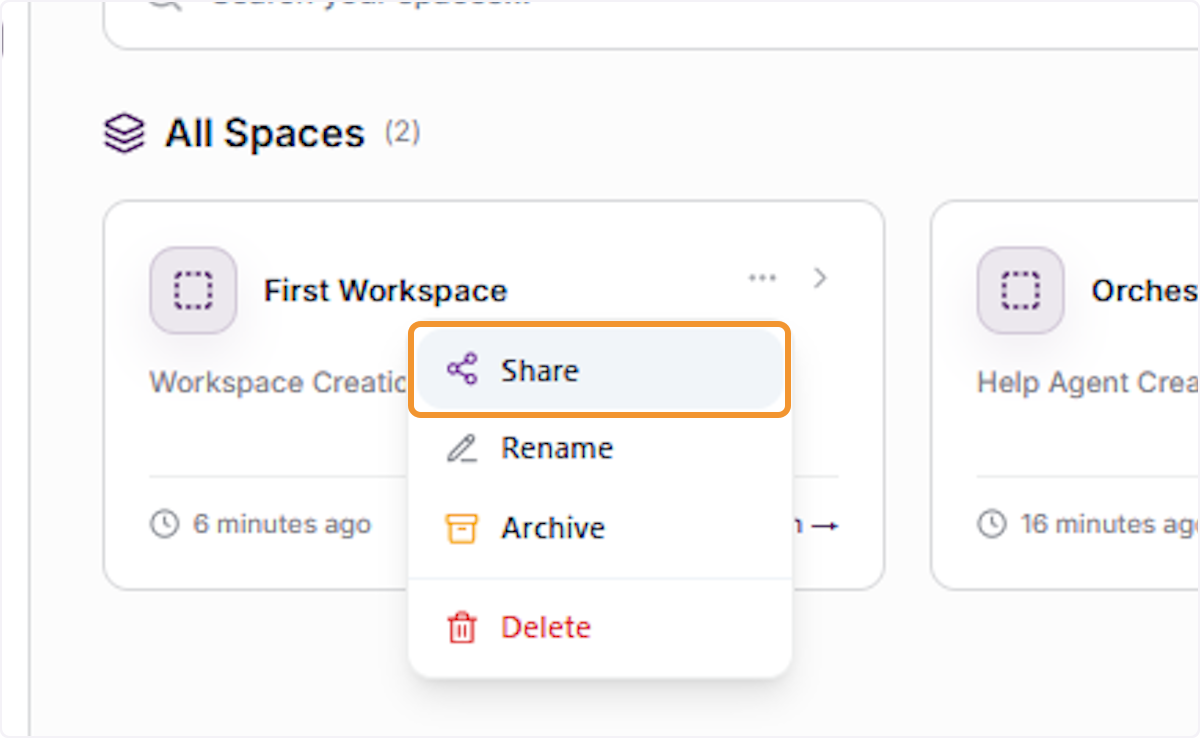
Click ‘Share’ from the workspace options dropdown to open the member addition modal directly from the Spaces overview. This is a shortcut to the Add Member functionality, allowing you to invite collaborators to a workspace without navigating inside it first.
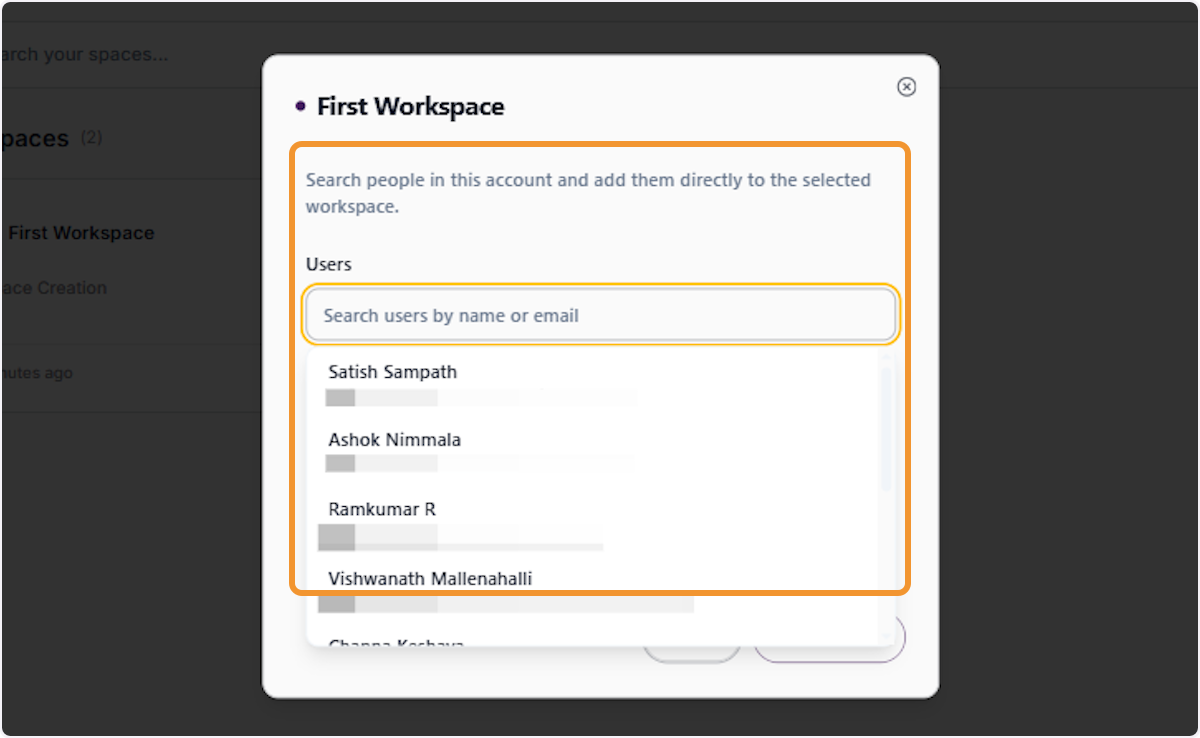
In the Share modal, use the ‘Search users by name or email’ field to find team members in your organization. A list of all available users is displayed by default, which is filtered in real time as you type a name or email address.
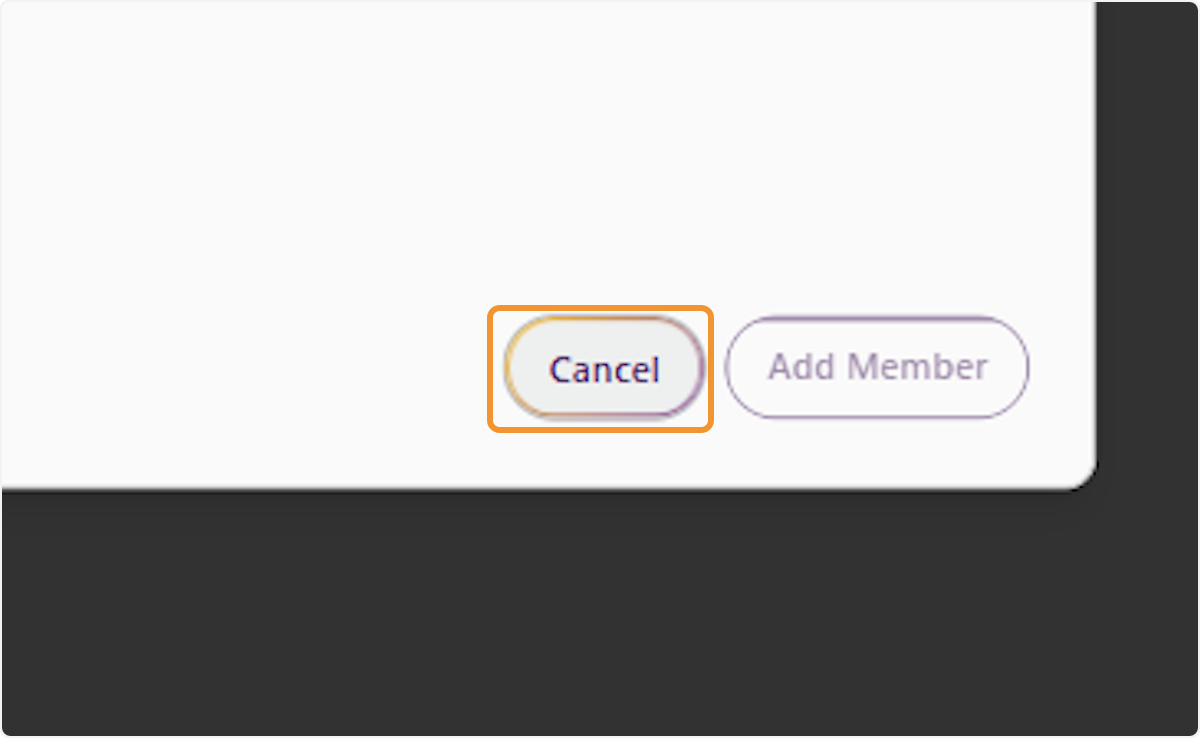
Click ‘Cancel’ to close the Share modal without adding any new members to the workspace. This returns you to the ‘Your Spaces’ overview with no changes made to workspace membership. Use this if you opened the modal unintentionally or changed your mind.
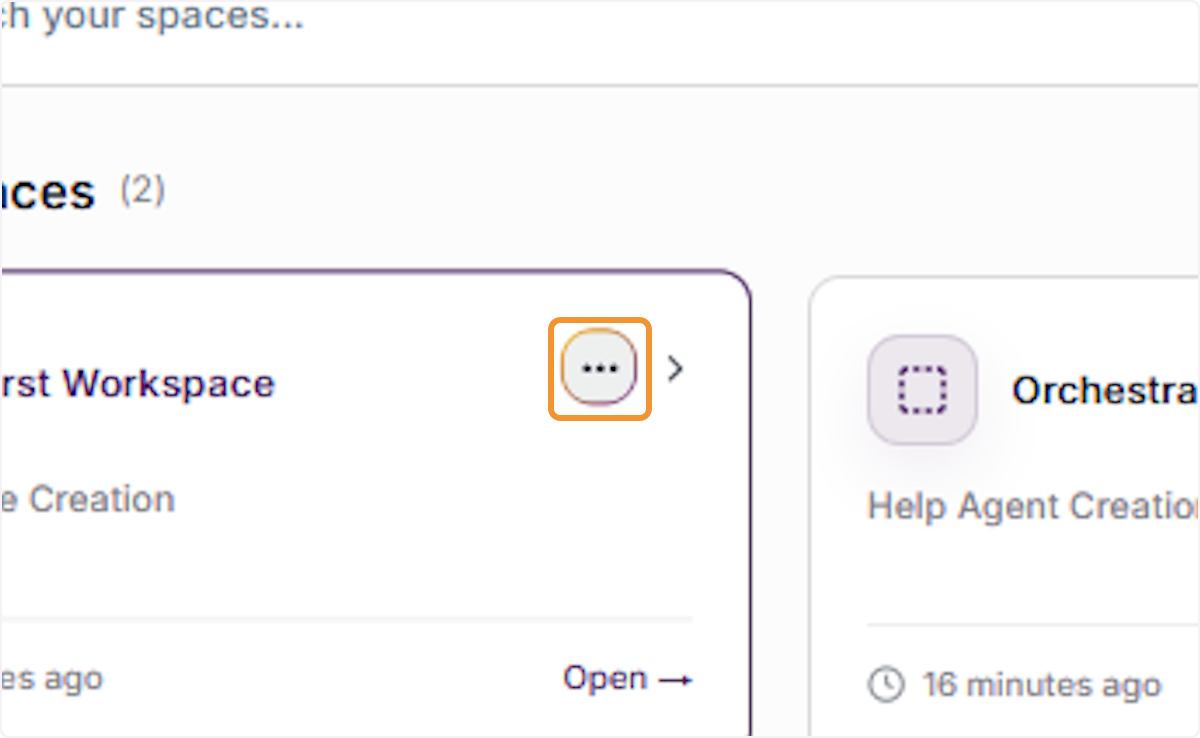
Open Workspace Options for Renaming
Hover over the workspace card and click the three-dot (···) icon to reopen the workspace options dropdown menu. Select ‘Rename’ to change the workspace’s display name. Renaming a workspace does not affect its content, members, threads, or any other associated data.
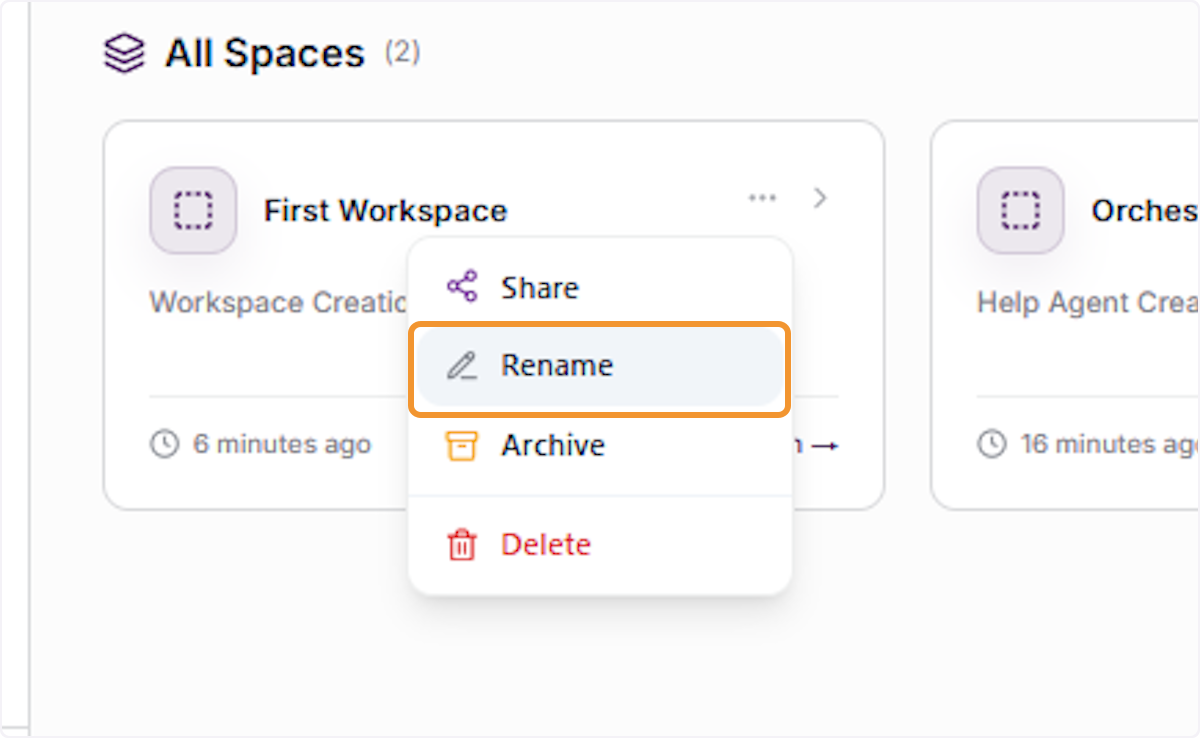
Select Rename from Options
Click ‘Rename’ from the workspace options dropdown to open the Rename Workspace dialog. This option allows you to update the workspace’s display name to better reflect its current purpose or to improve clarity for all team members who access the workspace.
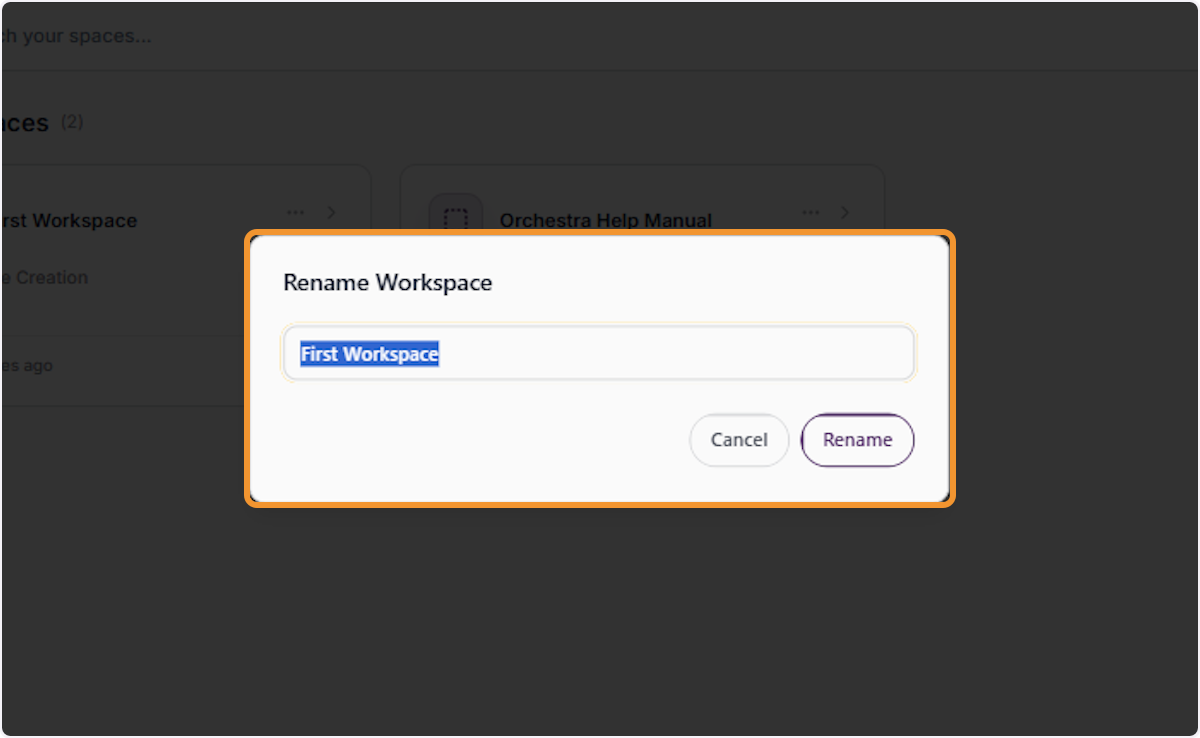
Edit the Workspace Name
The ‘Rename Workspace’ dialog opens with the current workspace name pre-filled in the input field and highlighted for easy replacement. Type the new desired name directly in the field. The new name will be visible to all workspace members immediately after saving.
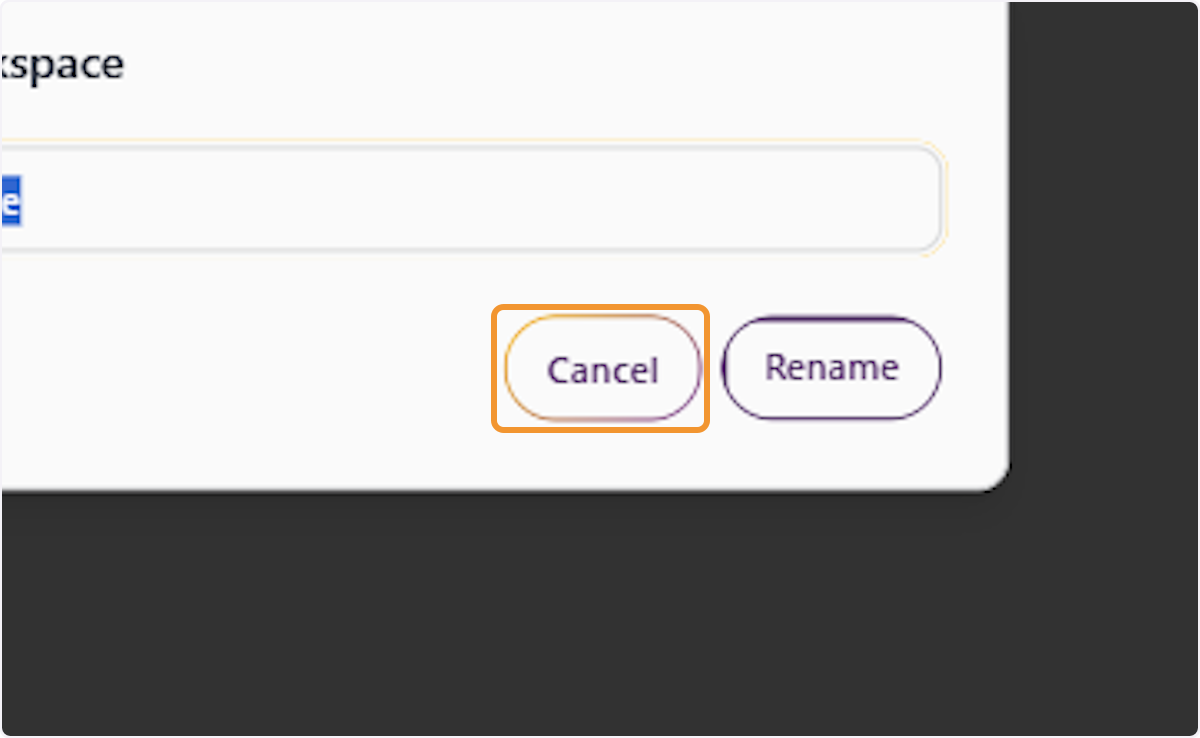
Cancel the Rename Action
Click ‘Cancel’ in the Rename Workspace dialog to discard any changes and close the dialog without renaming the workspace. The workspace name will remain unchanged. Alternatively, click ‘Rename’ to save the new name and apply the change immediately.
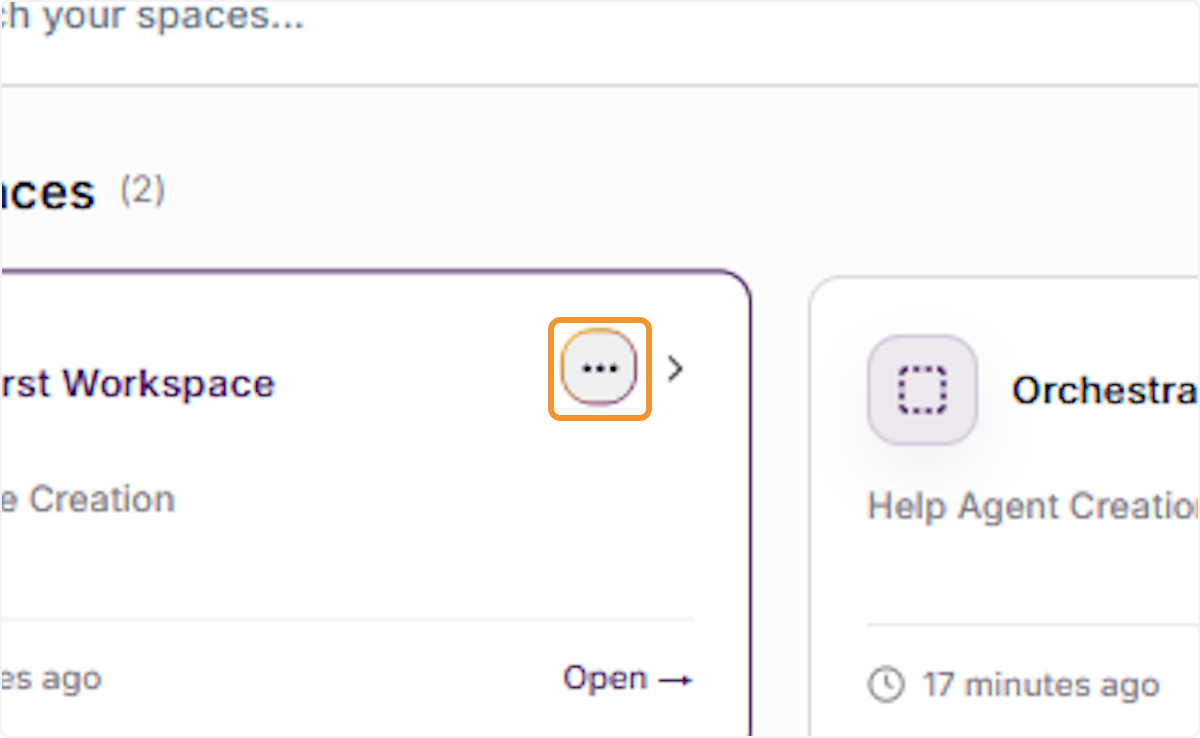
Open Workspace Options for Archiving
Hover over the workspace card and click the three-dot (···) icon to open the workspace options dropdown. Select ‘Archive’ to hide the workspace from your active Spaces view. Archiving is a reversible action — all data, threads, and members are preserved and can be restored at any time.
Select Archive from Options
Click ‘Archive’ from the workspace options dropdown to begin the archiving process. Archiving a workspace removes it from the active ‘All Spaces’ list, reducing clutter in your workspace overview while preserving all content for future reference or restoration.
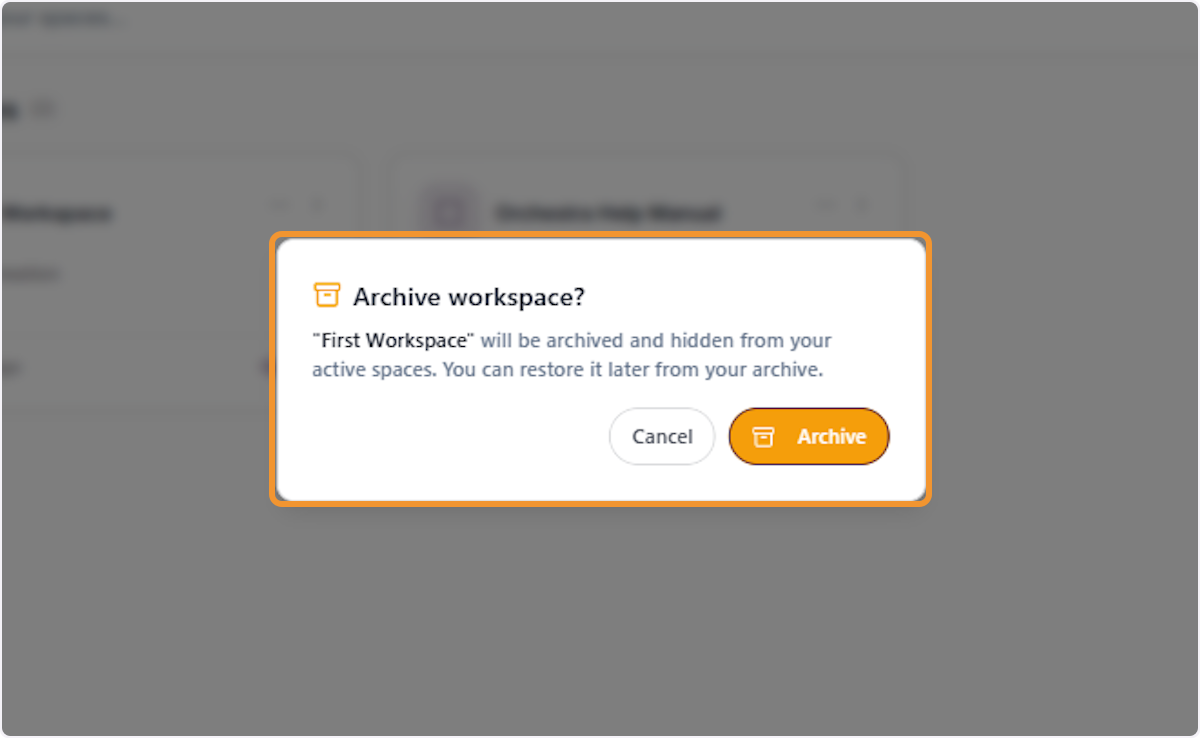
Review Archive Confirmation
The ‘Archive workspace?’ confirmation dialog will appear, stating that the workspace will be archived and hidden from your active spaces. This is a non-destructive action — click ‘Archive’ to proceed or ‘Cancel’ to keep the workspace active.
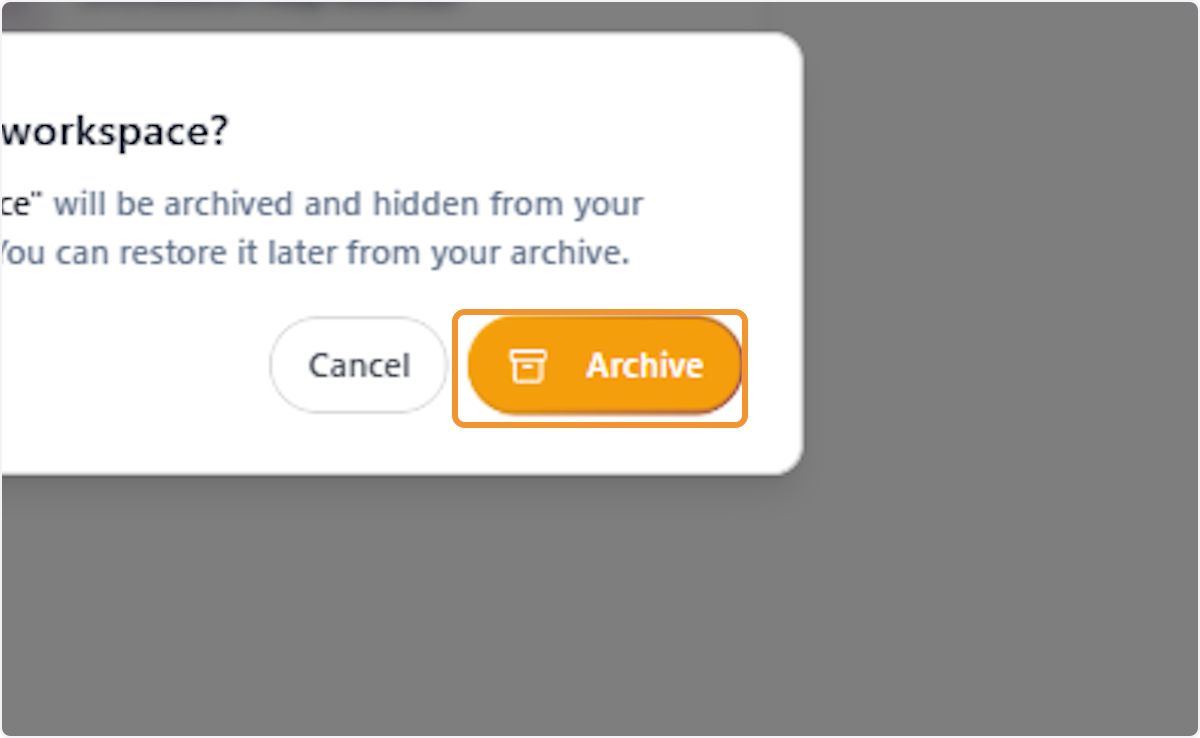
Confirm Workspace Archiving
Click the ‘Archive’ button in the confirmation dialog to proceed with archiving the workspace. The workspace will be immediately removed from the active ‘Your Spaces’ view and moved to the Archived Workspaces section, accessible via the left sidebar under Settings.
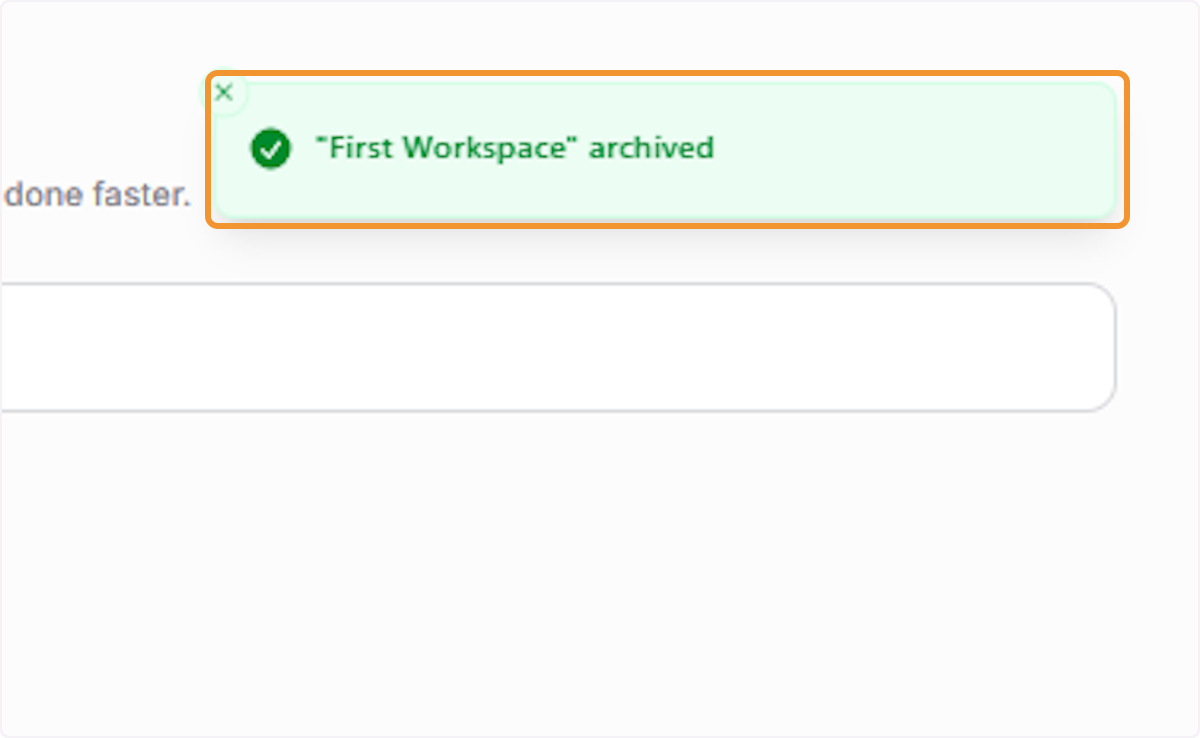
Archive Confirmation Banner
A green confirmation banner will briefly appear at the top of the screen confirming the workspace has been successfully archived. The workspace is no longer visible in the active spaces list but remains fully accessible through the Archived Workspace section under Settings.
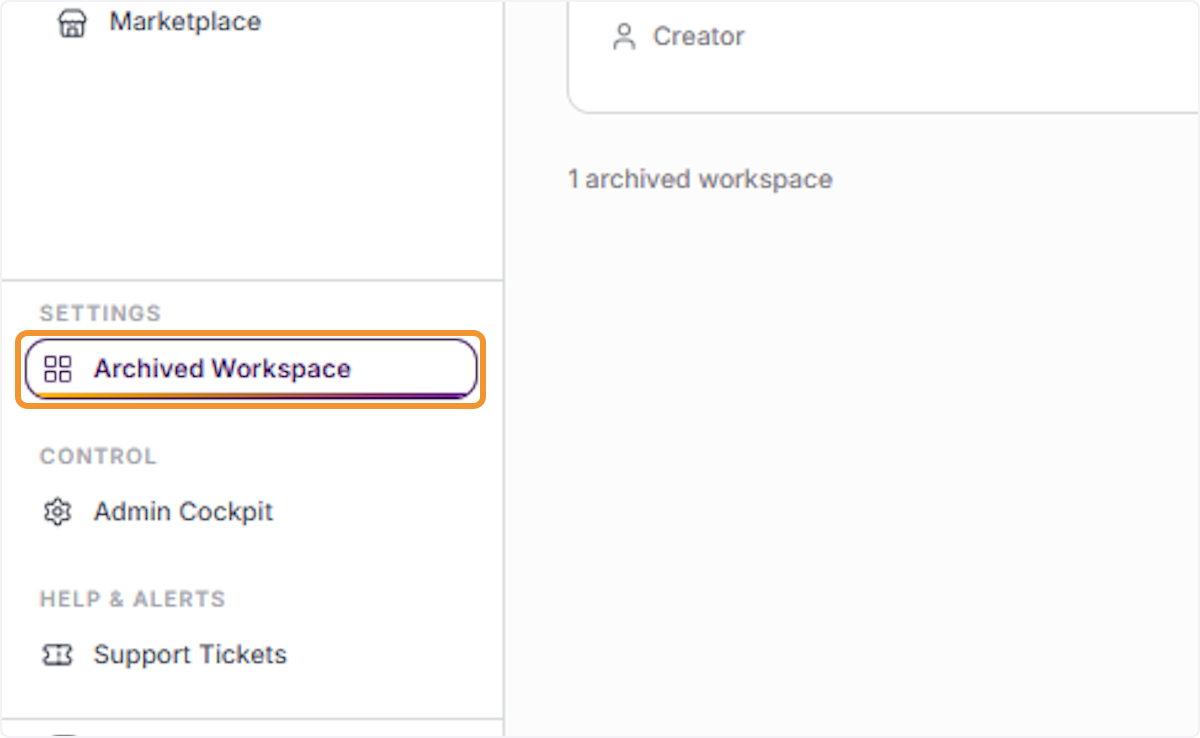
Archived Workspace Management
Click ‘Archived Workspace’ under the Settings section in the left sidebar to view all archived workspaces. The sidebar badge shows the count of archived workspaces. From this section, you can view, manage, or restore any previously archived workspace.
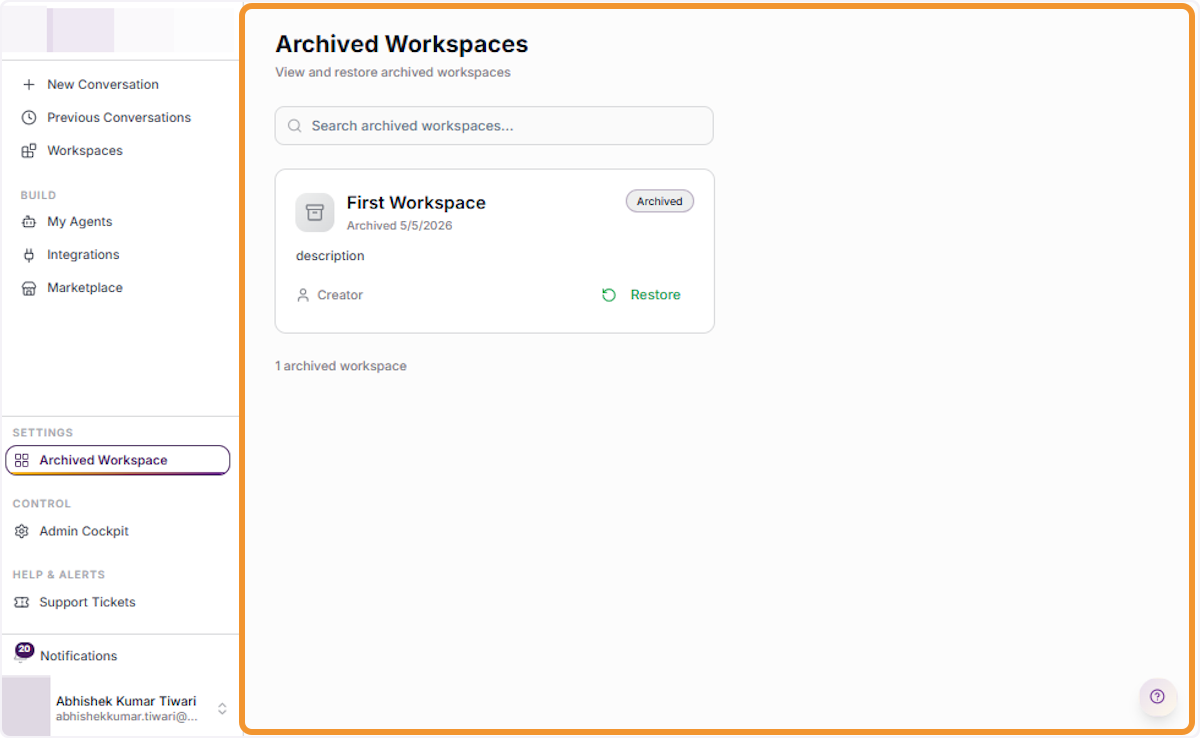
View the Archived Workspaces List
The ‘Archived Workspaces’ panel displays all workspaces that have been archived, showing each workspace’s name, archive date, description, and creator. A ‘Restore’ button is available next to each archived workspace, allowing you to reactivate it and make it active again.
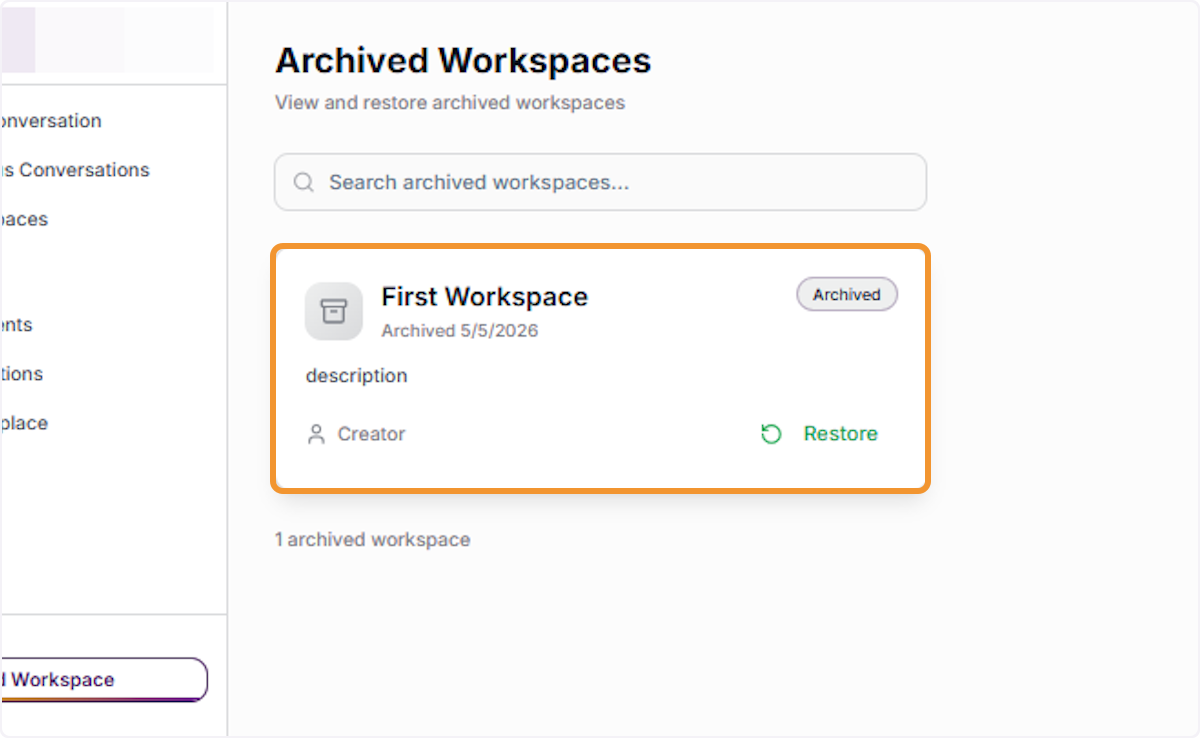
Select an Archived Workspace
Click on the archived workspace card to review its details, including the archive date and description. The workspace entry also shows the creator’s name and the ‘Restore’ button, which you can use to bring the workspace back to your active spaces.
Initiate Workspace Restoration
Click the ‘Restore’ button on the archived workspace card to begin the restoration process. This will open a confirmation dialog asking you to verify that you want to restore the workspace and make it active and accessible to all members again.
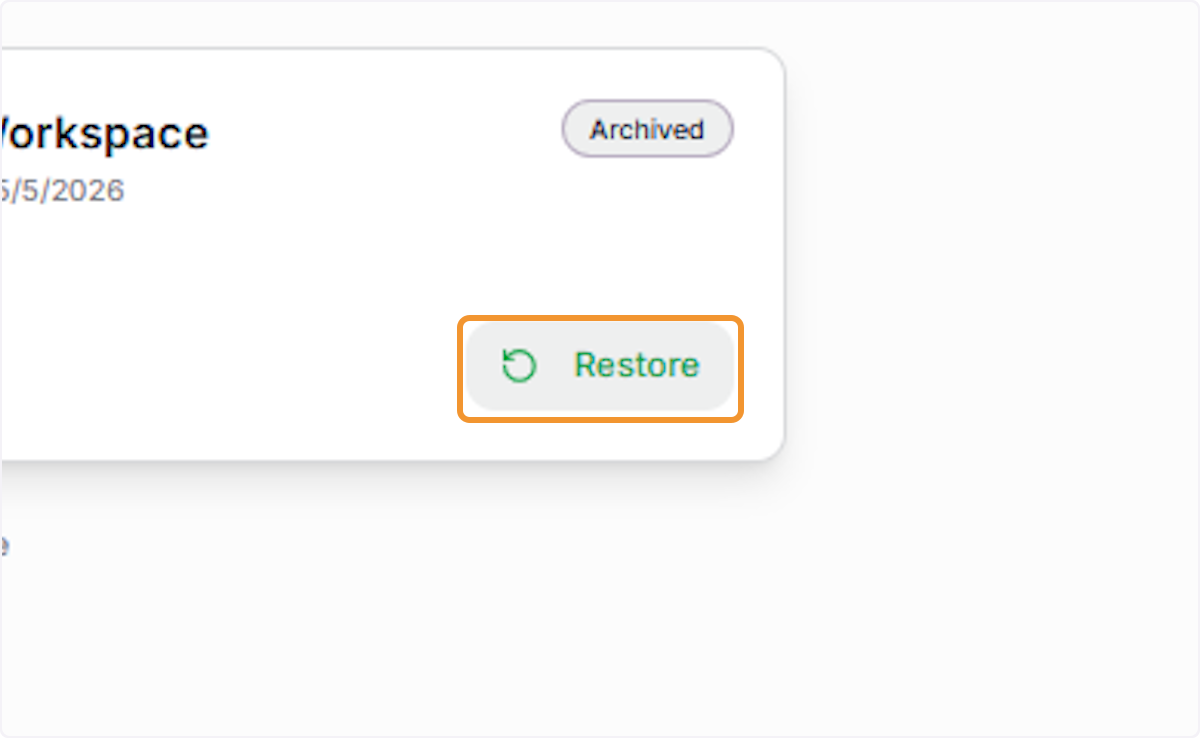
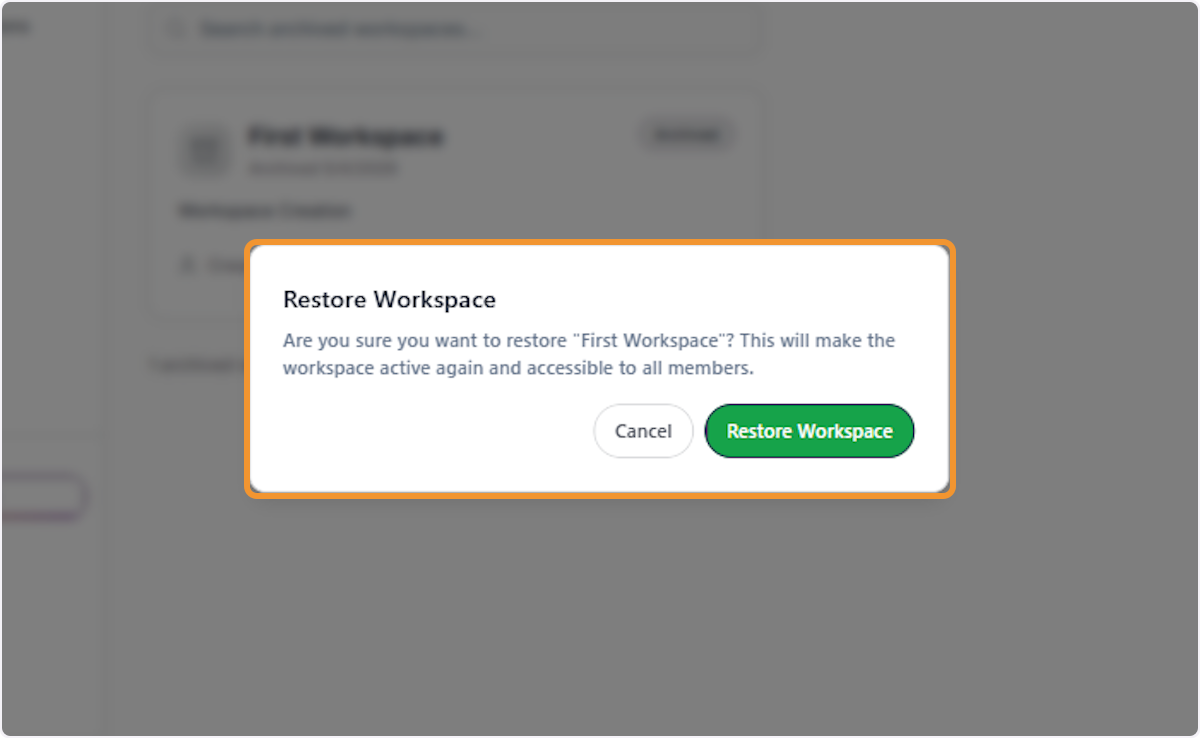
Review Workspace Restoration Confirmation
The ‘Restore Workspace’ confirmation dialog will appear, informing you that restoring the workspace will make it active again and accessible to all members. Review the confirmation carefully and click ‘Restore Workspace’ to proceed with the restoration.
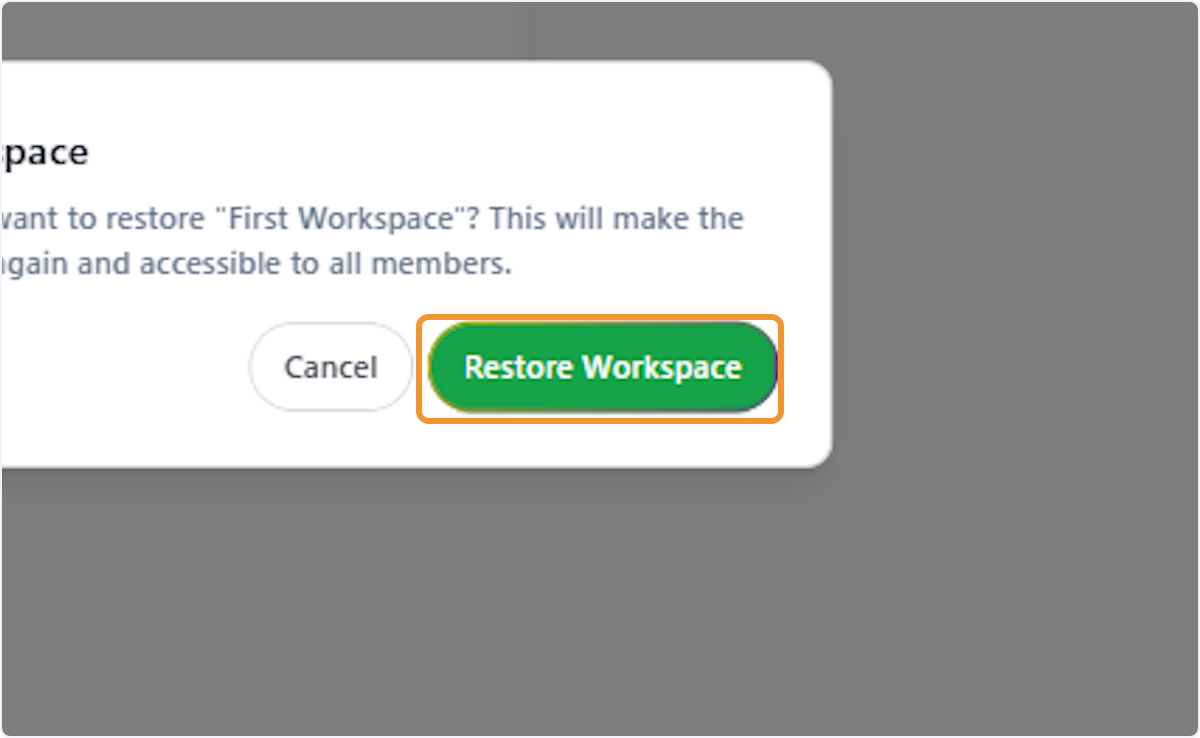
Confirm Workspace Restoration
Click the ‘Restore Workspace’ button in the confirmation dialog to restore the workspace to active status. The workspace will immediately reappear in the ‘Your Spaces’ overview and all members will regain access to all threads, artifacts, and knowledge resources.
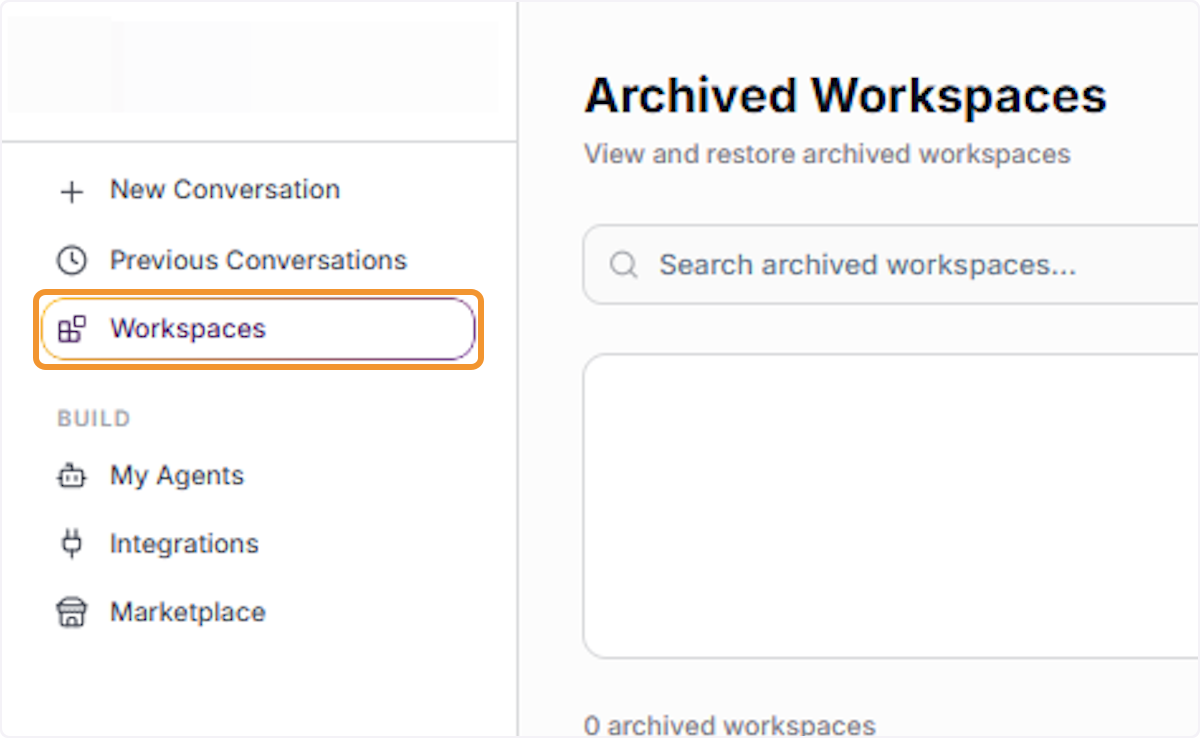
Verify Restoration in Workspaces View
After restoring, click ‘Workspaces’ in the main navigation to return to the Your Spaces overview. Confirm the restored workspace now appears in your active spaces list, verifying the restoration was successful.
Permanent Workspace Deletion
Select Delete from Workspace Options
Click ‘Delete’ (shown in red) from the workspace options dropdown to begin the permanent deletion process. A confirmation dialog will appear before the workspace is deleted, allowing you a final opportunity to cancel. Consider archiving instead if you may need the data later.
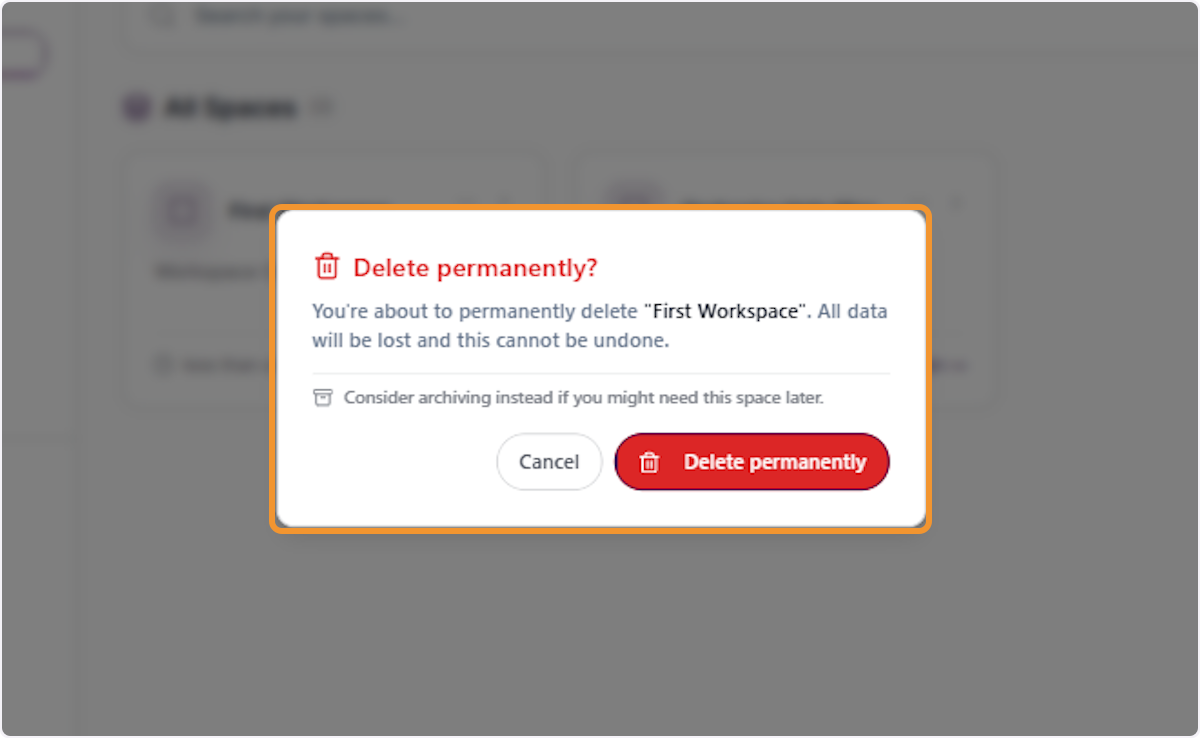
Review Permanent Deletion Warning
The ‘Delete permanently?’ dialog will appear with a warning that all data will be lost and this cannot be undone. The dialog also suggests considering archiving instead if you might need this space later. Read the warning carefully before proceeding.
Confirm the Deletion Warning
Review the ‘Delete permanently?’ dialog again to ensure all data loss implications are understood. All workspace data — including threads, artifacts, knowledge files, member associations, and autonomous run configurations — will be permanently deleted with no possibility of recovery.
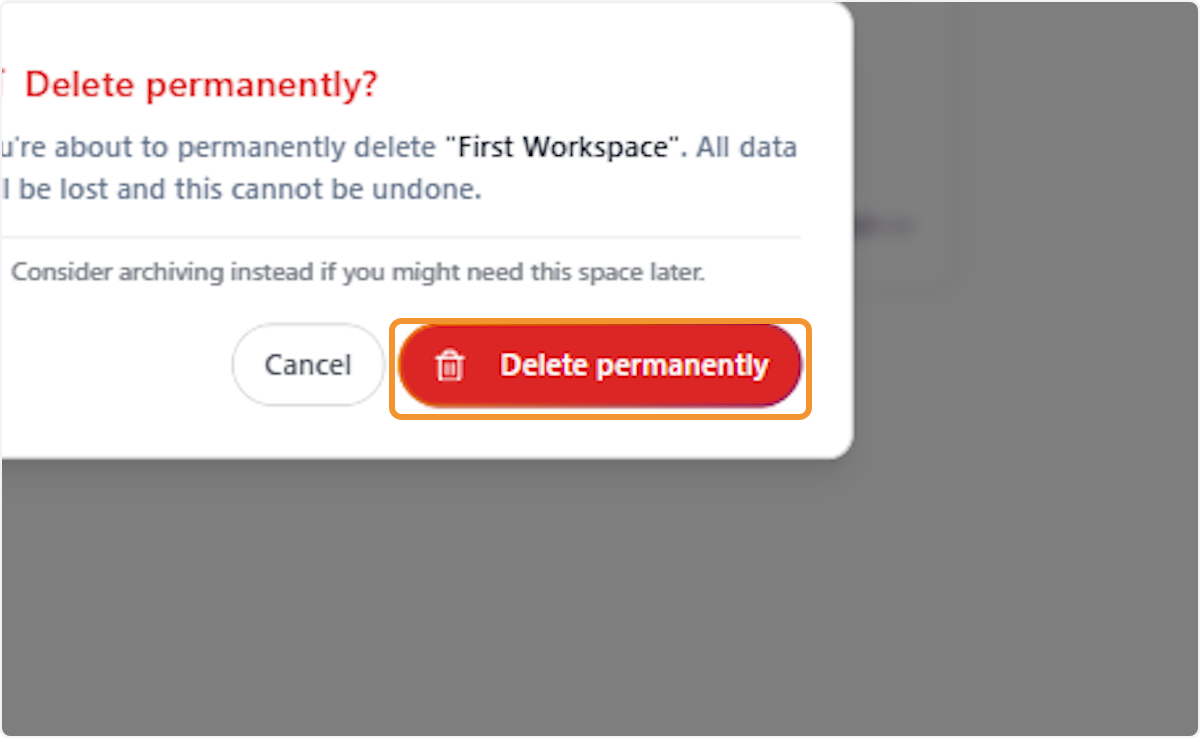
Confirm Permanent Workspace Deletion
Click the red ‘Delete permanently’ button to confirm the irreversible deletion of the workspace. All workspace data — including threads, artifacts, knowledge files, member associations, and autonomous run configurations — will be permanently deleted with no possibility of recovery.
Workspace Permanently Deleted
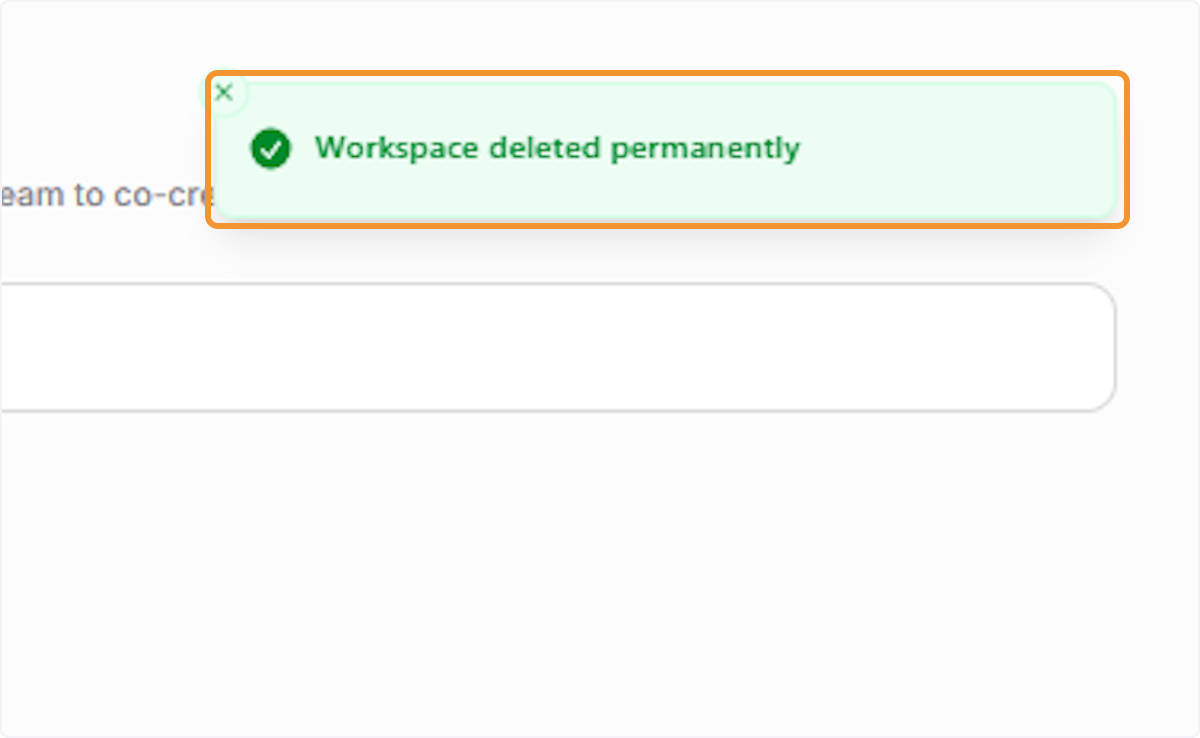
A green confirmation banner reading ‘Workspace deleted permanently’ will briefly appear, confirming the workspace has been fully removed from the system. The workspace will no longer appear in any views, and all associated data has been permanently erased from the platform.